

LightWave 2015.x Training
More videos are coming soon all the time! Check back often for new releases from Liberty3D.com
![Advanced TurbulenceFD Concepts and Projects: Propulsion [KAT]](https://www.liberty3d.com/wp-content/plugins/wp-cart-for-digital-products/lib/timthumb.php?src=https://www.liberty3d.com/wp-content/uploads/2018/07/PACLauncherExample_R03.jpg&h=125&w=125&zc=1&q=100)
![LightWave 2018- Volume #3- Getting Started III [AG]](https://www.liberty3d.com/wp-content/plugins/wp-cart-for-digital-products/lib/timthumb.php?src=https://www.liberty3d.com/wp-content/uploads/2018/10/LW_2018_Vol_3_Product_Box_400pix.jpg&h=125&w=125&zc=1&q=100)
![Fusion for LightWave Artists Vol. 5 - Curse of the Phantom Shadow [KAT]](https://www.liberty3d.com/wp-content/plugins/wp-cart-for-digital-products/lib/timthumb.php?src=https://www.liberty3d.com/wp-content/uploads/2018/05/FFLWAV_3-150x150.jpg&h=125&w=125&zc=1&q=100)
![TFD Advanced Concepts and Projects: Engine Fire [KAT]](https://www.liberty3d.com/wp-content/plugins/wp-cart-for-digital-products/lib/timthumb.php?src=https://www.liberty3d.com/wp-content/uploads/2018/05/TFDEngineFire_PromoImage1-150x150.jpg&h=125&w=125&zc=1&q=100)
![LightWave 2018- Volume #2- Getting Started II [AG]](https://www.liberty3d.com/wp-content/plugins/wp-cart-for-digital-products/lib/timthumb.php?src=https://www.liberty3d.com/wp-content/uploads/2018/10/LW_2018_Vol_2_Product_Box_400pix.jpg&h=125&w=125&zc=1&q=100)
![Adobe Fuse for LightWave Artists [PN]](https://www.liberty3d.com/wp-content/plugins/wp-cart-for-digital-products/lib/timthumb.php?src=https://www.liberty3d.com/wp-content/uploads/2018/03/title_card-300x169.png&h=125&w=125&zc=1&q=100)
![LightWave 2018- Volume #1- Getting Started I [AG]](https://www.liberty3d.com/wp-content/plugins/wp-cart-for-digital-products/lib/timthumb.php?src=https://www.liberty3d.com/wp-content/uploads/2018/10/LW_2018_Vol_1_Product_Box_400pix.jpg&h=125&w=125&zc=1&q=100)
![ARKit - Augmented Reality for LightWave 2018 [CW]](https://www.liberty3d.com/wp-content/plugins/wp-cart-for-digital-products/lib/timthumb.php?src=https://www.liberty3d.com/wp-content/uploads/2018/01/ARKitScreenshot.png&h=125&w=125&zc=1&q=100)
![TFD for LightWave3D - Conventional Weapons Pack [KAT]](https://www.liberty3d.com/wp-content/plugins/wp-cart-for-digital-products/lib/timthumb.php?src=https://www.liberty3d.com/wp-content/uploads/2017/12/TFDCWP_TankExample.jpg&h=125&w=125&zc=1&q=100)
![LightWave 2015- Getting Started in FiberFX- Volume #1 [AG]](https://www.liberty3d.com/wp-content/plugins/wp-cart-for-digital-products/lib/timthumb.php?src=https://www.liberty3d.com/wp-content/uploads/2018/10/LW_2015_FiberFX-Vol_1_400pix.jpg&h=125&w=125&zc=1&q=100)
![LightWave 2015- Volume #12- Modeling for Beginners [AG]](https://www.liberty3d.com/wp-content/plugins/wp-cart-for-digital-products/lib/timthumb.php?src=https://www.liberty3d.com/wp-content/uploads/2018/10/Lightwave_2015_Vol_12_Product_Box_400pix.jpg&h=125&w=125&zc=1&q=100)
![Advanced TurbulenceFD For LightWave3D - Masks and Fuel Masks [KAT]](https://www.liberty3d.com/wp-content/plugins/wp-cart-for-digital-products/lib/timthumb.php?src=https://www.liberty3d.com/wp-content/uploads/2017/08/SimpleAnimatedFuelMask_R06.jpg&h=125&w=125&zc=1&q=100)
![Current Rigging Concepts [RR]](https://www.liberty3d.com/wp-content/plugins/wp-cart-for-digital-products/lib/timthumb.php?src=https://www.liberty3d.com/wp-content/uploads/2017/07/CurrentRiggingConcepts_Thumbnail.jpg&h=125&w=125&zc=1&q=100)
![Adam's Crazy (Summer 2017) 3D Bundle Pack [AG]](https://www.liberty3d.com/wp-content/plugins/wp-cart-for-digital-products/lib/timthumb.php?src=https://www.liberty3d.com/wp-content/uploads/2017/06/Adams_Crazy_Summer_2017_3D_Bundle_JPEG.jpg&h=125&w=125&zc=1&q=100)
![Lightwave 2015 Bundle Pack- (Volumes #1 to #11)- [AG]](https://www.liberty3d.com/wp-content/plugins/wp-cart-for-digital-products/lib/timthumb.php?src=https://www.liberty3d.com/wp-content/uploads/2017/06/Lightwave_2015_Bundle_Vol_1_to_11_JPEG.jpg&h=125&w=125&zc=1&q=100)
![Practical Production Techniques Vol. 10 - Project Smoke Monster [kat]](https://www.liberty3d.com/wp-content/plugins/wp-cart-for-digital-products/lib/timthumb.php?src=https://www.liberty3d.com/wp-content/uploads/2017/01/PPTV10_FusionCompExample-150x150.png&h=125&w=125&zc=1&q=100)
![LightWave 2015- Volume #11- Character Rigging for Beginners [AG]](https://www.liberty3d.com/wp-content/plugins/wp-cart-for-digital-products/lib/timthumb.php?src=https://www.liberty3d.com/wp-content/uploads/2019/08/Lightwave_2015_Vol_11_Product_Box_400pix.jpg&h=125&w=125&zc=1&q=100)
![Fusion for LightWave Artists Part III [KAT]](https://www.liberty3d.com/wp-content/plugins/wp-cart-for-digital-products/lib/timthumb.php?src=https://www.liberty3d.com/wp-content/uploads/2016/05/FusionCompOne.jpg&h=125&w=125&zc=1&q=100)
![TFD Advanced Concepts and Projects - Clouds [KAT]](https://www.liberty3d.com/wp-content/plugins/wp-cart-for-digital-products/lib/timthumb.php?src=https://www.liberty3d.com/wp-content/uploads/2016/05/CloudOne_SoftPuffyLookR07_0065-300x169.png&h=125&w=125&zc=1&q=100)
![Fusion for LightWave Artists Part II [KAT]](https://www.liberty3d.com/wp-content/plugins/wp-cart-for-digital-products/lib/timthumb.php?src=https://www.liberty3d.com/wp-content/uploads/2016/03/FFLWAPromo2.jpg&h=125&w=125&zc=1&q=100)
![LightWave 2015- Volume #10- Surfacing [AG]](https://www.liberty3d.com/wp-content/plugins/wp-cart-for-digital-products/lib/timthumb.php?src=https://www.liberty3d.com/wp-content/uploads/2019/08/Lightwave_2015_Vol_10_Product_Box_400pix.jpg&h=125&w=125&zc=1&q=100)
![LightWave 2015- Volume #9- UV Mapping [AG]](https://www.liberty3d.com/wp-content/plugins/wp-cart-for-digital-products/lib/timthumb.php?src=https://www.liberty3d.com/wp-content/uploads/2019/08/Lightwave_2015_Vol_9_Product_Box_400pix.jpg&h=125&w=125&zc=1&q=100)
![Instant 3D Turntable for LightWave Users [cw]](https://www.liberty3d.com/wp-content/plugins/wp-cart-for-digital-products/lib/timthumb.php?src=https://www.liberty3d.com/wp-content/uploads/2015/12/Screen-Shot-2015-12-15-at-5.38.22-PM.png&h=125&w=125&zc=1&q=100)
![LightWave 2015- Volume #8- Particles & HyperVoxels II [AG]](https://www.liberty3d.com/wp-content/plugins/wp-cart-for-digital-products/lib/timthumb.php?src=https://www.liberty3d.com/wp-content/uploads/2019/08/Lightwave_2015_Vol_8_Product_Box_400pix.jpg&h=125&w=125&zc=1&q=100)
![LightWave 2015- Volume #7- Particles & HyperVoxels I [AG]](https://www.liberty3d.com/wp-content/plugins/wp-cart-for-digital-products/lib/timthumb.php?src=https://www.liberty3d.com/wp-content/uploads/2019/08/Lightwave_2015_Vol_7_Product_Box_400pix.jpg&h=125&w=125&zc=1&q=100)
![Fusion for LightWave Artists [KAT]](https://www.liberty3d.com/wp-content/plugins/wp-cart-for-digital-products/lib/timthumb.php?src=https://www.liberty3d.com/wp-content/uploads/2015/09/A10CompExample_01.png&h=125&w=125&zc=1&q=100)
![LightWave 2015- Volume #6- Getting Started VI [AG]](https://www.liberty3d.com/wp-content/plugins/wp-cart-for-digital-products/lib/timthumb.php?src=https://www.liberty3d.com/wp-content/uploads/2019/08/Lightwave_2015_Vol_6_Product_Box_400pix.jpg&h=125&w=125&zc=1&q=100)
![LightWave 2015- Volume #5- Getting Started V [AG]](https://www.liberty3d.com/wp-content/plugins/wp-cart-for-digital-products/lib/timthumb.php?src=https://www.liberty3d.com/wp-content/uploads/2019/08/Lightwave_2015_Vol_5_Product_Box_400pix.jpg&h=125&w=125&zc=1&q=100)
![LightWave 2015- Volume #4- Getting Started IV [AG]](https://www.liberty3d.com/wp-content/plugins/wp-cart-for-digital-products/lib/timthumb.php?src=https://www.liberty3d.com/wp-content/uploads/2019/08/Lightwave_2015_Vol_4_Product_Box_400pix.jpg&h=125&w=125&zc=1&q=100)
![LightWave 2015- Volume #3- Getting Started III [AG]](https://www.liberty3d.com/wp-content/plugins/wp-cart-for-digital-products/lib/timthumb.php?src=https://www.liberty3d.com/wp-content/uploads/2019/08/Lightwave_2015_Vol_3_Product_Shot_400pix.jpg&h=125&w=125&zc=1&q=100)
![LightWave 2015- Volume #2- Getting Started II [AG]](https://www.liberty3d.com/wp-content/plugins/wp-cart-for-digital-products/lib/timthumb.php?src=https://www.liberty3d.com/wp-content/uploads/2019/08/Lightwave_2015_Vol_2_Product_Box_400pix.jpg&h=125&w=125&zc=1&q=100)
![LightWave 2015- Volume #1- Getting Started I [AG]](https://www.liberty3d.com/wp-content/plugins/wp-cart-for-digital-products/lib/timthumb.php?src=https://www.liberty3d.com/wp-content/uploads/2019/08/Lightwave_2015_Vol_1_Product_Box_400pix.jpg&h=125&w=125&zc=1&q=100)
![Practical Production Techniques - Vol. 9 Polygon Reduction [KAT]](https://www.liberty3d.com/wp-content/plugins/wp-cart-for-digital-products/lib/timthumb.php?src=https://www.liberty3d.com/wp-content/uploads/2015/02/PolygonCruncherPromoImage.jpg&h=125&w=125&zc=1&q=100)
 CLICK A PAGE NUMBER ABOVE FOR EVEN MORE LIGHTWAVE 3DTRAINING PRODUCTS:
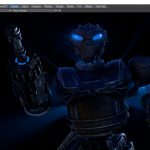
![Advanced TurbulenceFD Concepts and Projects: Propulsion [KAT]](https://www.liberty3d.com/wp-content/uploads/2018/07/PACLauncherExample_R03.jpg)
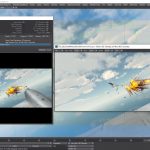
In this video Kat shows you how to create two separate types of propulsion effects using TurbulenceFD for LightWave3D. First up, a PAC-3 Missile launcher effect is produced using a freely available model (included) of a Patriot missile battery system. Second, an afterburner effect similar to that which you would see on an F-18 combat fighter jet. Kat takes it further though by showing you how to convert TurbulenceFD's native BCF cache data file to OpenVDB so they can be used with LightWave2018's OpenVDB volume object primitive and rendering system or for use with external rendering solutions such as Octane.
With the first project having a run time of almost 120 minutes and the second at approximately 45 minutes this tutorial is jammed packed with useful information for TurbulenceFD users looking to create effects beyond simple smoke or fire while remaining a "get in, get it done and get out" educational experience.
Complete project files and work ups are included so you can follow along.
![LightWave 2018- Volume #3- Getting Started III [AG]](https://www.liberty3d.com/wp-content/uploads/2018/10/LW_2018_Vol_3_Product_Box_400pix.jpg)
In this third volume of 12 volumes 3D Instructor Adam Gibson will not only show you how to get up and started using Lightwave 2018 but will also introduce you to some the new powerful features.
A great place to start for beginner Lightwave Users.
Some of the Topics Covered: 1) Backdrop Color 2) Gradient Backdrop, 3) SkyTracer 2 Introduction & Basics, 4) Backdrop Images, 5) Spherical Light, 6) Primitive Light
*FREE Bonus Content: 1) Free Dinosaur Mega-Pack (Reg. $49.00 US), 2) Free Posed Alien Model.
In Fusion for LightWave Artists Vol. 5 - "Curse of the Phantom Shadow", Kelly "Kat" Myers takes you through a CG+Live action footage mixed VFX shot from the short film by Mark Ross. This tutorial is rather advanced but even first time users of Fusion can benefit from this title and the massive amount of information that Kat passes onto you while he builds out the composite in Black Magic Designs Fusion 9.02
Every LightWave artist needs to learn how to composite CG footage into a live action shot and this title is a perfect way to get into doing exactly that. But more importantly, is learning how to deal with footage that is not of the best quality, as Curse of the Phantom Shadow was shot on a first generation Panasonic Lumix GH1 Camera at 720p in 4:2:0 MPEG format on a shoe-string budget in Mark Ross' living room. This is where Rotoscoping comes in and some creative problem solving is needed. Rotoscoping is an essential skill all compositors must have in their tool belt and Kat shows you how to work with Rotosplines for masking of shot video as well as still photographic elements and where and how to make use of them correctly in matte control and keying tools. Corner positioner and lens distortion tools are also discussed as they are used in the comp in rather creative ways to compensate for the way the material was shot in order to get it to "line up" with the CG rendered portion produced in LightWave3D.
On the CG elements side of the comp workflow demonstrated in full in this video title, Kat shows you how to take a single render pass from LightWave3D rendered with several basic buffers (provided through exrTrader although LW's native solution works just fine) into Fusion and create bitmap masks for use on Surface/ObjectID tagged portions of the rendered image sequence to isolate them for further independent adjustment. STOP TRYING TO GET EVERYTHING PERFECT IN CAMERA! Do it in comp! Save time by making use of LightWave's render buffer technology and Fusion's ultra-powerful compositing engine, leveraging them both to your advantage and making you a better VFX artist as a result.
In this tutorial with an approximate runtime of 165 minutes, Kat takes the shot from "Zero to Hero" and you can follow along every step of the way. Provided as an optional download of just over 4GB of bonus content, the rendered image sequence, live-action blue screen footage and photographic elements as well as the Fusion Flow Comp files used to create the final shot are included. As an extra bonus, for those of you with After Effects and Optical Flares from Video Co-pilot is also provided. This is for a small final element requested by the director to finish off the shot.
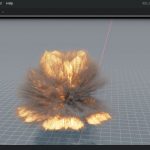
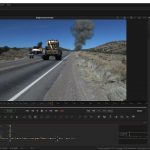
Kat is back with a new installment in the TurbulenceFD Advanced Concepts and Projects Series. This time in “Project Engine Fire”, Kat shows you what goes into setting up a WWII era USAF B-25 with an engine fire effect.
This is a real-world shot from the upcoming feature-film (direct-to-video) “Behind the Lines” which is currently in post-production. With a run time of approximately 105 minutes, you get all the info you need to recreate such an effect using LightWave3D (works in 2015.x and 2018.x) and TurbulenceFD from Jawset.com
You also get the renders and the Fusion composite flows from Kat for this project so you can play with the render results instead of having to render out things on your own (which can take a wee bit of time). Don’t worry though, if you want to play around with things in LightWave3D and tweak settings and sim things for yourself, we have you covered there, too. The basic geometry and the scene files are included so you have everything you need to follow along and get the exact results you want using the provided materials as a guide!
You get almost 4GB of content and learning material, ready to go for just $24.95USD
![LightWave 2018- Volume #2- Getting Started II [AG]](https://www.liberty3d.com/wp-content/uploads/2018/10/LW_2018_Vol_2_Product_Box_400pix.jpg)
In this second volume of 12 volumes 3D Instructor Adam Gibson will not only show you how to get up and started using Lightwave 2018 but will also introduce you to some the new powerful features. A great place to start for beginner Lightwave Users. Some of the Topics Covered: 1) Autofit Items, 2) Parenting Scene Items, 3) Cloning Scene Items & Hierarchies, 4) Keyframing Basics for Animation, 5) Glow Filter, 6) Volumetrics Lights Node Introduction, 7) New Lightwave 2018 Light Features!! FREE Bonus Content: 1) Environment Maps- Volume #1 (40 Environment Maps)- 4096 x 2048 pixels, 2) Environment Maps- Volume #2 (10 Environment Maps)- 4096 x 2048 pixels.
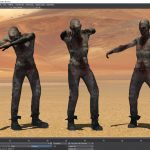
Phil Nolan walks you through the finer points of creating a character in Adobe Fuse and how to export and make them work in LightWave3D (2015.3 and prior). This is a great tutorial for artists who want to dabble in Character Animation without having to drown themselves in the process with creating custom rigs or sets ups. Adobe Fuse does it for you while working with Miximo for adding animations to the characters you create! This is complete tutorial providing end to end project details so you are up and running fast!
![LightWave 2018- Volume #1- Getting Started I [AG]](https://www.liberty3d.com/wp-content/uploads/2018/10/LW_2018_Vol_1_Product_Box_400pix.jpg)
In this first volume of 12 volumes 3D Instructor Adam Gibson will not only show you how to get up and started using Lightwave 2018 but will also introduce you to some the new powerful features. A great place to start for beginner Lightwave Users. Some of the Topics Covered: 1) User Interface Basics, Viewports, Image Editor, Importing Models, Item Animation Tools, PBR (Spec/Gloss & Metallic) Node Basics, VDB Import, Volumetric Primitives, Shape Primitives, Buffer Drop Down List, Surface Noise Removal, Creating an Asteroid, Making Rocky Terrains, and Render Basics. Running Time: 4 hrs. 23 mins., High Quality (Screen-Res 1920 x 1080 pixels) , Video Format: MP4 (.mp4), Level: Beginner.
Topics Covered: 1) User Interface Basics, Viewports, Image Editor, Importing Models, Item Animation Tools, PBR (Spec/Gloss & Metallic) Node Basics, VDB Import, Volumetric Primitves, Shape Primitives, Buffer Drop Down List, Surface Noise Removal, and Render Basics. Running Time: 4 hrs. 23 mins., High Quality (Screen-Res 1920 x 1080 pixels) , Video Format: MP4 (.mp4), Level: Beginner.
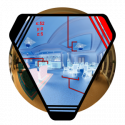
Augmented Reality introduction for iPhone and iOS devices, using LightWave 2018, Unity3D, and ARKit.
![TFD for LightWave3D - Conventional Weapons Pack [KAT]](https://www.liberty3d.com/wp-content/uploads/2017/12/TFDCWP_TankExample.jpg)
The long-awaited Conventional Weapons Pack for TFD for LightWave3D Volume 1. is now available!
Check it out...
Priced at just $39.95 this package is a great deal.
Over 40 individual and unique examples plus the work up files are included in this pack and that's less than a dollar per scene. Most are render/sim ready for you to load up and make use of as you see fit in your own scenes.
Included in this package are scene file folderscontaining the scenes categorized ccording to the type of explosion or effect. Description of their contents listed as follows:
- Abrams (Tank cannon barrel demo example)
- FlakBursts (Ranging in style from conventional Anti-Aircraft flak guns to "Galactica style" flak, even though that was all done with HVs. A total of 11 are included plus the work up files so you can learn from them and the process that went into creating them)
- FlashBang (Simple flash bang example, simply add your own point or spherical light in the center of the detonation, animate it to go "Off" with the explosion and you are good to go! BREACH! BREACH!)
- Grenades (Fragmentation type although your interpretation of that may vary. These can easily be repurposed for RPG impacts or other weapons).
- IEDs (Five IED examples constructed from reference material of real combat video from Iraq and Afganistan. These range from small to hurt locker level.)
- LandMines\Anti-Personnel (Similar to the IED examples, these are also built from reference video from actual combat and are built off of two real-world mine types that are anti-personnel in purpose. M-14AP and M-16AP mines are standard US arsenal mines and used by militaries around the world. They can be used any way you see fit though so don't limit your imagination. 11 mines are included in this package.)
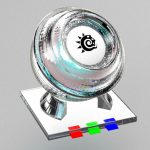
- Smoke Grenades (Several smoke grenades are included in this package which includes one for tear gas, RGB colors each and a basic generic setup as well.)
MP4 videos have been included for easy reference and can be found in the "Renders" folder.
They are listed as follows:
FlakBurst_One_R03
FlakBurst_Two_R02
FlakBurstEight_R02
FlakBurstEleven_R02
FlakBurstFive_R01
FlakBurstFour_R01
FlakBurstNine_R02
FlakBurstSeven_R02
FlakBurstSix_R01
FlakBurstTen_R01
FlakBurstThree_R01
FlashBang_R01
FragementationGrenadeThree_R01
FragementationGrenadeTwo_R01
FragmentationGrenade_R01
FragmentationGrenadeThree_R02
FragmentationGrenadeThree_R03
IED_Five_R03
IED_One_R01
IED_Four_R02
IED_Three_R03
IED_Two_R10
M1AbramsTank_BasicSetUp_R09
M-14AP_Mine_Five_R02
M-14AP_Mine_Four_R02
M-14AP_Mine_R04
M-14AP_Mine_Six_R01
M-14AP_Mine_Three_R01
M-14AP_Mine_Two_R01
M-16AP_MineFive_R01
M-16AP_MineFiveR01
M-16AP_MineFour_R01
M-16AP_MineOne_R01
M-16AP_MineOneB_R01
M-16AP_MineThree_R01
M-16AP_MineTwo_R01
M-16AP_MineTwoB_R01
SmokeGrenade_Green_R01
SmokeGrenade_TearGas_R01
SmokeGrenade_Two_R01
SmokeGrenadeBlue_R01
SmokeGrenadeOne_R03
SmokeGrenadeRed_R01
![LightWave 2015- Getting Started in FiberFX- Volume #1 [AG]](https://www.liberty3d.com/wp-content/uploads/2018/10/LW_2015_FiberFX-Vol_1_400pix.jpg)
Hey Kids!! Things are about to get very Hairy!! and Furry!! In this four volume training series 3D Instructor Adam Gibson will show you how to add Hair, Fur, Grass, and other cool Fibrous detail to your 3D Characters and 3D Models using Lightwave 3D's powerful Fur & Hair System!! FiberFX is a fairly deep package with a lot of great features/options. Lots of Buttons and Controls to tackle. With that being said it can very scary and confusing to get started without getting lost or frustrated. This four volume course is specifically designed to help beginner 3D students get started quickly through easy to follow tool-based and small project-based video chapters!! FREE Bonus Content: 3D Practice Character Models are included in the digital download. *(Free Tiger, Elephant, Rhino, Human Female and Puff-Ball character models included!!) Learn the tools to make all sorts of traditional, wild and messy hairdos!! Easily create that "Bed-Head" look!!
![LightWave 2015- Volume #12- Modeling for Beginners [AG]](https://www.liberty3d.com/wp-content/uploads/2018/10/Lightwave_2015_Vol_12_Product_Box_400pix.jpg)
This course is designed specifically for those who are beginners in 3D modeling and also for those who may have had some difficulty in understanding the concepts of 3D modelling.
Lightwave has a massive set of great modeling tools but most beginners are overwhelmed and don't know where to start.
In this video training course 3D Instructor Adam Gibson takes you through the most important modeling tools to get you up and running fast for your own projects.
Polygonal and Sub-D Modeling tools/concepts will be a covered along a with a full project-based creature modeling journey from concept art to a finished modeled beast.
Tips and tricks on how to quickly Sculpt and Shape Sub-D Body Parts (Torso, Arms, Legs, Claws, Tails, Heads, Teeth), Importing Reference Concept Art, Mastering the Use of Basic Tools (Move, Rotate, Drag, Stretch, Knife Tool, Band-Saw Pro, Extender Plus).
*Bonus: Content Folder Included that contains the Creature Model files and Reference Concept Art from the video tutorial.
Running Time: 14 hrs. 5 mins.,
High Quality (Screen-Res 1920 x 1080 pixels),
Video Format: MP4 (.mp4),
Level: Beginner.
Kat is back in another installment of his TurbulenceFD for LightWave3D series with "Advanced TurbulenceFD For LightWave3D - Masks and Fuel Masks".
Running approximately 182 minutes, this video features great tips on how to take advantage of TurbulenceFD's Fuel mask functions. One of the big "secrets" to making your scenes with TFD shine is to provide TFD's simulation engine with more variables. Learn how this makes a huge difference when going for high-end looks of fire and smoke that moves naturally but controlled in any way you want.
Featuring 5 example scenes that you can breakdown and then apply the techniques in your own shots, "Advanced TurbulenceFD For LightWave3D - Masks and Fuel Masks" is a great value to anyone looking to step up their game with TurbulenceFD and or need ideas of how to go about taking what they have learned so far in the series and rounding out their knowledge so they can take on any challenge head-on.

Ultra-Camera Bundle
What is an Ultra-Camera bundle?
Simple! It is the ultimate triple threat of tools for LightWave3D artists who take their pictures seriously, especially those venturing into the realm of VR!
Get everything you need to do the job and do it right!
You get UberCam 2.6, RRCam and VR Scientist 1.0 for 80 dollars off what it would cost if you bought them separately.Character rigging is faster and easier than it has ever been, Current Rigging Concepts teaches the entire character rigging workflow in a single convenient learning product.
![Adam's Crazy (Summer 2017) 3D Bundle Pack [AG]](https://www.liberty3d.com/wp-content/uploads/2017/06/Adams_Crazy_Summer_2017_3D_Bundle_JPEG.jpg)
This Massive 3D Bundle contains: Lightwave 2015 Bundle Pack- (Volumes #1 to #11), DDO for Lightwave Users- Bundle Pack (Volumes #1 to #7), 3d Coat 4 Ultimate Bundle- 23 Volumes, Substance Painter for Lightwave Users Bundle- Volumes #1 to #8, Sci-Fi Alpha Brush Collection Volumes #1 & 2, Dinosaur Mega-Pack.
![Lightwave 2015 Bundle Pack- (Volumes #1 to #11)- [AG]](https://www.liberty3d.com/wp-content/uploads/2017/06/Lightwave_2015_Bundle_Vol_1_to_11_JPEG.jpg)
This Lightwave 2015 Bundle contains: Volumes #1 to #11 and Bonus Content.
Fusion for LightWave Artists: Volume 4 - Curse of the Phantom Shadow
Award winning VFX artist and CG Supervisor, Kelly "Kat" Myers is back in his latest installment in the Fusion for LightWave Artists series.
This time Kat walks you through a real-world production shot from the low-budget 30+ minute short film written and directed by Mark Ross; "Curse of the Phantom Shadow"
With over 396 VFX shots in the current edit of the film, the daunting challenge of completing the task at hand is met through the use of LightWave3D and Fusion!
In this tutorial, Kat demonstrates how one can employ creative uses of volumetrics supplied by LightWave3D natively as well as via TurbulenceFD From Jawset.com and mix them together in Fusion 8 in a way that "sells the shot".
It doesn't stop there, however! Kat also demonstrates where the use of LightWave's PRMB is essential vs. the use of Vector-Based motion blur in post, and what to do if you ever have to "mix and match" in a compositing program like Fusion.
If you have enjoyed the previous installments of Fusion for LightWave artists, then you are for sure going to want to grab this title as you can follow along with Kat as he breaks down the composite that made up the final shot and continues on improving it!
Kat also discusses how you can ensure that 'WYSIWYG' for input and output when working with LightWave's Linear Color Space workflow and how Fusion's LUTs should be used with sRGB rendered material.
Exclusively available from Liberty3d.com, Fusion for LightWave Artists: Volume 4 - Curse of the Phantom Shadow, includes the entire render results used in the tutorial. You can practice the techniques demonstrated by Kat without having to render a single frame out of LightWave! He's done that for you and the renders are included as a secondary download aside from the tutorial video so you can watch right away as the downloads for the renders come across to you in the background if you choose!
Practical Production Techniques Vol. 10 - Project Smoke Monster!
Kat is back with another installment in the highly popular Practical Production Techniques series. In Volume 10, Kat walks you through an entire shot featuring a Daz3D character model, taking the asset from Daz3D into LightWave, surfacing it using the maps from the asset, setting it up with animation applied via MDD, transferring in TurbulenceFD settings from another scene, lighting the character using some nifty tricks for realism in a photographic plate and then compositing the rendered results in Fusion.
With a runtime of almost 4.5 hours, this tutorial is jam-packed with lots of great tips and techniques pulled from Kat's experiences in production. The tutorial includes the rendered image files so you can follow along in the compositing process in Fusion or even AE and Nuke. You also get the scene files saved at every step along the way. Not included is the model which is a commercial asset but retails for 25 dollars on Daz3d.com and can be easily substituted for a character of your own design or any other Daz Character you may have laying about.
![LightWave 2015- Volume #11- Character Rigging for Beginners [AG]](https://www.liberty3d.com/wp-content/uploads/2019/08/Lightwave_2015_Vol_11_Product_Box_400pix.jpg)
This massive Character Rigging Course is designed specifically for beginner 3D students who have never rigged a character in Lightwave or any other 3D package. Basic rigging concepts and principles are shown to get you up and started fast allowing you to be able to easily pose and control your characters movements with Lightwave's powerful rigging toolset. In this highly detailed course a Human Biped Character will be rigged using Lightwave's traditional rigging toolset first and then using the Genoma 2 Bi-Ped Rig (Lightwave's Auto-Rigging System). Learn how to Use and Download 2 pieces of "Free Character Creation Software" so that you can build thousands of you own detailed characters of all shapes and sizes that you can export and use in your Lightwave projects. Topics: Preparing your Models, Traditional Rigging Tools, Genoma Rigging, Bone Tools, Skelegons, Weight Maps, Facial Morphs (Endomorphs), Export/Import of DAZ Studio Characters, Export/Import of Make Human Characters, Surface Editing, Character Creation in DAZ Studio/Make Human Software, Saving Rig Presets, Inverse Kinematics (IK), Arm/Foot/Head/Eye Controls, Muscle Flexing/Joint Compensation. Also learn how you can import and use beautiful DAZ 3D Characters in Lightwave 3D. *Note: This course is not recommended for advanced-level or experienced rigging artists. *Bonus: Content Folder Included containing Scene, Model files, and Printable Pin-Up Notes/Diagrams from the tutorials.
In part III of Fusion for LightWave Artists, Kelly "Kat" Myers breaks new ground in the series as he walks you through a complete shot to recreate a news broadcast style "playback" element using the assets from Iron Sky. SyntheyesTrackingMany years ago, Kat worked for a company that specialized in this area of film and television effects production working with Fusion and LightWave to produce video playback that would be used on set. This tutorial goes from start to finish including the tracking in Syntheyes of a plate shot using an everyday smart phone (in this case a Samsung Galaxy Note4), prepping the resulting footage for efficient use in Layout while getting the Iron Sky Valkyrie UFOs into the shot. From there this project takes a bit of a different turn as Kat demonstrates how to track elements in 2D using Fusions precise tracking tools and how to attach masks to these tracks providing for additional control of your composite. LightWave3DISValksThe tutorial finishes off with the introduction of several effects tools that you can use to "fake" broadcast TV interference or replicate the appearance of conventional television footage.
Learn how to deal with noisy "tracks" from a 3D tracking program by working with the data in Layout's graph editor while at the same time knowing what you can get away with due to the nature of the final target element. There are several tricks and tips in this tutorial that you simply will not find anywhere else covering an area of VFX creation that is rarely discussed if at all by visual effects artists.
With an approximate run time of 3.7 hours, Fusion for LightWave Artists Part III is a great companion title to the previous two parts in the series. With 20 video segments and all of the content included for you to follow along, this title is a must have for LightWave artists working with Fusion in their production work flows no FusionTrackingTwomatter what the tasks you may face. Visual Effects artists are sometimes asked to do some pretty odd things and creating "playback" for on-set shooting use is one of these odd ball jobs you are going to come across.
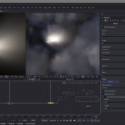
Do you need clouds in your shot? Hypervoxels got you down? Skytracer not cutting it?
No problem!
With "TFD Advanced Concepts and Projects - Clouds", learn how you can get awesome looking cloud formations that you can produce quickly with maximum control over their shape and appearance while rendering extremely fast compared to any other solutions available for LightWave3D.
Jawset's Turbulence FD for LightWave is the key! Award winning CG supervisor and VFX artist, Kelly "Kat" Myers walks you through the process of creating photorealistic cloud formations in this 3.6 hour 13 part tutorial specifically aimed at VFX artists who need to produce clouds for their shots.
Kat does it again!
Fusion for LightWave Artists Part II a 390 minute project based tutorial using the same techniques from Battle Star Galactica and Iron Sky for LightWave3D shot construction, Lighting, Rendering, Render Management, and Fusion Compositing that demonstrates how you can leverage the power of BlackMagic Design’s Fusion 7 (or 8) which is now free; into your LightWave production workflows.
Whether you use Mac or PC, Fusion is your best and most affordable compositing option available that provides absolutely uncompromising results and speed. Now, experience how you can take your LightWave work to the next level. Fusion and LightWave have a long history of being used together in top studios over the last two decades producing some of the most iconic television shows and films of our time.
In this video Kat takes you through an entire production level shot from "Battlestar Galactica" using freely downloadable assets (download links provided). Not only that, you get the complete renders from each lighting and buffer pass. That's 6500 frames from 16 different scene files to make up one awesome shot! No need to render at home! This package provides you with the content. That means you get all the the scenes, Fusion comp files and the renders in full!
This video is the second part in a series of videos designed specifically for LightWave artists in mind and is balanced between Layout and Fusion’s interface building up each element so the artist gets a firm grasp as to how to break out shots for compositing and how to manage renders in a network environment leveraging the power of Lightwave and Fusion network rendering technology.
This video gives you deep insight into how an entire shot would be produce on BSG or Iron Sky and can be applied to just about any product or project.
Get it now for only $39.49USD
Liberty3D UberCam 2.6 for LightWave3D 9.3.1 - LightWave 2015 (and beyond!) with Oculus Rift Virtual Reality support!
Studio Pack (5 Seats)
More Awesome Cameras and tools for LightWave3D that you can use in production right away.
We have updated our VR Cameras in this release to provide for "back seam" free rendering as well as a completely re-written algorithm for our VR Stereo Camera giving you the best stereoscopic rendering for VR video out there.
You get the following Cameras:
Liberty3D VR Stereoscopic Camera (New in 2.1) Make Stereoscopic Spherical 360 Degree VR Video!
Liberty3D VR Camera (New in 2.0!) Make Spherical 360 degree videos on youtube!
Liberty3D Surface Baking Camera (New in 2.0! - Experimental)
Liberty3D Spherical Camera (Updated for 2.0!)
Liberty3D Radial Shift Camera (Updated for 2.0!)
Liberty3D OverScan Camera (Updated for 2.0!)
Liberty3D SuperPano Camera (Updated for 2.0!)
Liberty3D Stereoscopic Camera (Updated for use and compatibility with LW 2015 and Oculus Rift VR Headsets)
Liberty3D Dual-Cam Camera (Updated for 2.0!)
Liberty3d 4-Up Camera (Updated for 2.0!)
Liberty3D 12-Up Camera (Updated for 2.0!)
Liberty3D Perspective Camera (DOF) (Motion Blur) (Updated for 2.0!)
Liberty3D Perspective Camera (No DoF) (Motion Blur) (Updated for 2.0!)
Liberty3D Perspective Camera (No DoF) (No Motion Blur) (Updated for 2.0!)
Liberty3D Panoramic Camera (Updated for 2.0!)
Liberty3D Cylinder Camera (Updated for 2.0!)
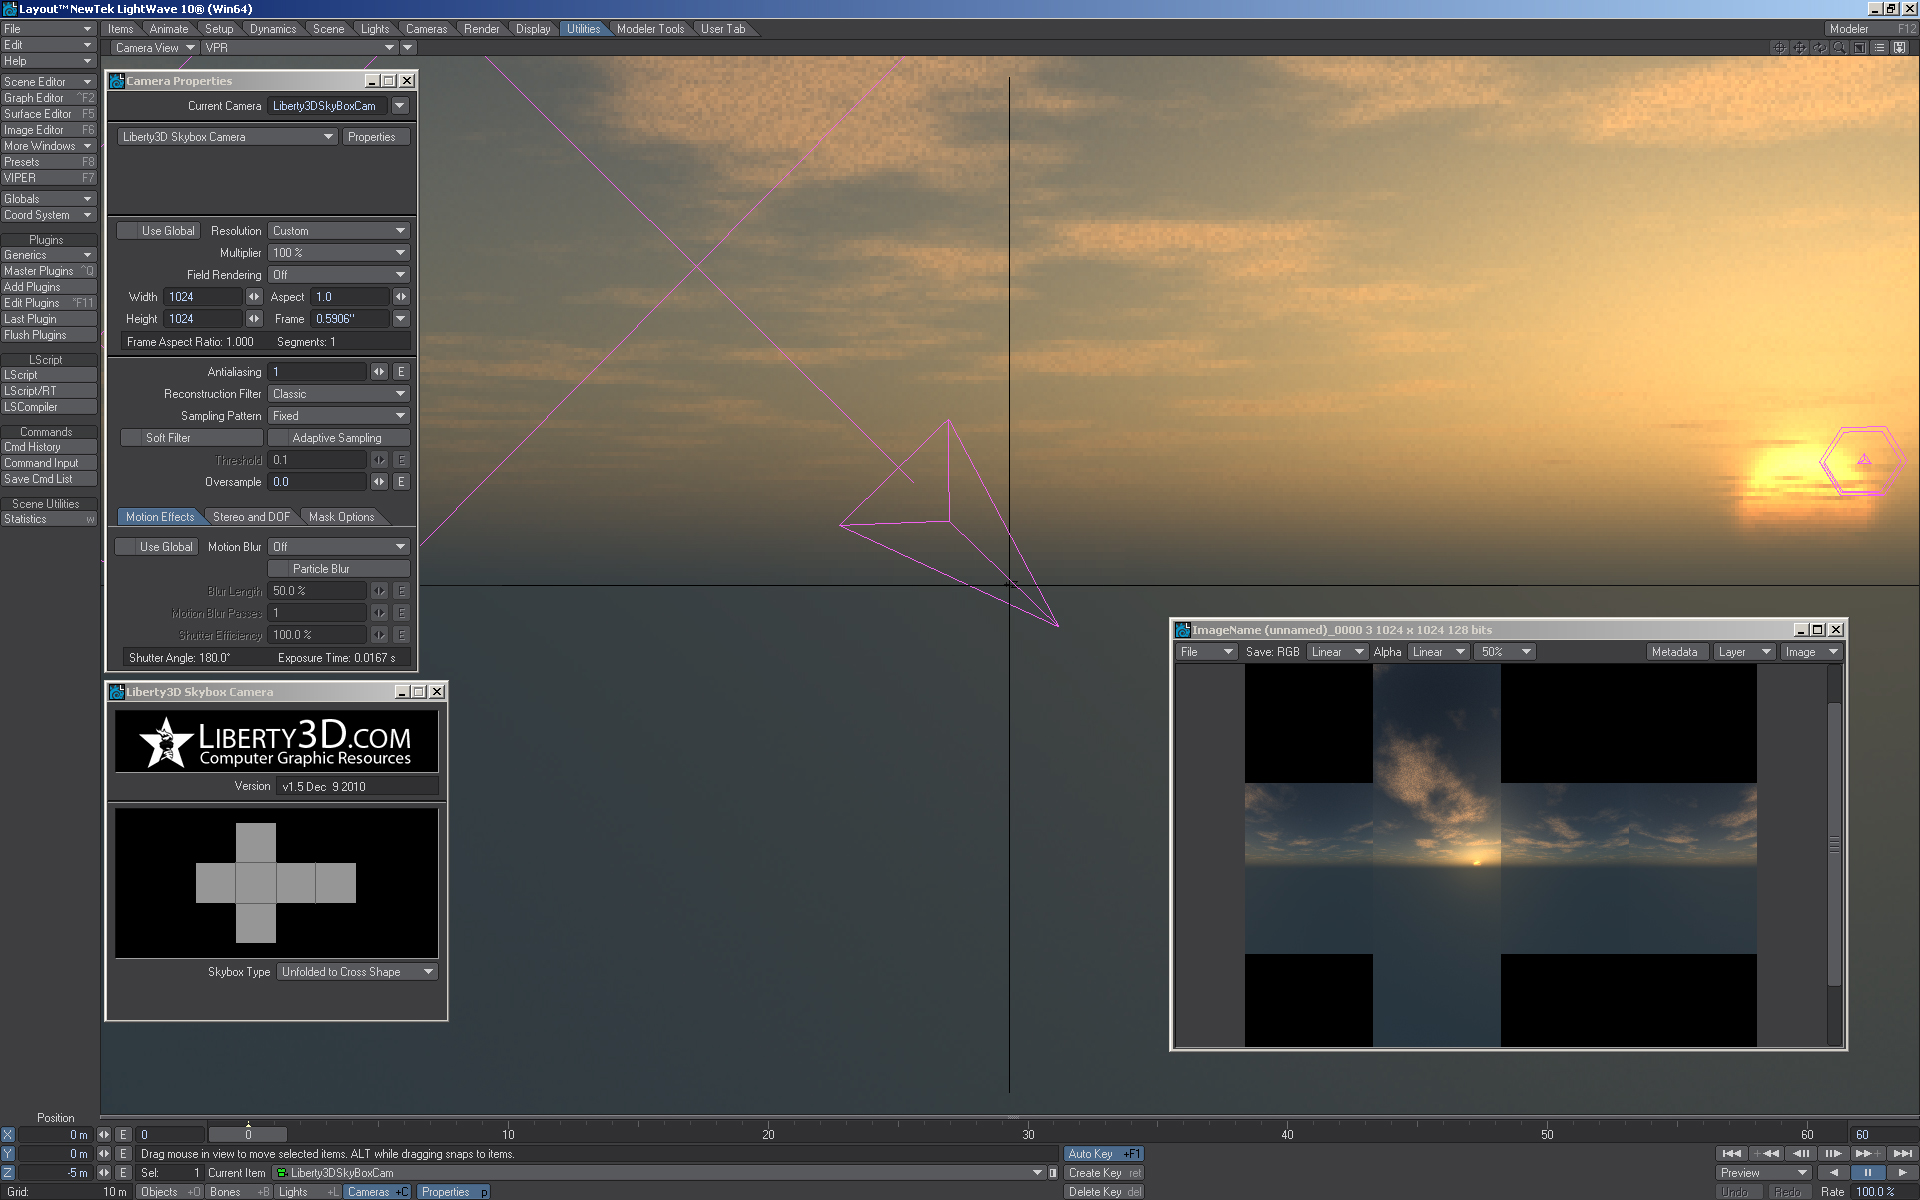
Liberty3D Skybox Camera (Updated for 2.0!)
Liberty3D FishEye Camera (Updated for 2.0!)
You get the following Tools:
VRHeadset Manager (For use with both Oculus Rift DK1.1 and DK2 Virtual Reality Headsets)
Virtual Studio Tools VR Headset Device Node (For connecting your camera in lightWave to the Oculus Rift via virtual Studio Tools)
UberRift Viewer (A brand new floating viewer window that works with the Oculus Rift in stereoscopic, properly applying the barrel lens distortion effect to your layout camera viewport)
L3D Oculus Rift Barrel Distortion Image Filter (For use with our Stereoscopic camera so you can render out images using LightWave's renderer for viewing on the Oculus Rift)
This release of UberCam 2.6 is jammed packed with features and comes with an awesome 60+ page manual covering everything you need to know about how to set up your Oculus Rift and use it with LightWave3D.
MacOS 32bit/64bit (Universal Binary), Win64bit and Win32bit versions are shipped in this plug-in along with our new manual.
Please note that at this time the UberRift viewer works on Windows PC platforms (32bit and 64bit) only and requires at least LightWave3D 11.6.3.
Most camera plug-ins are backward compatible to LightWave 9.3.1.
LightWave 2017 is supported.
![LightWave 2015- Volume #10- Surfacing [AG]](https://www.liberty3d.com/wp-content/uploads/2019/08/Lightwave_2015_Vol_10_Product_Box_400pix.jpg)
LightWave 2015- Volume #10- Surfacing [AG]
In this 10th Volume of our 2015 training series 3D Instructor Adam Gibson introduces the beginner 3D student how to get started using Lightwave's powerful surfacing tools.
Table of Contents for Volume #10: Chapter 1- Intro, Chapter 2- What is Surfacing?, Chapter 3- Polygons and Surface Normals, Chapter 4- Color Channel Basics, Chapter 5- Creating Surface Names and Renaming Surfaces, Chapter 6- Working with Multiple Surfaces, Chapter 7- Smoothing Angle, Chapter 8- Luminosity Channel, Chapter 9- Enable Glow, Chapter 10- Diffuse Channel, Chapter 11- Specular and Gloss Channels, Chapter 12- Reflection Channel, Chapter 13- Transparency and Refraction Index, Chapter 14- Object Dissolve, Chapter 15- Translucency Channel, Chapter 16- Bump Channel, Chapter 17- Double Sided Polygons, Chapter 18- Surface Presets (Colors, Metals, Rock, Fabric, Glass and More), Chapter 19- Gradients Introduction, Chapter 20- Nodes Introduction (Part One), Chapter 21- Nodes Introduction (Part Two), Chapter 22- Final. Running Time: 4 hrs. 0 mins., High Quality (Screen-Res 1920 x 1080 pixels), Video Format: MP4 (.mp4), Level: Beginner.![LightWave 2015- Volume #9- UV Mapping [AG]](https://www.liberty3d.com/wp-content/uploads/2019/08/Lightwave_2015_Vol_9_Product_Box_400pix.jpg)
LightWave 2015- Volume #9- UV Mapping [AG]
In this latest Lightwave 2015 Series tutorial 3D Instructor Adam Gibson will demonstrate how to quickly UV Map a Parasaurolophus Dinosaur model using the "ABF UV Unwrap" tool and the "PLG UV Tools" Plugin (Free Plugin). Learn how to systematically break up your model for easy flattening of UV Islands. Tips and Tricks are also shown on how to avoid typical problems and also how to deal with issues along the way. Table of Contents for Volume #9: Chapter 1- Intro, Chapter 2- UV Workflow for Project, Chapter 3- Dividing Up Body Parts (Part One), Chapter 4- Dividing Up Body Parts (Part Two), Chapter 5- Body UV Map, Chapter 6- Front Feet UV Map, Chapter 7- Claws of Front Feet UV Map, Chapter 8- Inner Mouth UV Maps, Chapter 9- Inner Nostrils, Eye Sockets, Ear Sockets UV Map, Chapter 10- Claws UV Map, Chapter 11- Neck UV Map, Chapter 12- Tail UV Map, Chapter 13- Eyes UV Map, Chapter 14- Arms UV Map, Chapter 15- Rear Feet UV Map, Chapter 16- Legs UV Map, Chapter 17- Head UV Map, Chapter 18- Merging Body Parts into One Layer and Merging Points, Chapter 19- Using the PLG Pack UV Chart Plugin, Chapter 20- Final. Running Time: 2 hrs. 44 mins., High Quality (Screen-Res 1920 x 1080 pixels) , Video Format: MP4 (.mp4), Level: Beginner.![Instant 3D Turntable for LightWave Users [cw]](https://www.liberty3d.com/wp-content/uploads/2015/12/Screen-Shot-2015-12-15-at-5.38.22-PM.png)
Build Instant 3D turntables and navigable rooms and buildings using the free version of Unity 5 and LightWave3D.
![LightWave 2015- Volume #8- Particles & HyperVoxels II [AG]](https://www.liberty3d.com/wp-content/uploads/2019/08/Lightwave_2015_Vol_8_Product_Box_400pix.jpg)
LightWave 2015- Volume #8- Particles & HyperVoxels II [AG]
In Particles and HyperVoxels II 3D Instuctor Adam Gibson demonstrates how to make your particles and hypervoxels interact with other objects and 3D Models in your scene. This can be useful for limitless amount of situations whether it be making dust, debris or liquids fall and bounce off the ground, a character, or any other 3d models in the scene or for making a 3d object realistically pass through smoke, steam, or fire. The possibilities are limitless. In the second part of the tutorial how to convert your 3D models/meshes into Particle Emitters is shown. This is a very powerful feature as you can create effects like making your 3D models look like they are on fire or emitting smoke or steam or even sweating. If you are new to Lightwave 3D this a great tutorial to get started fast with Particles and HyperVoxels. Table of Contents for Volume #8: Chapter 1- Intro, Chapter 2- Collision Object (Plane-Type), Chapter 3- Collision Object (Roughness Setting), Chapter 4- Using 2 Collision Planes at the Same Time, Chapter 5- Collision Mode Types, Chapter 6- Polygonal Collision Mode (for Polygonal Models), Chapter 7- HyperVoxel Surface Permeation Problem (Radius/Level Fix), Chapter 8- SubDiv Collision Mode (for Sub-D Models), Chapter 9- Particle Collision Using Textured Deformed Terrains, Chapter 10- Using an Object/Mesh as a Particle Emitter, Chapter 11- Final. Running Time: 1 hrs. 51 mins., High Quality (Screen-Res 1920 x 1080 pixels), Video Format: MP4 (.mp4), Level: Beginner.![LightWave 2015- Volume #7- Particles & HyperVoxels I [AG]](https://www.liberty3d.com/wp-content/uploads/2019/08/Lightwave_2015_Vol_7_Product_Box_400pix.jpg)
LightWave 2015- Volume #7- Particles & HyperVoxels I [AG]
Learn How to Create Clouds and Outer Space Nebulas in Lightwave 2015. Spice up your sky environments and outer space scenes. In this Beginner Level Lightwave 2015 tutorial Adam Gibson demonstrates easy to follow steps for Cloud and Nebula creation in Layout. So if you are new to Particles and HyperVoxels this tutorial is a great place to start. Table of Contents for Volume #7: Chapter 1- Intro, Chapter 2- HyperVoxel Cloud Concepts, Chapter 3- HyperVoxel Cloud Initial Set-Up, Chapter 4- HyperVoxel Cloud (Stretch Direction Input Parameter), Chapter 5- HyperVoxel Cloud (Shading Using Procedural Textures), Chapter 6- Nebula Creation (Using a Multi-Colored Gradient), Chapter 7- Nebula Render and Tweaking, Chapter 8- Final. Running Time: 1 hrs. 34 mins., High Quality (Screen-Res 1920 x 1080 pixels) , Video Format: MP4 (.mp4), Level: Beginner.This title is massive!
Fusion for LightWave Artists is a 420 minute exploration and project based tutorial that demonstrates how you can leverage the power of BlackMagic Design’s Fusion 7 (or 8) which is now free; into your LightWave production workflows. Whether you use Mac or PC, Fusion is your best and most affordable compositing option available that provides absolutely uncompromising results and speed. Now, experience how you can take your LightWave work to the next level. Fusion and LightWave have a long history of being used together in top studios over the last two decades producing some of the most iconic television shows and films of our time.
In this video learn how to make use of Fusion’s powerful workflow and LightWave render buffer system to integrate photographic (stills or video can be used) material producing photorealistic composites.
Kat masterfully walks you through the process over the course of 27 video clips and 4 project based examples demonstrating the use of Object ID, Surface ID, Depth (linear fog and z-Buffer techniques are covered) to gain maximum control over your shots. Learn how to produce color correction effects over distances using depth as well as DoF application and how to avoid “gotchas” when working with deep pixel data.
Take advantage of LightWave’s Shadow Catcher node and learn how you can precisely control the results in comp helping you to save time in render as well as remain flexible when it comes to your final look.
Learn how you can take advantage of LightWave’s native Composite Buffer tool or DB-W’s exrTrader buffer saver export plug-in to reduce the amount of image files you have to manage while getting the most out of each render pass to create your final composites. Learn how to use the power of motion vectors and work with them in comp without the need for any RSMB plug-ins or fancy tricks to make them work.
Over 1.64GB in size this video is a huge value and comes with rendered image content and scenes (The A-10 model/scenes are not included due to copyright reasons, but the renders are).
This video is the first part in a series of videos designed specifically for LightWave artists in mind and is balanced between Layout and Fusion’s interface building up each element so the artist gets a firm grasp as to how to break out shots for compositing later.
Get it now for only $39.49USD
![LightWave 2015- Volume #6- Getting Started VI [AG]](https://www.liberty3d.com/wp-content/uploads/2019/08/Lightwave_2015_Vol_6_Product_Box_400pix.jpg)
LightWave 2015- Volume #6- Getting Started VI [AG]
What is Lightwave 3D? Lightwave is powerful 3D Modeling/Animation and VFX software used in the Film and Television Industry by 3D artists/studios in Hollywood and all over the world. This 12 volume series is designed for beginners who are new to 3D or students who are new to Lightwave. The series will be covering everything you need to get started fast. Some of the Topics Covered throughout the 12 Volume Series will be: User Interface, Polygonal Modeling, Sub-D Modeling, UV Mapping, Surfacing Techniques, Animation Basics, Compositing Tools, Particle FX, Genoma II Character Rigging and more!! Table of Contents for Volume #6: Chapter 1- Intro, Chapter 2- Volumetric Light Introduction, Chapter 3- Volumetric Light Types, Chapter 4- How to Create a Vortex Effect with Volumetrics, Chapter 5- Particles Introduction, Chapter 6- Particle Attributes (Part One)- Emitter Size, Birth Rate, Lifetime, Particle Limit, Gravity, Chapter 7- Particle Attributes (Part Two)- Explosion, Vibration, Particle Resistance, Variance, Chapter 8- Snow Particle Scene Set-Up (Part One), Chapter 9- Snow Particle Scene Set-Up (Part Two) and Final. Running Time: 2 hrs. 24 mins., High Quality (Screen-Res 1920 x 1080 pixels) , Video Format: MP4 (.mp4), Level: Beginner.![LightWave 2015- Volume #5- Getting Started V [AG]](https://www.liberty3d.com/wp-content/uploads/2019/08/Lightwave_2015_Vol_5_Product_Box_400pix.jpg)
LightWave 2015- Volume #5- Getting Started V [AG]
What is Lightwave 3D? Lightwave is powerful 3D Modeling/Animation and VFX software used in the Film and Television Industry by 3D artists/studios in Hollywood and all over the world. This 12 volume series is designed for beginners who are new to 3D or students who are new to Lightwave. The series will be covering everything you need to get started fast. Some of the Topics Covered throughout the 12 Volume Series will be: User Interface, Polygonal Modeling, Sub-D Modeling, UV Mapping, Surfacing Techniques, Animation Basics, Compositing Tools, Particle FX, Genoma II Character Rigging and more!! Table of Contents for Volume #5: Chapter 1- Intro, Chapter 2- Fog FX Scene Set-Up (Fog Color, Thickness, Backdrop, Gradient Backdrop), Chapter 3- Fog Min Distance and Max Distance Circles (Radius), Chapter 4- Setting Up Textured Fog, Chapter 5- How to Animate Fog and Multiple Fog Layers, Chapter 6- Water Plane Set-Up (Basics of Making a Lake or Ocean), Chapter 7- Animating Water (Part One), Chapter 8- Animating Water (Part Two), Chapter 9- Final. Running Time: 1 hrs. 43 mins., High Quality (Screen-Res 1920 x 1080 pixels), Video Format: MP4 (.mp4), Level: Beginner.![LightWave 2015- Volume #4- Getting Started IV [AG]](https://www.liberty3d.com/wp-content/uploads/2019/08/Lightwave_2015_Vol_4_Product_Box_400pix.jpg)
LightWave 2015- Volume #4- Getting Started IV [AG]
What is Lightwave 3D? Lightwave is powerful 3D Modeling/Animation and VFX software used in the Film and Television Industry by 3D artists/studios in Hollywood and all over the world. This 12 volume series is designed for beginners who are new to 3D or students who are new to Lightwave. The series will be covering everything you need to get started fast. Some of the Topics Covered throughout the 12 Volume Series will be: User Interface, Polygonal Modeling, Sub-D Modeling, UV Mapping, Surfacing Techniques, Animation Basics, Compositing Tools, Particle FX, Genoma II Character Rigging and more!! Table of Contents for Volume #4: Chapter 1- Intro, Chapter 2- Importing Explosion Clip into Lightwave, Chapter 3- Explosion Surface Settings (Transparency Channel), Chapter 4- OpenGL Setting for Explosion Clip, Chapter 5- Clip Map Set-Up Concepts, Chapter 6- Frame Rate Fix for Explosion Clip, Chapter 7- Spaceship Animation Keyframe Set-Up, Chapter 8- Laser Explosion Set-Up, Chapter 9- Lens Flare Options and Time Envelope, Chapter 10- Motion Blur Basics and More Camera Animation, Chapter 11- Final Animation Rendered. Running Time: 2 hrs. 25 mins. High Quality (Screen-Res 1920 x 1080 pixels) , Video Format: MP4 (.mp4), Level: Beginner.![LightWave 2015- Volume #3- Getting Started III [AG]](https://www.liberty3d.com/wp-content/uploads/2019/08/Lightwave_2015_Vol_3_Product_Shot_400pix.jpg)
LightWave 2015- Volume #3- Getting Started III [AG]
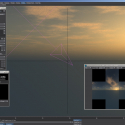
What is Lightwave 3D? Lightwave is powerful 3D Modeling/Animation and VFX software used in the Film and Television Industry by 3D artists/studios in Hollywood and all over the world. This 12 volume series is designed for beginners who are new to 3D or students who are new to Lightwave. The series will be covering everything you need to get started fast. Some of the Topics Covered throughout the 12 Volume Series will be: User Interface, Polygonal Modeling, Sub-D Modeling, UV Mapping, Surfacing Techniques, Animation Basics, Compositing Tools, Particle FX, Genoma II Character Rigging and more!!
Table of Contents for Volume #3: Chapter 1- Intro, Chapter 2- Textured Environment- Part One- Images, Chapter 3- Textured Environment- Part Two- Procedural Textures, Chapter 4- Sky Tracer (Part One) -Sun, Chapter 5- Sky Tracer (Part Two)-Clouds, Chapter 6- Sky Tracer (Part Two)-Atmosphere, Chapter 7- Sky Baker Plugin, Chapter 8- Lighting Your Scene with a Baked Environment Map, Chapter 9- Final. Running Time: 1 hrs. 34 mins., High Quality (Screen-Res 1920 x 1080 pixels), Video Format: MP4 (.mp4), Level: Beginner.![LightWave 2015- Volume #2- Getting Started II [AG]](https://www.liberty3d.com/wp-content/uploads/2019/08/Lightwave_2015_Vol_2_Product_Box_400pix.jpg)
LightWave 2015- Volume #2- Getting Started II [AG]
What is Lightwave 3D? Lightwave is powerful 3D Modeling/Animation and VFX software used in the Film and Television Industry by 3D artists/studios in Hollywood and all over the world. This 12 volume series is designed for beginners who are new to 3D or students who are new to Lightwave. The series will be covering everything you need to get started fast. Some of the Topics Covered throughout the 12 Volume Series will be: User Interface, Polygonal Modeling, Sub-D Modeling, UV Mapping, Surfacing Techniques, Animation Basics, Compositing Tools, Particle FX, Genoma II Character Rigging and more!! Table of Contents for Volume #2: Chapter 1- Intro, Chapter 2- Backdrop Color, Chapter 3- Gradient Backdrop Colors, Chapter 4- How to Animate the Backdrop Color (Part One), Chapter 5- How to Animate the Backdrop Color (Part Two), Chapter 6- Backdrop Image Concepts, Chapter 7- How to Resize Backdrop Images, Chapter 8- Camera View Background Modes, Chapter 9- OpenGL Image Resolution Settings, Chapter 10- How to Use an Image Sequence as a Background, Chapter 11- Foreground Image Concepts and Tools, Chapter 12- Foreground Image Set-Up in Adobe Photoshop, Chapter 13- How to Create 3D Images with an Alpha Channel to Export to Photoshop, Chapter 14- Final. Running Time: 2 hrs. 16 mins., High Quality (Screen-Res 1920 x 1080 pixels), Video Format: MP4 (.mp4), Level: Beginner.![LightWave 2015- Volume #1- Getting Started I [AG]](https://www.liberty3d.com/wp-content/uploads/2019/08/Lightwave_2015_Vol_1_Product_Box_400pix.jpg)
LightWave 2015- Volume #1- Getting Started I [AG]
What is Lightwave 3D? Lightwave is powerful 3D Modeling/Animation and VFX software used in the Film and Television Industry by 3D artists/studios in Hollywood and all over the world. This 12 volume series is designed for beginners who are new to 3D or students who are new to Lightwave. The series will be covering everything you need to get started fast. Some of the Topics Covered throughout the 12 Volume Series will be: User Interface, Polygonal Modeling, Sub-D Modeling, UV Mapping, Surfacing Techniques, Animation Basics, Compositing Tools, Particle FX, Genoma II Character Rigging and more!! Table of Contents for Volume #1: Chapter 1- Intro, Chapter 2- What is Lightwave?, Chapter 3- Layout Vs. Modeler, Chapter 4- Lightwave's Hub, Chapter 5- Selecting Items in Layout (Loading, Positioning, Rotating), Chapter 6- Creating Your First Animation, Chapter 7- How to Render Your First Animation, Chapter 8- Space Scene Project and Final. Running Time: 2 hrs. 28 mins., High Quality (Screen-Res 1920 x 1080 pixels), Video Format: MP4 (.mp4), Level: Beginner.![Practical Production Techniques - Vol. 9 Polygon Reduction [KAT]](https://www.liberty3d.com/wp-content/uploads/2015/02/PolygonCruncherPromoImage.jpg)
Kelly "Kat" Myers is back with another installment in the Practical Production Techniques series.
In this video, Kat gets you into QemmLoss3 and Motool's Polygon Cruncher for LightWave Modeler.
For anyone who is doing work with LightWave and wants to create game ready assets, effective polygon reduction is the other half of the process apart from Texture Baking. This title is the third and final volume in the sub-series on Advanced Texture Baking. The skills you will learn in this video carry over the concepts of those learned in Practical Production Techniques Vol. 6 - Advanced Surface Baking and Practical Production Techniques Vol. 7 - Advanced Surface Baking Part II.
With a run time of 180 minutes this video details the process of working with QemmLoss3, MooTools Polygon Cruncher as well as PB Texture Baker. Learn when and where to rebuild geometry rather than poly reduce objects using reductions plus tricks on how to handle tricky geometry that doesn't want to seem to cooperate.
Only $24.95USD
Kat's Disco In-fur-no Turbulence for LightWave3D Bundle (Newly expanded!)
*Newly expanded in June 2017!*
The Disco In-Fur-No bundle is now better than ever!
It's been expanded to include two more videos not previously included in this bundle for a total of 7 kick ass tutorials for TurbulenceFD.
This includes the video tutorial that goes along with the dozens of Nuclear Weapons Detonations that are ready to load into your LightWave shots. Simply find a Nuclear detonation that's to your liking out of the dozens included in the collection, load it into your shot, simulate it, and you're pretty much good to go! Kat's done the heavy lifting for you and now you can get it all and up to speed. Fast.
Does it get better than this? Absolutely. Every single person who participated in the TFD group buy-in this spring needs to pay attention here!
Get these great videos of Kat's at one low price to get...
Introduction to Turbulence FD
Advanced Concepts and Projects: Fireball
Advanced Concepts and Projects: Atmospherics
The complete Nuclear Weapons Pack (which includes a training video and of course the dozens of pre-built nuclear weapons detonations made with TurbulenceFD and LightWave3D)
Advanced Concepts and Projects - Clouds
Practical Production Techniques Vol. 10 - Project Smoke Monster
Fusion for LightWave Artists: Volume 4 - Curse of the Phantom Shadow
All together that's $193.65USD in awesome product from Liberty3D.com, but it gets more awesome with the bundle pricing of $139.65USD!
That's 53.70USD saving if bought separately and this bundle is discountable so if we have a sale on and you want to use a sale coupon to get even a further discount - you can use on this product!
While coupons can't be mixed with each other in our store... some of you have a really, really extra special coupon and you should use it for this exact bundle!
This means you, recent TFD Group Buy-in Participants! Do I have your attention still? Good. Because the Liberty3D.com Coupon code I issued you during the last phase of the Buy-in can be applied to discount this bundle while your coupon remains active!
Even if you have picked up a couple of these titles since picking up TFD during the spring 2017 buy-in, the discount possible with your coupon code top of the bundle discount will more than likely still you big savings!