



UberCam 4 with HyperCam
Bundle 1.9.18<!–mep-nl–><p style=”text-align: center;”><img src=”https://www.liberty3d.com/wp-content/uploads/2026/10/media-generation-ubercam-banner-0-a64b3d9b-14e3-4bd1-b106-5a178a1d0746-scaled.webp” alt=”UberCam 4 with HyperCam” style=”max-width: 100%; height: auto;” /></p><!–mep-nl–><h1 style=”text-align: center;”>UberCam 4 with HyperCam</h1><!–mep-nl–><div style=”text-align: center; margin: 1.2em 0 2em;”><!–mep-nl–><p style=”font-size: 1.6em; font-weight: bold; line-height: 1.35; margin: 0;”>UberCam 4 — now rebuilt for LightWave 2024 and later!</p><!–mep-nl–><p style=”font-weight: bold; margin: 0.6em 0 0;”><strong>System Requirements:</strong><br />LightWave3D 2024.2 and up<br />Windows 10, Windows 11 x64</p><!–mep-nl–></div><!–mep-nl–><p><strong><a href=”https://www.liberty3d.com/store/tools/ubercam/lens-and-stmap-submission-portal/”>📷 Submit a Lens or STMap</a></strong></p><!–mep-nl–><p><strong><a href=”https://www.liberty3d.com/store/tools/ubercam/report-a-bug/”>🐛 Report a Bug</a></strong></p><!–mep-nl–><p><strong><a href=”https://www.liberty3d.com/store/tools/ubercam/ubercam-4-hypercam-manual/”>📖 UberCam 4 with HyperCam — User Manual</a>< | <a href=”https:/liberty3d.com/Artists/Plugins//UberCam4-HyperCam-Mimic-Manual.pdf”>PDF manual (104 pages)</a><br /><a href=”https://www.liberty3d.com/store/tools/ubercam/supported-cameras-and-lenses/”>🎥 Supported Camera Bodies & Lenses</a><br /></strong></p><!–mep-nl–><p><strong><a href=”https://liberty3d.com/Artists/Plugins1.9.16<!–mep-nl–>/DemoScenes/HyperCamDemoScenes.rar”>🎬 HyperCam Demo Scenes (.rar)</a></strong></p><!–mep-nl–><h3>Already own UberCam 4 with HyperCam? Download the latest version</h3><!–mep-nl–><p>If the in-app update ever gives you trouble – a download that stalls or a connection that drops – you can always get the current installer right here instead.</p><!–mep-nl–>
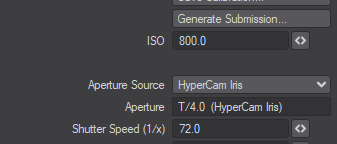
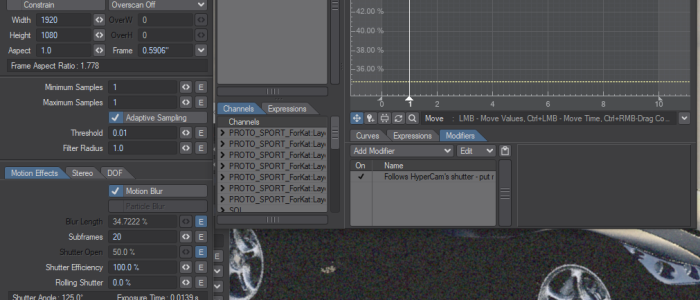
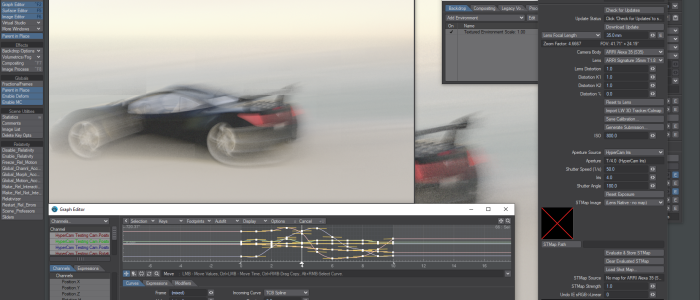
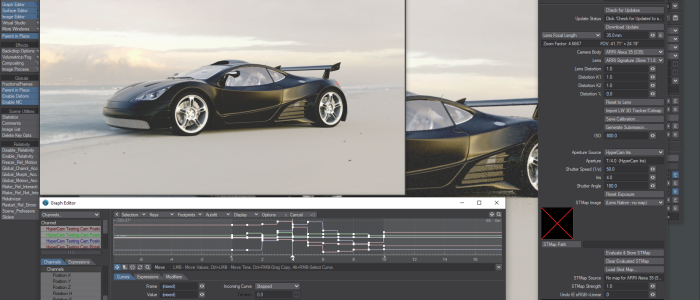
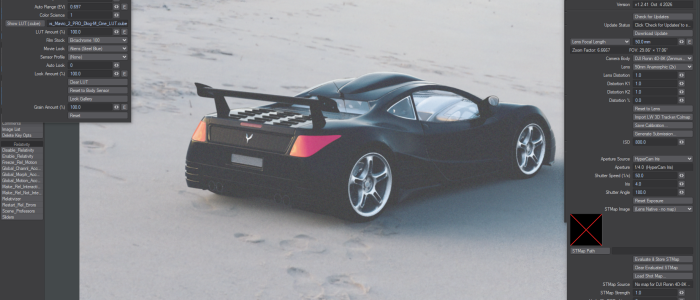
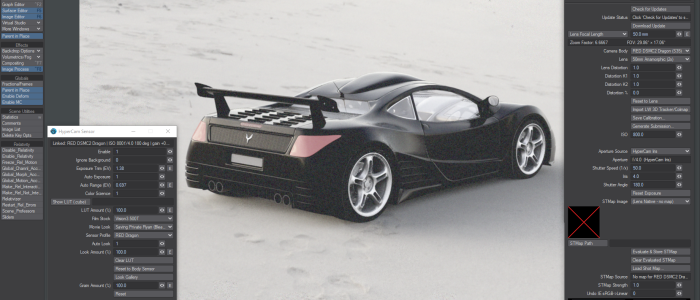
<!–mep-nl–><h2 style=”border-bottom: 2px solid #909090; padding-bottom: 8px;”>New in this release</h2>1.9.18-mep-nl–><p><strong>Bundle 1.9.18 — HyperCam 1.2.101 · Sensor 0.4.145 · HyperDIT 0.9.7 · Mimic 1.3.100 · Alpha Mimic 0.3.1</strong></p><p>New in Bundle 1.9.18:</p><p>HyperCam 1.2.101 adds the Canon EOS lineup – 95 Canon bodies – plus the iPhone 18 Pro, and fixes the production STMap override. UberCam 4.0.0.23 brings stereo and immersive fixes, and Sensor 0.4.145 is included. The bundle now covers 305 camera bodies and 354 lenses..</p><p>Mimic now has its own standalone manual, and the online manual has been republished with the new Mimic chapters.</p><p>The install notes now include your license in plain terms: one key, two computers, downloads by key — no account needed.</p><!–mep-nl–><!–mep-nl–><p style=”text-align: center;”><img src=”https://www.liberty3d.com/wp-content/uploads/2026/10/7f23a918e0ca9de45c7cc3e91bb8300123fb84c4b68c2814272540a9acb68fc0.png” alt=”HyperCam Sensor and HyperDIT live in LightWave — RED Komodo profile with Fujinon Premista” style=”max-width: 100%; height: auto;” /></p><!–mep-nl–><h2 style=”border-bottom: 2px solid #909090; padding-bottom: 8px;”>Fourteen Specialty Cameras</h2><!–mep-nl–><p>Fourteen specialty cameras for VFX, previz, and immersive work:</p><!–mep-nl–><div style=”display: grid; grid-template-columns: repeat(2, 1fr); gap: 12px; margin: 0 0 1.5em;”><!–mep-nl–><div style=”border: 1px solid rgba(128,128,128,0.35); border-radius: 8px; padding: 10px 14px;”><strong>Perspective</strong> — the workhorse. Standard perspective camera with full DOF and motion blur with vector blur!</div><!–mep-nl–><div style=”border: 1px solid rgba(128,128,128,0.35); border-radius: 8px; padding: 10px 14px;”><strong>Spherical</strong> — full 360×180 equirectangular for HDRI baking and environment capture.</div><!–mep-nl–><div style=”border: 1px solid rgba(128,128,128,0.35); border-radius: 8px; padding: 10px 14px;”><strong>Panoramic</strong> — cylindrical panorama for wide plates and set extensions.</div><!–mep-nl–><div style=”border: 1px solid rgba(128,128,128,0.35); border-radius: 8px; padding: 10px 14px;”><strong>Fisheye</strong> — hemispherical fisheye for stylized looks and dome projection.</div><!–mep-nl–><div style=”border: 1px solid rgba(128,128,128,0.35); border-radius: 8px; padding: 10px 14px;”><strong>Cylinder</strong> — cylindrical projection for wraparound screens and LED volumes.</div><!–mep-nl–><div style=”border: 1px solid rgba(128,128,128,0.35); border-radius: 8px; padding: 10px 14px;”><strong>Skybox</strong> — six-face cube map for skyboxes and realtime environment export.</div><!–mep-nl–><div style=”border: 1px solid rgba(128,128,128,0.35); border-radius: 8px; padding: 10px 14px;”><strong>Stereo</strong> — side-by-side stereoscopic pair for 3D delivery.</div><!–mep-nl–><div style=”border: 1px solid rgba(128,128,128,0.35); border-radius: 8px; padding: 10px 14px;”><strong>Immersive</strong> — wide-FOV immersive camera for VR preview and dome work.</div><!–mep-nl–><div style=”border: 1px solid rgba(128,128,128,0.35); border-radius: 8px; padding: 10px 14px;”><strong>Overscan</strong> — renders beyond the frame edge for post reframing and stabilization.</div><!–mep-nl–><div style=”border: 1px solid rgba(128,128,128,0.35); border-radius: 8px; padding: 10px 14px;”><strong>AdvPan</strong> — advanced panoramic with extended controls for multi-row stitches.</div><!–mep-nl–><div style=”border: 1px solid rgba(128,128,128,0.35); border-radius: 8px; padding: 10px 14px;”><strong>RadialShift</strong> — tilt-shift style perspective correction for architecture.</div><!–mep-nl–><div style=”border: 1px solid rgba(128,128,128,0.35); border-radius: 8px; padding: 10px 14px;”><strong>12Up / 4Up</strong> — multi-view arrays for lookdev turntables and contact sheets.</div><!–mep-nl–><div style=”border: 1px solid rgba(128,128,128,0.35); border-radius: 8px; padding: 10px 14px;”><strong>MultiCam</strong> — the original multi-camera rig for complex setups.</div><!–mep-nl–></div><!–mep-nl–><p>All fourteen share one license with HyperCam and the Sensor — activate once, everything unlocks via our new licensing system.</p><!–mep-nl–><p>Note: additional UberCam cameras from prior versions (including the Surface Baking camera) are being evaluated for reintroduction in future updates. These updates will come quick!</p><!–mep-nl–><p style=”text-align: center;”><strong>And Now, introducing!!!!</strong></p><!–mep-nl–><p style=”text-align: center;”><img src=”https://www.liberty3d.com/wp-content/uploads/2026/10/hypercam_banner.png” alt=”HyperCam” style=”max-width: 100%; height: auto;” /></p><!–mep-nl–><h2 style=”border-bottom: 2px solid #909090; padding-bottom: 8px;”>HyperCam</h2><!–mep-nl–><p>HyperCam replaces LightWave’s camera with a real-world cinematography tool. Pick an actual camera body and lens, and HyperCam matches its sensor, optics, and character.</p><!–mep-nl–><h2 style=”border-bottom: 2px solid #909090; padding-bottom: 8px;”>Real Cameras, Real Lenses</h2><!–mep-nl–><ul><!–mep-nl–><li><strong>305 camera bodies</strong> — from cinema flagships (ARRI, RED, Sony Venice, Canon C500) to mirrorless, DSLRs, and phones</li><!–mep-nl–><li><strong>354 lenses</strong> — spherical primes, zooms, anamorphics, and 155 cine lenses with true T-stop data</li><!–mep-nl–><li><strong>Pick a body and lens</strong>, and the sensor size, crop, and optical character follow automatically</li><!–mep-nl–></ul><!–mep-nl–><h2 style=”border-bottom: 2px solid #909090; padding-bottom: 8px;”>Real Optics</h2><!–mep-nl–><ul><!–mep-nl–><li><strong>Lens distortion</strong> — per-lens K1/K2 coefficients plus baked STMaps for complex warps. What you see is what that glass does.</li><!–mep-nl–><li><strong>T-stops, not just F-stops</strong> — 155 cine lenses carry real transmission data. The panel shows T/ for cine glass, f/ for still lenses. Depth of field follows the geometry; exposure follows the light. Just like the real lens.</li><!–mep-nl–><li><strong>Anamorphic support</strong> — 2x squeeze with proper desqueeze preview</li><!–mep-nl–></ul><!–mep-nl–><h2 style=”border-bottom: 2px solid #909090; padding-bottom: 8px;”>Film Looks and Stocks</h2><!–mep-nl–><p style=”font-style: italic;”>(via HyperCam Sensor)</p><!–mep-nl–><ul><li><strong>53 film stocks</strong> — Kodak (Vision3, Portra, Ektar, T-Max, Kodachrome, Ektachrome, Gold, HIE Infrared, Aerochrome), Fujifilm (Eterna, Reala, Astia, Velvia, Provia, Fujicolor Pro, Neopan Acros, FP-100C), Ilford (Delta, FP4 Plus, HP5), CineStill, Agfa, ORWO Wolfen, and Polaroid/li><!–mep-nl–></li><li><strong>20 movie looks</strong> — curated cinematic grades</li><!–mep-nl–><li><strong>26 sensor profiles</strong> — matched to real cinema cameras (ARRI Alexa, RED, Blackmagic, Canon Cinema, Sony Venice, Panasonic Varicam)</li><!–mep-nl–><li><strong>Body-driven response</strong> — with Auto Look on, the Sensor reads your HyperCam body and selects the matching sensor profile and grain character. Switch from a Sony FX3 to an ARRI Alexa and the color science follows — or load any LUT manually to override</li><!–mep-nl–></ul><!–mep-nl–><h2 style=”border-bottom: 2px solid #909090; padding-bottom: 8px;”>Works as a System</h2><!–mep-nl–><ul><!–mep-nl–><li><strong>HyperCam Sensor (included)</strong> — a pixel filter that reads HyperCam’s exposure data and applies real sensor response: ISO, shutter, iris, film stocks, movie looks. What the camera meters is what you get.</li><!–mep-nl–><li><strong>CameraLink</strong> — HyperCam publishes its state to a sidecar file so the Sensor, HyperCast, and third-party tools stay in sync.</li><!–mep-nl–><li><strong>In-camera updates</strong> — the panel checks for new versions and downloads them directly (no website visit needed).</li><!–mep-nl–></ul><!–mep-nl–><h2 style=”border-bottom: 2px solid #909090; padding-bottom: 8px; margin-top: 32px;”>HyperLook — Look Passes for Comp</h2><!–mep-nl–><p>HyperLook is an Image Filter that works with the HyperCam Sensor to write separate look passes as EXR files for compositing — solving LightWave’s inability to create custom render buffers.</p><!–mep-nl–><p><strong>Three EXR passes, next to your beauty render:</strong></p><!–mep-nl–><ul><!–mep-nl–><li><strong>_stock</strong> — beauty + film stock LUT</li><!–mep-nl–><li><strong>_pregrain</strong> — beauty + stock + movie look (no grain)</li><!–mep-nl–><li><strong>_grain</strong> — grain only: raw signed noise centered on 0, alpha 0, so it adds straight onto the shot in comp</li><!–mep-nl–></ul><!–mep-nl–><p><strong>Comp formula (Nuke):</strong></p><!–mep-nl–><p style=”font-family: monospace; background: rgba(128,128,128,0.1); padding: 12px; border-radius: 4px;”>final = Read(“beauty_pregrain_0001.exr”) + Read(“beauty_grain_0001.exr”)</p><!–mep-nl–><p>In Fusion, a plain Normal merge works and its Blend control dials the grain strength. Grain files written by HyperLook before 1.1.12 were centered on 0.5 with a solid alpha — for those older files only, subtract 0.5 from the grain pass first, then add.</p><!–mep-nl–><p><strong>Automatic Sensor coordination:</strong> HyperLook and the Sensor coordinate via the look sidecar — no manual setup. When the Sensor is on, it owns the beauty look and HyperLook writes only the grain pass. When the Sensor is off, HyperLook takes over the full look plus all passes. No double-application, ever.</p><!–mep-nl–><p><strong>Production paths:</strong> Passes go next to your beauty render (from Render Options output path), respecting render controller path remapping. Never touches the plugin directory.</p><!–mep-nl–><div style=”background-color: rgba(128,128,128,0.12); border: 1px solid rgba(128,128,128,0.45); border-radius: 8px; padding: 16px 20px; margin: 1.5em 0;”><!–mep-nl–><strong>One license, everything:</strong> HyperCam, all fourteen UberCam cameras, and the Sensor activate together. Two seats per license (One seat Per Product Lock ID but you can put it on two separate machines without it complaining).<!–mep-nl–><!–mep-nl–><img src=”https://www.liberty3d.com/wp-content/uploads/2026/11/HyperDrive-Monstro-Panel-1.9.13.png” alt=”HyperDrive panel in LightWave Layout with a RED Monstro R3D loaded: 5 of 6 channel types detected across 145 frames, bake channels on” width=”791″ height=”721″ class=”size-full wp-image-13175″ /> HyperDrive at work: a RED Monstro R3D read straight in — 5 of 6 channel types across all 145 frames, every bake channel armed. Focal, focus, iris, shutter and ISO bake onto the camera; Bake Position and Bake Rotation each offer Overwrite or Additive (greyed here — an R3D carries no camera pose, and HyperDrive never invents one).<p style=”text-align: center;”><img src=”https://www.liberty3d.com/wp-content/uploads/2026/11/HyperCam-Monstro-Baked-Camera-Panel-1.9.13.png” alt=”HyperCam Camera panel after the bake: RED Weapon Monstro body, 50mm lens at f/9.9, ISO 400, shutter angle 150.15 degrees, lens STMap active” width=”791″ height=”694″ class=”size-full wp-image-13176″ /></p><!–mep-nl–><p style=”text-align: center;”>…and the camera it produces: after the bake, HyperCam is wearing the Monstro — 50 mm at f/9.9, ISO 400, the shutter converted to 150.15° at the scene’s 25 fps, the lens STMap auto-loaded. Nothing to sync by hand: the bake keys HyperCam’s own channels and attaches its native-channel links itself.</p><!–mep-nl–><h2 style=”border-bottom: 2px solid #909090; padding-bottom: 8px; margin-top: 32px;”>HyperCam in Action</h2><!–mep-nl–><p>HyperCam at work — sensor and camera panels, ShutterLink motion blur, IrisLink depth of field, the Looks Gallery, movie looks, and film stock emulations:</p><!–mep-nl–>
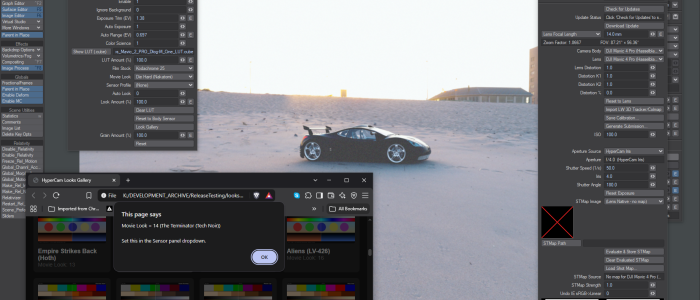
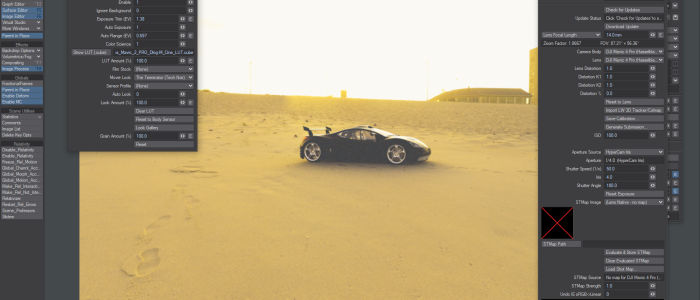
<!–mep-nl–><p><strong>System Requirements:</strong><br />LightWave3D 2024.2 and up<br />Windows 10, Windows 11 x64</p><!–mep-nl–><h2>FireFly Killer</h2><!–mep-nl–><p>Same scene, same light, same render settings — the only change is the HyperCam Sensor switched on. Fireflies are born when a renderer has to shout: extreme values get lifted in post until single hot pixels sparkle across the frame. HyperCam exposes in-camera, in honest stops, so nothing needs the shout; the filmic response rolls the extremes off instead of clipping them, and the finishing grain dithers whatever residue is left.</p><!–mep-nl–><p><strong>HyperCam Sensor disabled</strong><br /><img src=”https://www.liberty3d.com/wp-content/uploads/2026/10/firefly-killer-sensor-DISABLED-1024×576.png” alt=”Supercar render with fireflies, HyperCam Sensor disabled” style=”max-width: 100%; height: auto;” /></p><!–mep-nl–><p><strong>HyperCam Sensor enabled</strong><br /><img src=”https://www.liberty3d.com/wp-content/uploads/2026/10/firefly-killer-sensor-ENABLED-1024×577.png” alt=”Same supercar render clean, HyperCam Sensor enabled” style=”max-width: 100%; height: auto;” /></p><!–mep-nl–><h2 style=”border-bottom: 2px solid #909090; padding-bottom: 8px;”>Now includes <a href=”https://www.liberty3d.com/store/tools/mimic/”>Mimic</a></h2><!–mep-nl–><p>Every UberCam 4 + HyperCam bundle now includes Mimic, Liberty3D’s look-matching tool, at no extra cost. Drop in your footage and the film you want it to look like, and Mimic builds a standard.cube LUT matched to your material – then, with Link LightWave3D turned on, that look streams live into Layout through the HyperCam Sensor while you work, so your render takes on the film’s character in VPR before you ever save the file.</p><!–mep-nl–><p><img src=”https://www.liberty3d.com/wp-content/uploads/2026/10/1d04a06bdb819f88955202318a6e3ac58ad57fb4663a23460705751a1028e4f9-1024×198.png” alt=”Mimic working with HyperCam through Mimic Link” style=”max-width: 100%; height: auto;” /></p><!–mep-nl–><p>The Mimic installer is inside the bundle download, and your bundle license key activates it – the same key, the same 2 machines, nothing else to buy.</p><!–mep-nl–><p>Already own the bundle? You already own Mimic. It is in the current bundle download, and your existing key activates it today.</p><!–mep-nl–><p style=”text-align: left; font-size: 1.5em; font-weight: bold; margin: 2em 0 0.5em;”>Buy it now for Just $99.00</p><!–mep-nl–><p style=”text-align: center;”></p><!–mep-nl–></div>
Already own a license? Enter your key to download the latest installer.
Need a hand? Email support@liberty3d.com.
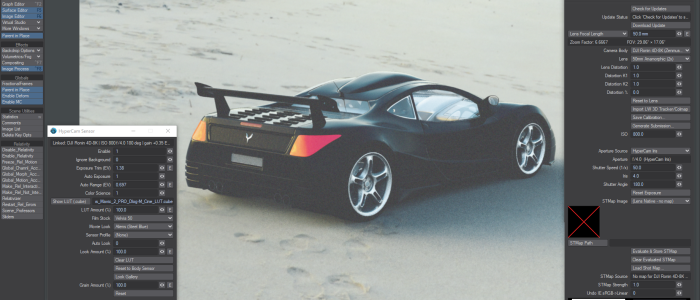
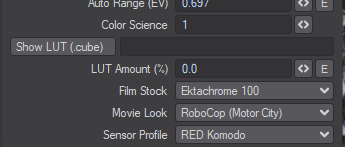 The HyperCam Sensor panel — real camera sensor emulation with exposure matching, film stocks, and movie looks. Shown here linked to a RED Komodo at ISO 800.