


LightWave 7.x-8.x
Tutorials made in LightWave 7.x – LightWave 8.x. Even though these are tutorials are older, many of these techniques still work in current versions.
![SCI-FI Environments- Desert Planet Collection I [AG]](https://www.liberty3d.com/wp-content/uploads/2026/04/SCI_FI_Desert_Planet_Product_Box_400pix.jpg)
![Adam's Everything LightWave Monster Bundle [AG]](https://www.liberty3d.com/wp-content/uploads/2023/05/Everything_LightWave_Monster_Bundle_JPEG.jpg)

![Practical Production Techniques Vol 1 - 20 Ultra Bundle [KAT]](https://www.liberty3d.com/wp-content/uploads/2010/09/STORE_Generic.jpg)
![The LFS Project [LFSP]](https://www.liberty3d.com/wp-content/uploads/2018/08/rising-pracima.jpg)
![LightWave 2019/2018 Bundle Pack-Volumes #1 to #12 (Free Bonus Content & Tutorials) [AG]](https://www.liberty3d.com/wp-content/uploads/2019/10/Lightwave_2019_Bundle_Pack_I_400pix_JPEG.jpg)
![LightWave 2019- Volume #12- Modeler Tools IV [AG]](https://www.liberty3d.com/wp-content/uploads/2019/10/LW_2019_Vol_12_Product_Box_400pix.jpg)
![LightWave 2019- Volume #11- Modeler Tools III [AG]](https://www.liberty3d.com/wp-content/uploads/2019/10/LW_2019_Vol_11_Product_Box_400pix.jpg)
![Iron Sky Model and Scene Pack Vol. Two [KAT]](https://www.liberty3d.com/wp-content/uploads/2018/11/AustraliaPromo_4.jpg)
![Advanced LightWave Modeling Projects - Chevy Impala [ELV]](https://www.liberty3d.com/wp-content/uploads/2016/05/impalapromoone-300x254.jpg)
![Fusion for LightWave Artists Part II [KAT]](https://www.liberty3d.com/wp-content/uploads/2016/03/FFLWAPromo2.jpg)
![Instant 3D Turntable for LightWave Users [cw]](https://www.liberty3d.com/wp-content/uploads/2015/12/Screen-Shot-2015-12-15-at-5.38.22-PM.png)
![Fusion for LightWave Artists [KAT]](https://www.liberty3d.com/wp-content/uploads/2015/09/A10CompExample_01.png)
![Substance Painter for Lightwave Users-Vol.#5-Smart Materials II [AG]](https://www.liberty3d.com/wp-content/uploads/2018/10/Substance_Painter_for_LW_Users_Vol_5_400pix.jpg)
![Substance Painter for Lightwave Users-Vol.#4-Smart Materials [AG]](https://www.liberty3d.com/wp-content/uploads/2018/10/Substance_Painter_for_LW_Users_Vol_4_400pix.jpg)
![Substance Painter for Lightwave Users-Vol.#3- Lightwave Import & Emissive Maps [AG]](https://www.liberty3d.com/wp-content/uploads/2018/10/Substance_Painter_for_LW_Users_Vol_3_Product_Box_400pix.jpg)
![DAZ 3D Model Creation- The Dark Art [AG]](https://www.liberty3d.com/wp-content/uploads/2018/10/DAZ_3D_Model_Creation_Product_Box_400pix.jpg)
![Tom Roth's Basic Principles of Character Animation [TR]](https://www.liberty3d.com/wp-content/uploads/2014/02/Tom_Roth.png)
![The Comprehensive Guide to IKBooster(Parts 3-5) [RR]](https://www.liberty3d.com/wp-content/uploads/2014/02/IKBCG_Titlecard_2.jpg)
![The Comprehensive Guide to IKBooster (Parts 1-2) [RR]](https://www.liberty3d.com/wp-content/uploads/2013/11/IKBCG_Titlecard-300x185.jpg)

![Advanced Space Scene Creation Vol. 2 [kat]](https://liberty3d.com/wp-content/uploads/2010/08/AdvancedSpaceSceneCreationVolumeTwo_Advert_R01.jpg)
The Desert Planet Collection from our "SCI-FI Environment Series" is a large collection of highly detailed background images that can be used on your next alien desert planet project!! Example Uses: 1) Green/Blue Screen Projects for your Live-Action Actors. 2) Backgrounds for 3D Models and Animations for use in 3D Software and Compositing Packages. 3) For use in AI Software packages to create animations and Visual FX. 4) For use in Photo-Editing Software packages like Adobe Photoshop to create still images that are combined with other image elements. 5) Great for Set Extensions to make your movies, short films, commercials and videos more interesting and detailed. Image Count: 104 x HD 4K Sci-Fi Images, Image Resolution: 4K (3840 x 2160 pixels), Aspect Ratio: 16:9, Image Format: JPEG (.jpg).
Price: $19.00
Adam's Everything LightWave Monster Bundle [AG]
This Monster LightWave Bundle contains every LightWave 3D Tutorial and Course that Adam Gibson has created since the year 2009. LightWave Versions: 9, 10, 11, 11.5, 2015, 2018, 2019 and 2020. Hundreds of hours of detailed training covering everything from 3D Modeling, Texturing, UV Mapping, Rigging, Animating and more!!Price: $140.00
Kat has released volume 2 of his DT Las Vegas Texture Pack. Taking through out the late summer months of 2021 in the downtown Las Vegas area these lovely photographs for you that are perfect for textures in use with just about any 3D program on the planet, especially LightWave3D. This is a complimenting package to the first volume so make sure to check that one out as well so you have the complete set.
You get:
Graffiti = 53
GroundNStuff = 83
StuccoStoneWalls =56
Misc = 11
That's just over 200 images ready for you to drop into a program such as Materializer (Materializer example project included!) to create your texture sets from for PBR use in just about any modern rendering engine such as LightWave3D 2018+, game engine such as Unreal or Unity or other PBR system. They can also easily be used LightWave3D Legacy editions as well. They are untouched, pristine images taken at magic hour during the months of August, September and October of 2021. Crop and adjust as needed!
Get 894MB of awesome texture images for your next project in this collection today!
All photos taken at 1960x4032 or 4032x1960 pixels.
Price: $9.95
Kat spent a good while walking around the Downtown Las Vegas area taking these lovely photographs for you that are perfect for textures in use with just about any 3D program on the planet, especially LightWave3D.
You get:
Brick = 16
CamoGrass = 16
Cement = 34
DirtSan =56
Metalics = 115
Misc = 9
PlasterStucco = 46
StoneRocks = 16
Woods = 114
That's 422 images ready for you to drop into a program such as Materializer (Materializer example project included!) to create your texture sets from for PBR use in just about any modern rendering engine such as LightWave3D 2018+, game engine such as Unreal or Unity or other PBR system. They can also easily be used LightWave3D Legacy editions as well. They are untouched, pristine images taken at magic hour during the month of August 2021.
Get over 1.65GB of awesome textures for your next project in this collection today!
All photos taken at 1960x4032 or 4032x1960 pixels.
Price: $19.95
Practical Production Techniques Vol 1 - 20 Ultra Bundle [KAT]
It's the most awesome bundle of all! 20 Practical Production Techniques videos in one ultra bundle from Kelly "Kat" Myers!
This is hundreds of hours of amazing learning material for LightWave3D, Fusion, Syntheyes and much more - spread across 20 titles for an amazingly low price!
With titles dating back to 2010 when we first started, this series covers practically (pun intended) every major type of visual effects scenario a VFX artist may face in the course of their career or pursuits as a hobbyist. From flying space ships to fixing impossibly bad footage in comp, every artist can benefit from the titles in this ultra bundle!
This is a massive product so be ready for some serious downloads!Price: $249.00
In an attempt to preserve some of the legacy of LightWave3D's history in the 3D and VFX world and its contributions to some of the most icon sci-fi television shows of the last 30 years; Liberty3d.com is making an effort archive and make available to the LightWave3D community many fan built assets from the series Babylon 5 (B5).
In this free to download collection, there are dozens of objects and scene set ups that will allow you to reproduce many wonderful visuals from the mid-1990s series. This is a great collection for anyone with a copy of LightWave3D going back to version 5.6 (if not earlier but we haven't tested this) to LightWave3D 2015.3. Later versions of LightWave3D may cause some pretty serious breakage of certain textures, and - volumetric engine or weapons fire effects rigs, so be warned! This doesn't mean that they cannot be reproduced using later versions of LightWave3D. They can, it just takes a bit of work.
While we can't list everything here, these are some highlights.
Included in this collection:
Whitestar LWO
Vorlon Dreadnought
Velarian_Class_Battleship
v9etu69q4r28-Babylon5
Shadow_Ship_(non_cannon)
Shadow_Alien
Psy_Corp_Mothership
narncruiser
minbari_warcruiser
Minbari_Sharlin_War_Cruiser
minbari_fighter
minbari
Jump_Gate
Hyperion
G-'Quan_v1
Earth_Force_One
EA_Shadow_New_Babylon_Station
EA_Omega_Destroyer_by_M.Tarling
EA Badger StarFury F3D Release
Centauri_Liner
big flying saucer
Babylon6
Babylon5
Babylon_5_Starfury_Version_3
B5Dockv2
Ashinta_Class_Escort_Frigate
ACTA_Jumpoint
A_Call_to_Arms_Babylon_5_Jump_Point
These and many more are included in this collection. They are provided "As Is" and where possible as they seem to be preserved from their original states produced by fans, credit for the authors is included in readme.txt files for most.
Price: $0.00
Price: $189.00
Lightwave 2019/2018 Bundle Pack-Volumes #1 to #12 (Free Bonus Content & Tutorials)
Price: $99.00
In this twelfth volume of the Lightwave 2019/2018 (12 Volume Series) 3D Instructor Adam Gibson continues to introduce Modeler's powerful toolset. A great place to start for beginner Lightwave Users.
Price: $19.00
In this eleventh volume of the Lightwave 2019/2018 (12 Volume Series) 3D Instructor Adam Gibson continues to introduce Lightwave’s powerful modeling tools. A great place to start for beginner Lightwave Users.
Price: $19.00
"The Commonwealth Ships"
Three "Earth Fleet" ships, specifically those from the British Common Wealth as we referred to them on the show are included in Iron Sky Model and Scene Pack Volume 2. You get some really awesome craft in this one!
The British "SpitFire", the Australia "Rooketer" (roo as in kangaroo) and the Canadian "CanadArm3". Each of which includes their appropriate volumetric engine set-ups and feature animated moving parts with the exception of the CanadArm3 ship which didn't have any moving parts. These are all "Hero" models, meaning they were the ones used for close up shots and later the base for downres or proxy objects used for shots where they appear in the distance or for previs. These models are an essential starting point to the series of packs being released later where entire shots will be made available to LightWave3D users with the goal of pretty much the entire work done in LightWave3D for the original film, being released. 4K, 6K and even 10K resolution texture maps are included where applicable, matching exactly the way they were used on the show.
Price: $49.98
Advanced LightWave3D Modeling Projects - Chevy Impala Car Model
Lewis3D (Elvis)
Get this complete project and model a 1958 Chevy Impala using spline patch modeling techniques. Lewis takes you through the entire process from start to finish including the set up of modeler to make the most efficient use of your time by placing the most often used tools in front of you for easy access.
With 68 Chapters in total running just over 37 hours this tutorial will turn you into an expert Lightwave modeler!
No details are left untouched, everything from modeling the base body right down to the headlights and Chevy logo are covered in full. If you have always wanted to take your modeling to the next level but were unsure where to start then this is the tutorial for you. While not entirely intended for beginners, this tutorial will take someone from a basic knowledge of LightWave Modeler or any other modeling package and through the process of each step, teach you the tools needed to create awesome cars, trucks, planes, you name it.
A full collection of reference images necessary to build with are included.
Price: $39.95
Kat does it again!
Fusion for LightWave Artists Part II a 390 minute project based tutorial using the same techniques from Battle Star Galactica and Iron Sky for LightWave3D shot construction, Lighting, Rendering, Render Management, and Fusion Compositing that demonstrates how you can leverage the power of BlackMagic Design’s Fusion 7 (or 8) which is now free; into your LightWave production workflows.
Whether you use Mac or PC, Fusion is your best and most affordable compositing option available that provides absolutely uncompromising results and speed. Now, experience how you can take your LightWave work to the next level. Fusion and LightWave have a long history of being used together in top studios over the last two decades producing some of the most iconic television shows and films of our time.
In this video Kat takes you through an entire production level shot from "Battlestar Galactica" using freely downloadable assets (download links provided). Not only that, you get the complete renders from each lighting and buffer pass. That's 6500 frames from 16 different scene files to make up one awesome shot! No need to render at home! This package provides you with the content. That means you get all the the scenes, Fusion comp files and the renders in full!
This video is the second part in a series of videos designed specifically for LightWave artists in mind and is balanced between Layout and Fusion’s interface building up each element so the artist gets a firm grasp as to how to break out shots for compositing and how to manage renders in a network environment leveraging the power of Lightwave and Fusion network rendering technology.
This video gives you deep insight into how an entire shot would be produce on BSG or Iron Sky and can be applied to just about any product or project.
Get it now for only $39.49USD
Price: $39.49
Build Instant 3D turntables and navigable rooms and buildings using the free version of Unity 5 and LightWave3D.
Price: $34.95
This title is massive!
Fusion for LightWave Artists is a 420 minute exploration and project based tutorial that demonstrates how you can leverage the power of BlackMagic Design’s Fusion 7 (or 8) which is now free; into your LightWave production workflows. Whether you use Mac or PC, Fusion is your best and most affordable compositing option available that provides absolutely uncompromising results and speed. Now, experience how you can take your LightWave work to the next level. Fusion and LightWave have a long history of being used together in top studios over the last two decades producing some of the most iconic television shows and films of our time.
In this video learn how to make use of Fusion’s powerful workflow and LightWave render buffer system to integrate photographic (stills or video can be used) material producing photorealistic composites.
Kat masterfully walks you through the process over the course of 27 video clips and 4 project based examples demonstrating the use of Object ID, Surface ID, Depth (linear fog and z-Buffer techniques are covered) to gain maximum control over your shots. Learn how to produce color correction effects over distances using depth as well as DoF application and how to avoid “gotchas” when working with deep pixel data.
Take advantage of LightWave’s Shadow Catcher node and learn how you can precisely control the results in comp helping you to save time in render as well as remain flexible when it comes to your final look.
Learn how you can take advantage of LightWave’s native Composite Buffer tool or DB-W’s exrTrader buffer saver export plug-in to reduce the amount of image files you have to manage while getting the most out of each render pass to create your final composites. Learn how to use the power of motion vectors and work with them in comp without the need for any RSMB plug-ins or fancy tricks to make them work.
Over 1.64GB in size this video is a huge value and comes with rendered image content and scenes (The A-10 model/scenes are not included due to copyright reasons, but the renders are).
This video is the first part in a series of videos designed specifically for LightWave artists in mind and is balanced between Layout and Fusion’s interface building up each element so the artist gets a firm grasp as to how to break out shots for compositing later.
Get it now for only $39.49USD
Price: $39.49
Substance Painter for Lightwave Users-Vol.#5-Smart Materials II [AG]
What is Substance Painter? Substance Painter is an extremely powerful 3D Painting Software package that is becoming very popular in the 3D Industry. It comes fully loaded with eye-popping materials to paint on your 3D models. Metals, Stone, Rock, Fabric, Wood and more. It also has a huge collection of tools and brushes to create weathering, dirt, scratches, corrosion, rust, skin, lizard scale detail (and more) with great speed and quality. A must have piece of software for those who want to add huge amounts of detail to their 3d Models. Table of Contents for Volume #5: Chapter 1- Intro, Chapter 2- Image Viewer Settings Vs. Final Map Output, Chapter 3- Height Force Setting Vs. Normal Map Amplitude Setting in Lightwave, Chapter 4- How Environment Map Lighting Affects Texture's Appearence, Chapter 5- Image World in Lightwave, Chapter 6- Textured Evironment in Lightwave and Light Tweaking, Chapter 7- How To Import Environment Maps into the Substance Painter Shelf, Chapter 8- Tips onHow to Figure Our Smart Material Controls, Chapter 9- Weapon Metal (Smart Material Preset), Chapter 10- Glossy Plastic (Smart Material Preset), Chapter 11- Monster Skin (Smart Material Preset), Chapter 12- Sand (Smart Material Preset), Chapter 13- Where Substance Painter Stores Newly Created Smart Materials, Chapter 14- Final. Running Time: 2 hrs. 9 mins., High Quality (Screen-Res 1920 x 1080 pixels), Video Format: MP4 (.mp4), Level: Beginner.Price: $19.00
Substance Painter for Lightwave Users-Vol.#4-Smart Materials [AG]
What is Substance Painter? Substance Painter is an extremely powerful 3D Painting Software package that is becoming very popular in the 3D Industry. It comes fully loaded with eye-popping materials to paint on your 3D models. Metals, Stone, Rock, Fabric, Wood and more. It also has a huge collection of tools and brushes to create weathering, dirt, scratches, corrosion, rust, skin, lizard scale detail (and more) with great speed and quality. A must have piece of software for those who want to add huge amounts of detail to their 3d Models. Table of Contents for Volume #4: Chapter 1- Intro, Chapter 2- What are Smart Materials and Input Maps?, Chapter 3- How to Bake Input Maps (Ambient Occlusion, World Space Normal, and more), Chapter 4- How to Add a Smart Material and Adjusting the Smart Material Settings, Chapter 5- Result of Not Having Input Maps Explained, Chapter 6- How to Import a Premade Normal Map from Other Software Packages, Chapter 7- Modifying a Preset to Create a New Preset, Chapter 8- How to Create a Preset Preview Image in Photoshop, Chapter 9- How to Build a Smart Material from Scratch, Chapter 10- Final. Running Time: 2 hrs. 14 mins., High Quality (Screen-Res 1920 x 1080 pixels) , Video Format: MP4 (.mp4). Level: Beginner.Price: $19.00
Substance Painter for Lightwave Users-Vol.#3- Lightwave Import & Emissive Maps [AG]
What is Substance Painter? Substance Painter is an extremely powerful 3D Painting Software package that is becoming very popular in the 3D Industry. It comes fully loaded with eye-popping materials to paint on your 3D models. Metals, Stone, Rock, Fabric, Wood and more. It also has a huge collection of tools and brushes to create weathering, dirt, scratches, corrosion, rust, skin, emissive-glow, lizard scale detail (and more) with great speed and quality. A must have piece of software for those who want to add huge amounts of detail to their 3d Models. Table of Contents for Volume #3: Chapter 1- Intro, Chapter 2- Texture Set-Up in Lightwave (Color, Specular, Gloss, Normal, Luminosity/Emissive), Chapter 3- Emissive Map Glow Options (Radiosity and Corona Image Filter Set-Up), Chapter 4- How to Create Emissive Channels in Substance Painter (Layer Settings), Chapter 5- Emissive Alpha Brushes, Chapter 6- Emissive Color Image Stamp Brush, Chapter 7- Final. Running Time: 2 hrs. 24 mins., High Quality (Screen-Res 1920 x 1080 pixels), Video Format: MP4 (.mp4), Level: Beginner.Price: $19.00
Would you like to Earn Money from Selling 3D Models on the Internet? If so, this video course is designed to teach you how to do just that. One of the largest 3D content market places on the internet is www.daz3d.com. DAZ Studio is a "FREE" piece of 3D Software that you can download from DAZ3D.com that is used by thousands and thousands of people all over the world.
Sounds complicated? Well don't worry in this course we will take you step-by-step on: Getting started with DAZ Studio UI (User Interface), Optimizing/Exporting Your Models for Import into DAZ, Converting/Adjusting your Models in DAZ Studio, Submission Guidelines, Dealing with the tricky DAZ File/Runtime(Texture) Folder Structure, Marketing and more!!
Although this course is designed for anyone who wishes to create models for DAZ3D.com we will be using Lightwave 3D as our starting point demonstrate model/optimization and object file export. But once again the principles shown can be used in all other software packages to get your 3D models into DAZ Studio.
*Please Note: Although this video tutorial is meant as a "Stand-Alone" Product it is also considered as Volume #5 of the "DDO for Lightwave Users" Series. Converting models and textures over to DAZ Studio for the purpose of Selling them on DAZ3D.com is part of the DDO series.
Table of Contents for DAZ 3D Model Creation
Chapter 1- Intro, Chapter 2- Basic DAZ Publishing Info Orientation, Chapter 3- DAZ UI (User Interface) Layouts and Menu Tabs, Chapter 4- IPR (Interactive Progressive Rendering) Image Preview, View Modes, Add Camera, Chapter 5- Draw Style Options Menu and Deleting Cameras, Chapter 6- Navigating View Modes (Pan, Orbit, Dolly Zoom, Frame Selection), Chapter 7- Item Selection and Transforms (Translation, Rotation, Scale), Chapter 8- Multiple Item Selection, Item Groups, Parenting Items, Chapter 9- Surface Selection Tool, Chapter 10- Item Duplication and Node Instances, Chapter 11- Create Primitives, Surfacing Primitives, Grouping Primitives, Chapter 12- Lights and Glowing Surfaces (Ambient Color and Strength), Chapter 13- Diffuse Color Vs Ambient Color (Glow Issue), Chapter 14- Rendering Product Images, Chapter 15- DAZ Content Library and Submission File Folder Structure, Chapter 16- Mesh Optimization (Tips on Triangles, Quads, Non-Planer Polys, UVs, and More), Chapter 17- FBX Export from Lightwave 3D and Proper UV Islands, Chapter 18- Import FBX into DAZ and Tweaking Surfaces, Chapter 19- Creating a Product Base Directory for your Files, Chapter 20- Runtime Texture Folder Structure Set-Up, Chapter 21- Setting Your Author/Artist Name in the Preferences Menu, Chapter 22- Props/Environments and Materials Folder Structure Creation, Chapter 23- Saving Prop Assets with Correct File Path and Settings, Chapter 24- Reassigning Texture File Paths to the Runtime Texture Folder, Chapter 25- Creating a Material Preset in the Materials Folder, Chapter 26- Zipping Up Your Product Folder and DAZ PASS Website, Chapter 27- Saving Multiple Item Products, Chapter 28- Helpful Websites for Selling Products on the Internet. Chapter 29- Final. Running Time: 7 hrs. 0 mins., High Quality (Screen-Res 1920 x 1080 pixels) . Video Format: MP4 (.mp4), Level: Beginner.
Price: $29.00
Tom Roth's Basic Principles of Character Animation for 3D Animators.
Legendary animator, Tom Roth, with over 40 years of experience in the animation industry guides
you through the essential fundamental principles of Character Animation.
Intended for Character animators of all levels the techniques discussed in this video are not
just for 3D by are rooted and apply to any character animation type.
With video and demonstration content, this tutorial is complete with hours of insight into
techniques and principles taught to Walt Disney Feature Film Animators and put into practice
The download includes:
Several hours of Video Content covering the basics to more advanced concepts including
The Bouncing Ball, Character Flexibility, Body Mechanics, "Warm up" or beginning acting, animating walk, run and skipping cycles plus much more.
Also included are the character model, animation thumbnail sketches and rigs!
Price: $40.00
Price: $34.95
The Comprehensive Guide to IKBooster
======================================
CONTENT INCLUDED WITH PURCHASE
------------------------------------------
-------
SUMMARY
-------
All videos included are encoded in h264 format, 1600x868 resolution, and include optional subtitles.
Total video content runtime is 114 minutes.
The download includes:
- The IKBooster Comprehensive Guide, parts 3 through 5
- Scenes, prefabs, and example/demonstrative Lightwave content to open and play with
- 5 character models
- Sample IKB relative motion files, including relative motion capture samples
- Sample commented Lscripts demonstrating time saving functions
- Supplementary video content
--------------
VIDEO DETAILS
--------------
? VIDEO PART 3: Relative Motion Loading ?
Relative motion loading is a workflow in IKBooster that allows you to load animations so that the character will perform the actions contained within that clip "relative" to their current position and orientation in 3d space. Because the motions are relative, one can, for example, use a run cycle, make the character turn while running, and not worry about slipping foot placement which is a typical problem in most 3d animation programs. This also introduces the concept of a "tweaker's" workflow, where one simply edits existing motions in order to create entirely new ones. Relative motion loading will change the way you work, whether you prefer IKBooster's part-time IK or not. Also included with this tutorial is how to edit and blend these relative motions.
? VIDEO PART 4: Motion Capture Adaptation ?
Motion capture sounds great, but often times it is a real pain to take advantage of in production. One problem is simply knowing how to adapt a custom character rig to a motion capture clip. Another is the fact that normally, tedious re-positioning is required in order to seamlessly blend the motion into the production. This section introduces how one can end up with a "1-click" workflow for adapting a character to motion capture, and how to utilize the techniques learned in part 3 to make the motion capture clip play relatively to the character's position.
? VIDEO PART 5: IKBooster Dynamics ?
IKBooster dynamics can be difficult to take advantage of without knowing how it works. If you want to do things like have characters interact with long ropes, or simulate things but retain total control over them at the same time, this section shows how to achieve that with IKB dynamics.
Price: $99.95
Price: $49.95
The Comprehensive Guide to IKBooster
======================================
CONTENT INCLUDED WITH PURCHASE
------------------------------------------
-------
SUMMARY
-------
All videos included are encoded in h264 format, 1600x868 resolution, and include optional subtitles.
Total video content runtime is 110 minutes.
The download includes:
- The IKBooster Comprehensive Guide, parts 1 and 2
- Scenes, prefabs, and example/demonstrative Lightwave content to open and play with
- 5 character models
- Sample IKB relative motion files
- Sample commented Lscripts demonstrating time saving functions
- Bonus videos (~ 3 minutes)
--------------
VIDEO DETAILS
--------------
? VIDEO PART 1: User Interface and Fundementals ?
With exception of motion files and dynamics (covered in the yet-to-be-released parts 3 and 5),
every conceivable aspect of IKBooster is revealed in this segment. After watching this part, you
will know what all of IKBooster's tools do and be provided with insight as to where those tools
are useful. Additionally, I include tips and advice that are absolutely required for smooth operation
of IKBooster. Why doesn't Apply Keys work all the time? Why would anyone use FK control? Why
do my characters wobble around after I use and animate with fixed bones? Why can't I load my
IKBooster characters into a new scene? Countless questions like this are answered entirely,
allowing you to use IKBooster seamlessly in your workflow.
? VIDEO PART 2: Rigging and Animation ?
Just knowing what IKBooster's tools do isn't enough. You need to know to use them and how they
all work together to give you a completed production. The following is covered in part 2...
- IKBooster's advantages vs. normal character rigs in Lightwave
- Creating a master template rig you can use on all your characters, includes basic usage relativity
(little to no math! I promise!). I explain the control mechanisms, the reasons behind bone placement,
and other details.
- How to quickly (in minutes) adapt your master template rig to other characters.
- Micro Scale Hold Nulls. These allow for easy 2-channel click-drag movements without using any
motion modifiers or adding bulk to your scene.
- Expressionless Multimorphs. A more visual and interactive approach to combining morphs
(uses micro scale hold nulls).
- How to do Character Interaction... by clicking a checkbox. I'm not kidding.
- Using IKBooster to rig other things like lights, cameras, and other things to make animation as
a whole much easier.
- Why you should NEVER, EVER do character animation at above 20 frames per second... no matter
what program you are using, Lightwave included.
- I demonstrate the basic animation process and how it relates to IKBooster's workflow. IKBooster's animation workflow is more traditional in approach rather than technical.
- How to make any looping animation in half the time. Literally.
Price: $99.95
Price: $49.95
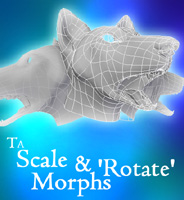
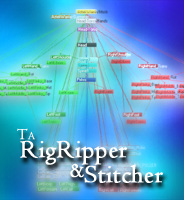
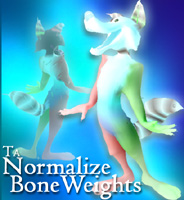
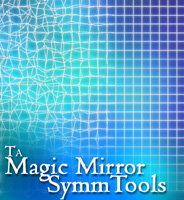
Liberty3D.com is proud to present the complete TA-Tools set from Timothy Albee.
This legendary tool package has been used on several productions around the world.
As an LScript set of tools these will run on LightWave3D up to version 11.6 in Modeler
and Layout. They include the following tools.
Price: $29.95
Continuing on with the concepts and techniques from Advanced Space Scene Creation Vol. 1, Kelly "Kat" Myers takes you to another level showing you how to mix LightWave volumetrics and objects to create even more fantastical space scenes.
This video includes the assets for you to immediately open up, drop in your own space ship and go. You can follow along with the tutorial video (which is over 2 hours in length) and make your own scene easily, building on these techniques which are widely used in space scenes as shown on TV and in Film.
This video tutorial compliments Advanced Space Scene Creation Vol. 1 and makes a great addition to that volume, but can be used and understood without having it in your collection. At this low price of just $17.99USD, Advanced Space Scene Creation Vol. 2 is a great deal. More videos in this series are planned, advancing each time in complexity and techniques and will be made available exclusively through Liberty3d.com
Price: $17.99