CG Tool Training
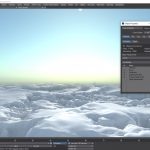
Practical Production Techniques Vol 27 - Ice Terrain is an practical exploration and implementation of a arctic landscape, using LightWave3D's incredibly powerful and legendary procedural texturing system for use in displacements to generate ultra realistic imagery.
Running at 2h52m, this is a fantastic video for anyone who uses LightWave3D, from beginner to expert production level artists.
Kat walks you through everything you need to know to get your brain wrapped around this process and methodology including the texturing of snow and "rock face" exposed through the tundra.
Kat is back with another installment in the Practical Production Techniques series with a sequel to Volume 25 "Damage", now in Volume 26, Damage Volume II, this video picks up and continues on with several concepts covered in the first "Damage" video but specifically covers in more depth and detail, LightWave Modeler's fracture tool, how to use it, avoid its pitfalls and what to do when it produces suboptimal result. Building out a destroyed object for crashing a space ship into it (included in this package!) and setting up Bullet Dynamics and additional displacement methods to help sell the realism of a craft hitting a large cement pillar, tearing off an engine in the process, this video walks you through each step and includes little know techniques to get bullet to play nice in simulations while remaining fast and enjoyable to use even under the most dreaded conditions.
While LightWave 2025 is required for opening the scenes and to use the Displacement Brush, you can still follow along in almost any version of LightWave3D from 2015 and up.
This video contains all the assets needed to follow along in 12 straight forward segments.
Run Time: Approximately 240 minutes
LW Flow is a new, GPU Enabled (CUDA Flex/Newton Physics) physics engine introduced in LightWave3D 2024 that can produce some great liquid simulations directly inside of LightWave3D. Kat has spent several months producing this tutorial, first, dealing with the current lack of documentation for the tool on release, plus the various oddities of the tool itself and has come up with 240+ minutes of exploration, ins and outs, gotchas and work arounds plus demonstration scenes for you to check out.
Starting out with a basic overview of what LW Flow is and isn't Kat then gets into the video by demonstrating how to set up a basic scene, where the most important controls are and what they do, then getting into more advanced concepts to help solve various problems users will hit and how to get around them using this early version of LW Flow.
This is a great introduction to LW Flow for ANY LightWave3D user looking to immerse themselves in this highly exciting tech.
Interesting scenes like doing a "Blood Pack/Squib", a straight forward glass fill with icecubes, decorating a cake and more are covered as well as extras including scenes taken from Kat's LightWave Digital videos on LW Flow, but not available elsewhere but in this package. Also covered is the baking process for LWO object sequences and a resurfacing tool for re-surfacing object sequences without having to re-simulate/bake via LW Flow, which can also be very handy for other scenarios working with object sequences. The tool is included in this download.
This is a LightWave3D Octane Render Project of a Casio ECB-500 Wrist Watch. If you picked up the modeling tutorial, then this is the next logical step if you are a LightWave3D+Octane Render user.
This tutorial uses LightWave3D version 2024 and Octane Render 2023.1.3 and can be easily followed with LW 2023, 2020, 2019, 2018 using Octane Prime (free) or Studio+ from Otoy. LightWave3D 2023 and 2024 come with Octane Prime (free) ready for you to use, so if you have been a recent upgrade or new seat participant, all you need is your Octane Prime account and you are ready to go.
Should you have questions please get in touch with me info@ram-studio.hr or lewis@tomsoft.hr if you need any help.
The tutorial is recorded in 2560*1440 resolution and encoded as MP4 H264 so the image quality is very clear and sharp.
If have been wanting to get into Octane then this is a great real-world case scenario built on a studio-grade production asset for the purpose of commercial distribution. LightWave and Octane are a fantastic combination, and Lewis, brings this tutorial to you in 4 easy to follow chapters, clocking in at 2h05m20s total.
In this tutorial, Kat brings you through the steps of working in LightWave 2023/2024 and TurbulenceFD (which is now included in LightWave) to create a "Napalm" drop effect.
Every aspect of the creation process is covered in this 3.5 hour tutorial split into 10 easily consumable segments.
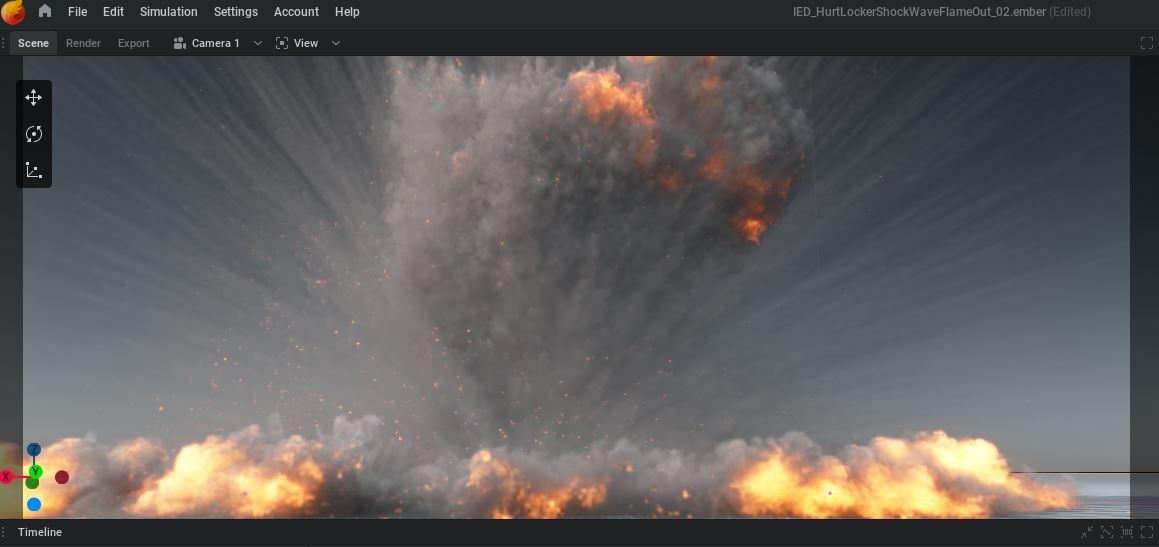
Here is a nice collection of Embergen Presets ready to use and learn from, created by Kat!
50 Ground burst style explosions in themes ranging from IEDs, Carbombs, Javelin Strikes and more. A few of these have been used in Feature Films for the Asylum, including Transmorphers: Mechabeasts.
All these presets were created on a GTX-1080Ti and as a result should load and go without too much trouble on any class of graphics card equal to that or above. In some cases, the volume area (Simulation Block as labeled in each) may need to be increased in size in order to accommodate the full effect.
Kat is back with another in the Practical Production Techniques series, this time with Volume 22!
In this installment in the incredibly popular series, Kat walks you through a complete VFX shot for "Curse of The Phantom Shadow" and continues off of the back of Project TowTruck (see Kat's other titles for details). Everything from BG plate clean up and roto, animation, TurbulenceFD effect, to lighting, rendering and to final comp working in LightWave3D 2020.0.3 and Fusion 18, this video has it all!
Kat runs through everything needed to work with the live-action stock footage plate and elements including the perspective match tool. Texture refinement to get clean fast renders and the many "gotchas" that can sneak up are met head-on and overcome.
At just over 305 Minutes (approx), this is a great video for anyone looking to spend an afternoon learning how to take a shot like this from end to end using your favorite tools!
Almost all of the needed content is included in this video including models, modified BG plate, the renders out of LightWave3D, scene files, and the composite flow from Fusion.
As a result, this is a big download of 12, 460MB RAR files that decompress in a sequence (check our FAQ for instructions in the store section).
Practical Product Techniques Vol. 21 VFX Editing and Previs in Resolve Studio and LightWave3D is a 20-part (+ bonus videos) Tutorial on subject matter that Kat has been wanting to teach for sometime. The Art of VFX Editing and Previs within the context of a real production of shots for Curse of the Phantom Shadow as the last sequence in the short film to be tackled is at hand! Over 80 shots to be finished though, makes it on the surface, seem like a daunting task.
Fear not! Kat discussed in detail the process, logic behind VFX editing, shot count systems in popular use with LightWave3D for decades and why they are still used today, and how even a small team of artists needs it to stay organized and not discouraged.
Featuring new tool tips and tricks working in Davinci Resolve 18 Beta2 and LightWAve3D 2020.0.3 This video covers a lot and includes content!
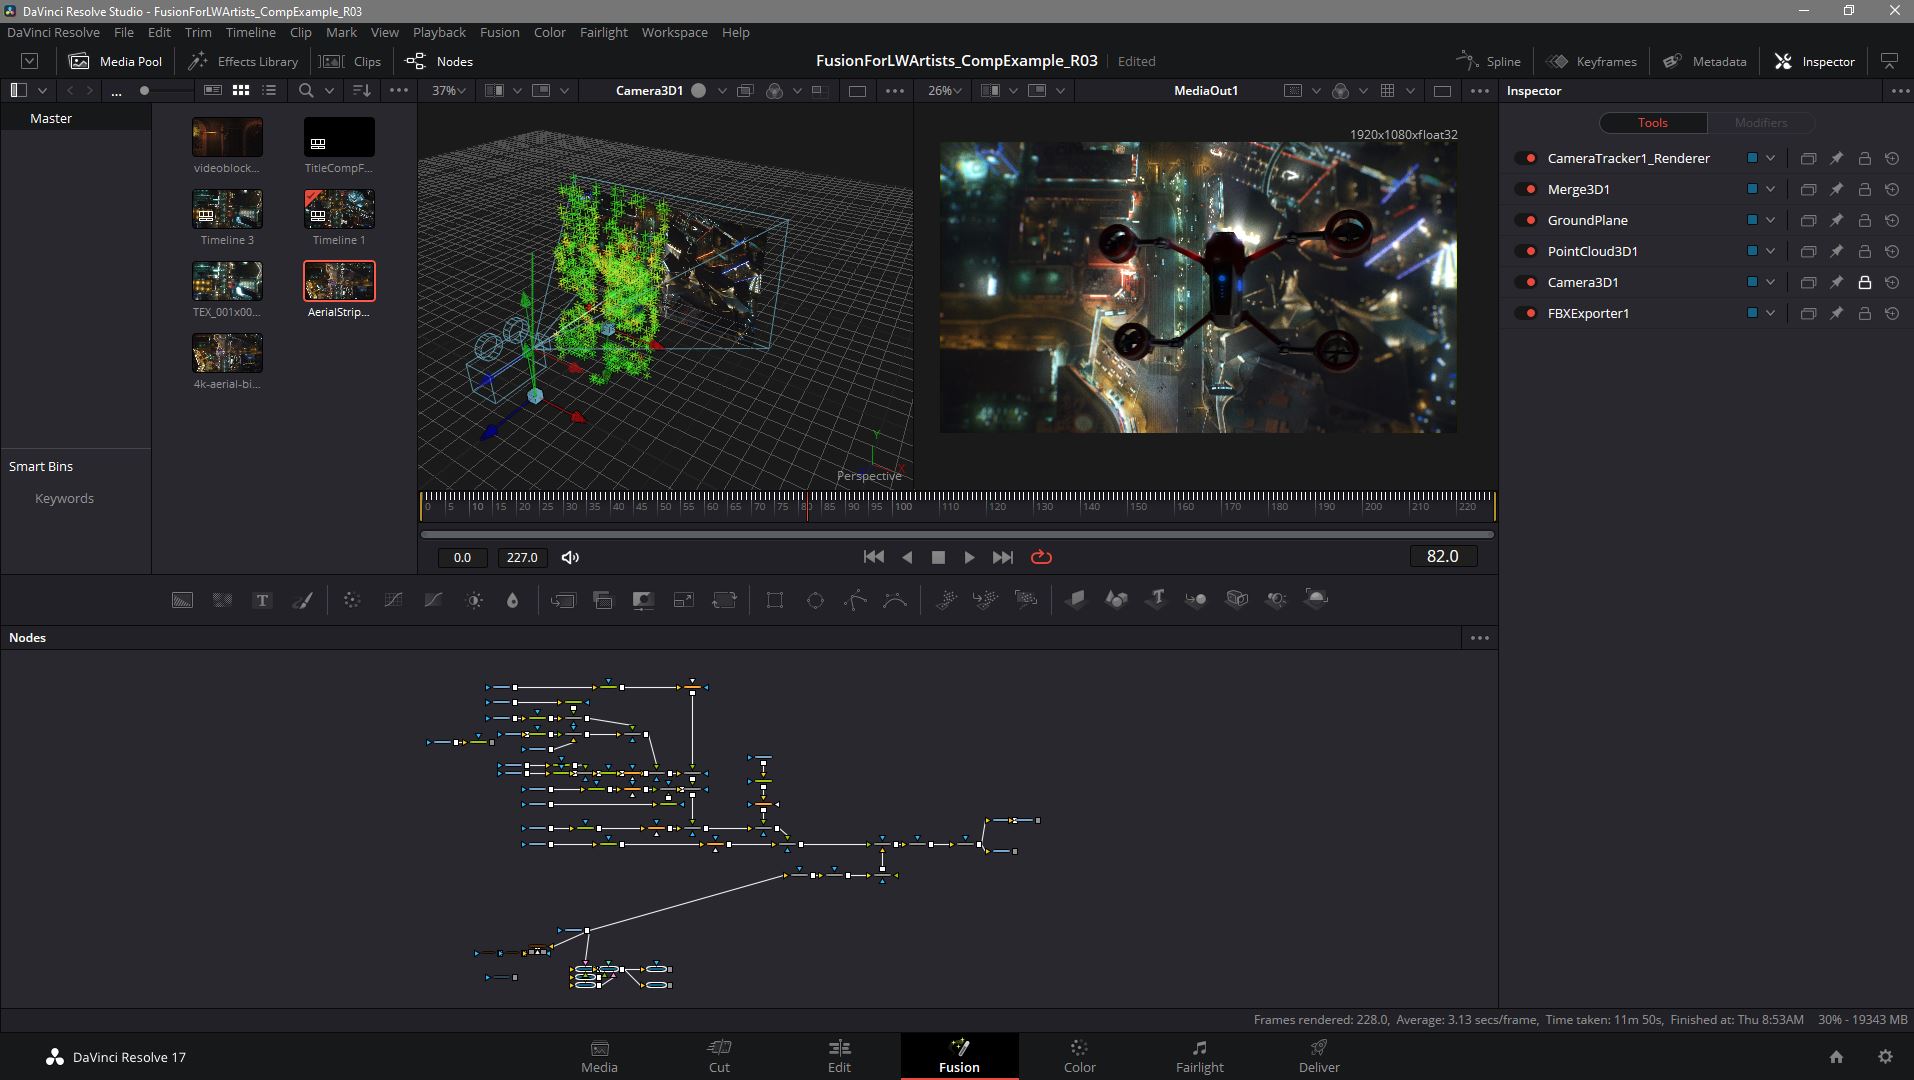
Fusion for LightWave Artists Volume Eight is a great tutorial for LightWave artists who want to explore Fusion inside of Davinci Resolve (ver 17.x) as Kelly "Kat" Myers walks the viewer through an entire VFX shot from start to finish. This title makes use of a StoryBlocks stock footage piece of the Las Vegas strip at night (not included, obviously) and is 3D camera tracked using Fusion's 3D Camera tracking tools. Once in LightWave3D, Kat shows how to set the 3D elements up in the shot and prepares it for lighting using some very unique tricks emulate light coming from the aerial BG plate in a way that he has not shown before and how this lighting helps "sell" the shot in VPR and later in Resolve Fusion Studio after rendering the shot out using LightGroups and Render Buffers for maximum control of the look of the CG elements. Using some of the tools unique to Resolve Fusion Studio for treating the BG plate and final composite over all, Kat demonstrates just how easy it can be to put a shot together using LightWave3D and Resolve Fusion Studio together to produce a wonderful film/cinematic look.
Video Run time is approximately 300 minutes and split into 15 easily digestible parts making it a perfect learning session for hobbyist and professional users, alike even if you have barely opened up Resolve+Fusion Studio. More in this series continues as Kat continues to produce training for VFX artists looking to ramp up their Fusion skills so as to be able to pull of high end TV series or Film VFX shots at will. Yes, the Fusion Comp file, exported from Resolve is included so you can rip it apart and see how things went together!
Model a Wheel in MoI 3D [PN]
Phil Nolan walks you through the finer points of modeling a car wheel in Moment of Inspiration (MoI 3D) and how to export and render it in LightWave3D 2019.1.5. This is a great tutorial for artists who want to get started using this very user friendly CAD software but don't know where to begin. This is complete tutorial providing end to end project details and files so you are up and running fast!In Kat’s Practical Production Techniques Volume 17., Megascans is the subject and how to produce a scene using them quickly, is the goal! This tutorial introduces New and Older LightWave3D users to the Megascan’s assets which are highly detailed photogrammetry sourced 3D objects and high resolution image maps. The objects featured in this title are freely available from https://quixel.com/megascans/free and are thus not included in the package but you can download them, unpack and use Kat’s already premade surface presets that he has included to quickly build out your own “Dino” naturescape scene.
In this installment of the Practical Production Techniques series, Kat is back with a KitBash3D.com to LightWave3D conversion tutorial dealing with PBR nodal based surfacing using the metalness and roughness shading theory types.
This tutorial covers how to work quickly using the Kitbash3D.com "Brooklyn" Kit. Originally built using 3DMax, this kit imports relatively ok, rather than some other kits produced in Maya, Blender or C4D - but with each there are always oddities and things to consider for making their use optimized in LightWave3D easily. Kat covers this and more in this great tutorial. You get all the surface presets created in this title so you can load and go if you own the kit, or follow along and get it done quickly yourself and take that knowledge and carry it over to other kits!
In this 15th volume of the Practical Production Techniques series which contains approximately 1191 minutes of video, multiple award-winning VFX artist and CG Supervisor Kelly "Kat" Myers takes on the daunting task of rescuing a model originally created in 3DS Max produced by a "Fivver" artist for the short film "Curse of the Phantom Shadow" and turning it from "zero to hero" so as to be ready for action in the film. This meant taking the original model and stripping it down to many of its individual parts, redesigning and remodeling them entirely. The model was that bad. Every single piece o the model was either rebuilt or retouched over the course of the creation of this video. In the process of getting the model, a giant 8 story tall robot, camera ready - Kat also goes about the task of prepping it for paint work done by the film's director Mark Ross himself using 3D-Coat. The model comes back from the "paintshop" complete with "metalness" PBR shading theory texture sets. Making quick work of the surfacing using LightWave3D 2020.0.2's advanced nodal shading system and some tricks pulled from many of the productions he has worked on over the years, Kat takes much of the mystery out of PBR/PBDSF shading in this scenario. It's easier than you think! So for you LightWavers out there who have a fear of nodes, fear not! This will get your feet wet and when you are done watching you will be upset with yourself for not trying this workflow earlier. It resolves a lot of problems people encounter in the LW community with "fireflies" and dialing in rendering settings. Finishing the model off in the sense of giving it some life via "running lights", Kat shows you how to set up some interesting internal volumetric lighting effects as well as "Eye Light Beams" using geometry driven Primitive Lights.
This model once complete gets merged into the least amount of layers possible and made "ready-to-rig". That portion being handed off to Ryan Roye. Please check back for that video installment in this amazing series.
This title includes 54 video installments plus the final robot scene and model!
Kat is back with another exciting installment in the Practical Production Techniques Series!
Now in the 14th volume of the series, Kat takes on a shot from a set of 3, from a low budget feature film out of Los Angeles that requires a full photo-realistic CG shot of a Boeing 747 flying over clouds in full 4K at 24 frames per second.
Not for the faint of heart, but by using a suite of tools that involves Black Magic Designs Davinci Resolve Studio 16, Andressen Technolgies Syntheyes, NewTek’s LightWave3D (2020.0.1) and finishing in Black Magic Designs Fusion Studio 16 plus a little bit of render help from the ultra powerful LightForge.cc rendering network; Kat makes quick work of the task using proven and battle tested methods for pulling off a fantastic looking shot from reference footage to previs to final in just 220 minutes! (Not including render time of course).
Working with a wonderful 3D model of a Boeing 747 (included!) provided by fellow LightWave3D artist who also happens to be a pilot, Catherine Smallwood; Kat walks you through each step while explaining many of the principles of taking a shot from previs to final and things to watch out for and factor in during the creation of feature film level Visual Effects that are photo-realistic using LightWave3D and the other complimentary tools to compete the shot. Learn how to produce a track of the plane out of Syntheyes quickly to produce a believable camera motion as it is based on real-world footage. From there Kat gets you into LightWave3D 2020.0.1 to set up the rest of the shot including the CG clouds and the process of making them from a single null object using the new Volumetric Primitive feature in Layout and then getting renders for both the CG plane and clouds ready for processing by the LightForge Render Network. Finally finishing in Fusion, working with the resulting “lightgroup” render buffers from LightWave3D’s rendering engine, Kat completes this VFX shot in a way that looks great!
Get this 220 minute long tutorial with LightWave3D assets, Fusion comp files, Syntheyes Project and of course the training videos today!
Renders are reference footage are unfortunately not included due to copyright reasons and because it would make the package over 100GB in size to download but everything else is included!
Do you want to get into Davinci Resolve Fusion? Are you a Fusion user now but not sure how to go about adjust your workflow to Resolve Fusion? Well, you are in luck with this new tutorial series from multiple awarding winning CG Supervisor and VFX artist, Kelly "Kat" Myers.
In this first installment, Kat takes on a VFX shot from the shot film "Curse of the Phantom Shadow", directed by Mark Ross, using Resolve Fusion 16 Studio. Originally shot many years ago on prosumer level equipment in 720p at 59.94fps, several challenges are overcome in this tutorial, working with 4:2:0 (Mpeg-4) based footage shot against a green screen under less than ideal conditions.
With a run time of 250 minutes, this tutorial is a complete journey from start to finish of a VFX shot that covers how to deal with keying material that typically doesn't key well due to its lack of color information in the format as well as being heavily compressed to footage stabilization, noise reduction tricks without turning your footage into mush, adding "beautifying" effects to the actors in the scene and over all Fusion flow "solving".
Davinci Resolve Fusion 16 (and Studio) is an amazingly powerful product but is not free of bugs! Learn how to overcome these bugs while marching towards a finished shot!
Award Wining CG/VFX Artist and Supervisor, Kelly "Kat" Myers brings you everything you need to know to get started with the Blackmagic Designs Fusion or Resolve tracking tools and start making really cool VFX shots, easily. In this tutorial, Kat breaks down the tips and tricks on how to use Fusions 3 tracking tools. Tracker, Planar Tracker and Camera Tracker. Every VFX artist needs to know how to do tracking. It's inescapable and to some, daunting. But it doesn't need to be. It's actually really straight forward to do if you have some basic knowledge to start with and this tutorial title!
Ever want to learn how to do a proper "screen burn-in"? Don't know what to do? It's easy with Fusion or Resolve's Fusion tracking tools. Kat shows you how to do this in minutes!
It doesn't matter if you use Davinci Resolve or Fusion, the tools are the same (with some small caveats), you can immediately get great results with the tracking tools included in either program including 3D tracks, planar tracks or single trackers to achieve wonderful visual effects.
Get this tutorial now with content including some sample videos and composite .comp files and LightWave3d scenes (showing the 3d tracking side of the tutorial) today!
In this title, VFX artist and CG supervisor of Declaration Pictures Inc., and founder of Liberty3d.com - Kelly Lee Myers (aka Kat), shows you how to take a VFX shot from end-to-end using SynthEyes, LightWave3D and Fusion.
Starting with tracking the shot in Syntheyes, Kat walks you through the basics of getting a 3D track done fast using a manual method that produces extremely solid tracks every time. From there he will show you how to set up a LightWave3D based particle snow storm, snowflakes and more before proceeding to the final stages in Fusion where he discussed the ins and outs of Rotoscoping, the caveats involved when dealing with bugs in Fusions Rototools (which are being fixed right now if not already by the time you read this), and how Keyers can work to your advantage if all else fails.
This 31 part video includes assets used in the original VFX shot that was part of a real-world VFX job for the feature film "The Christmas Cabin" which Kat and Wes Sargent completed in a very short time in November/December of 2018 on order to make a tight deadline for the producers to successfully sell the film at a film market conference.
More in the practical production techniques series feature this film as subject matter are in the works and will be available here on Liberty3d.com exclusively.
Phil Nolan goes into detail building a house model from scratch using LightWave 3D 2018 and LWCad 5.2. This tutorial assumes you know the basics of LightWave 3D and will go further, getting you into using CAD based tools inside LightWave. You'll start with included background images to work from and build the house level by level including the interior walls, stairs, windows and doors, a deck, and even a roof with modeled shingles! LWCad has a ton of features and this will get you started working with them quickly.
Kat is back with another installment of the Fusion for LightWave (2018) Artists series!
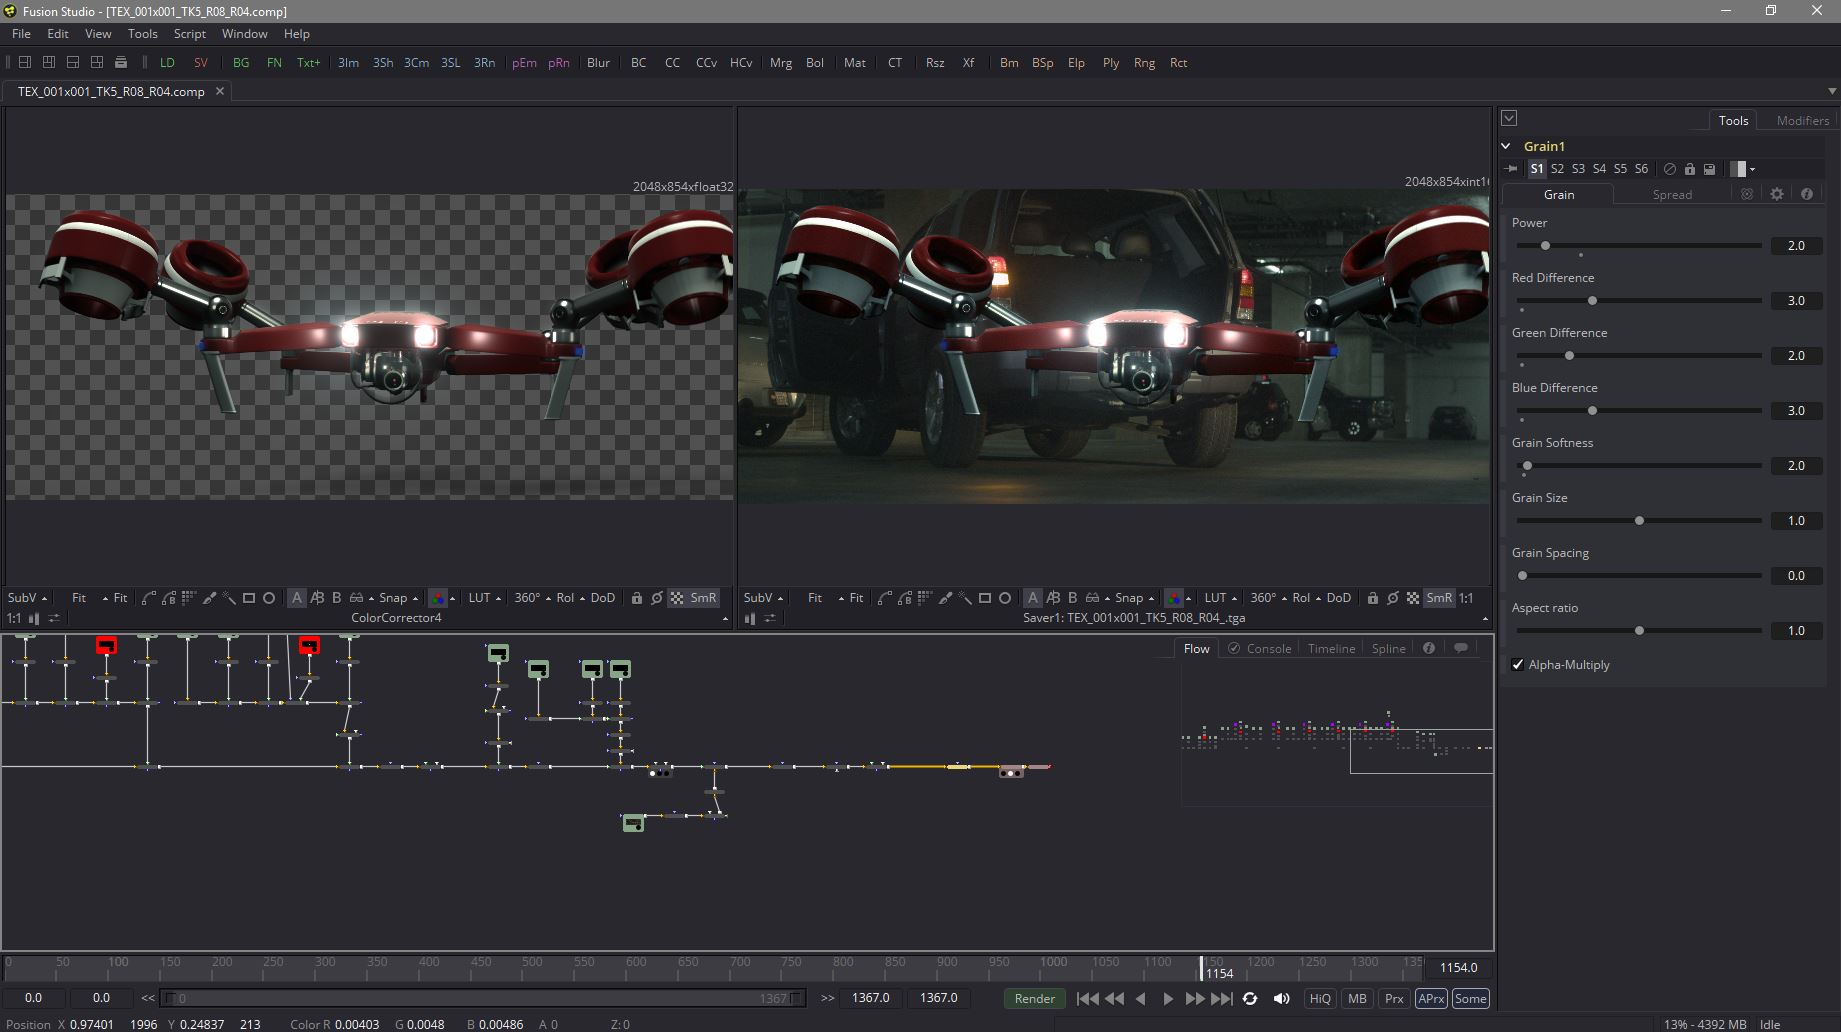
Now in Volume VII (7), Kat walks you through a different workflow that will allow for extremely fast compositing build outs in Fusion 9.02. This method provides artists with an easy way to tackle very complex sets of render passes with multiple buffers in each pass being used, to bring together a photorealistic, real-world VFX shot (although a test) working with the complete footage and asset package from his upcoming short film, "The Exchange".
With over 21GB of additional support materials which include the renders from Lightwave 2018 as well as the footage shot using a RED Scarlet (optional download), the scene and object files, the Fusion comp work-up files and of course the video recordings (primary product download), everything is ready for you to play with, take apart and study. Everything is included. At roughly 266 minutes or just under 4.5 hours in length, this video is jammed packed with helpful workflow techniques for LightWave artists getting into Fusion, working with the new PBR render engine output from LightWave3D 2018 and the "additive/normal" blending mode compositing formula process.
Kelly "Kat" Myers is back once again with the first LightWave 2018 specific tutorial in the Fusion for LightWave Artists series.
In "Fusion for LightWave (2018) Artists - Vol. 6" Kat breaks down a huge amount of information regarding the new AOV (Arbitrary Object Value) buffer system in LightWave3D 2018. This 11 part video tutorial contains information not covered in Kat's previous videos in this series or any of his other titles to date.
Areas covered include the new coverage buffer and how to make use of it in Fusion and the power of masks. Learn how to relight objects using Normals saved from LightWave3D 2018 while getting up to speed on how to compositing using material generated from the new shading and rendering engine to achieve true, "back to beauty" results exported from exrTrader 2018 and showing how the buffers correspond to the native buffer saving system. Kat takes it even further however with demonstrating different uses for the shadow buffer that many artists unaware of.
Learn about the power of Light Groups in LightWave 2018 and how to properly composite them together and why this functionality is so important to the CG pipeline process.
Using just a single render pass with buffers, Kat builds out a composite in Fusion that will blow your mind as to what can be achieved in the compositing process!
At a runtime of approximately 333 minutes, this title is an essential "must have" for anyone who is looking to take the next step into advanced VFX work using CG imagery from LightWave3D 2018 as well as many other packages that produce AOVs.
A pre-configured platform to rapidly build an augmented reality app around your 3D models.
Phil Nolan walks you through the finer points of creating a character in Adobe Fuse and how to export and make them work in LightWave3D (2015.3 and prior). This is a great tutorial for artists who want to dabble in Character Animation without having to drown themselves in the process with creating custom rigs or sets ups. Adobe Fuse does it for you while working with Miximo for adding animations to the characters you create! This is complete tutorial providing end to end project details so you are up and running fast!
Augmented Reality Showcase construction kit for Android, using LightWave 2018, Unity3D, and ARCore.
Kat is back in another installment of his TurbulenceFD for LightWave3D series with "Advanced TurbulenceFD For LightWave3D - Masks and Fuel Masks".
Running approximately 182 minutes, this video features great tips on how to take advantage of TurbulenceFD's Fuel mask functions. One of the big "secrets" to making your scenes with TFD shine is to provide TFD's simulation engine with more variables. Learn how this makes a huge difference when going for high-end looks of fire and smoke that moves naturally but controlled in any way you want.
Featuring 5 example scenes that you can breakdown and then apply the techniques in your own shots, "Advanced TurbulenceFD For LightWave3D - Masks and Fuel Masks" is a great value to anyone looking to step up their game with TurbulenceFD and or need ideas of how to go about taking what they have learned so far in the series and rounding out their knowledge so they can take on any challenge head-on.
Kat has put together 10 of his Practical Production Techniques videos into a super bundle!
Get up to speed fast on everything from surface baking to polygon reduction for games and VR/AR production as well as how to construct your shots for big space battles or mysterious nebula scenes and much much more in this bundle for a great low price!
Here is a list of the videos you get!
Practical Production Techniques Vol. One
Practical Production Techniques Vol. Two
Practical Production Techniques Vol. Three
Practical Production Techniques Vol. Four
Practical Production Techniques Vol. Five
Practical Production Techniques - Vol. 6 Advanced Surface Baking
Practical Production Techniques - Vol. 7 Advanced Surface Baking Part II
Practical Production Techniques - Vol. 8 Capital Ship Combat Techniques
Practical Production Techniques - Vol. 9 Polygon Reduction
Practical Production Techniques Vol. 10 - Project Smoke Monster
Fusion for LightWave Artists: Volume 4 - Curse of the Phantom Shadow
Award winning VFX artist and CG Supervisor, Kelly "Kat" Myers is back in his latest installment in the Fusion for LightWave Artists series.
This time Kat walks you through a real-world production shot from the low-budget 30+ minute short film written and directed by Mark Ross; "Curse of the Phantom Shadow"
With over 396 VFX shots in the current edit of the film, the daunting challenge of completing the task at hand is met through the use of LightWave3D and Fusion!
In this tutorial, Kat demonstrates how one can employ creative uses of volumetrics supplied by LightWave3D natively as well as via TurbulenceFD From Jawset.com and mix them together in Fusion 8 in a way that "sells the shot".
It doesn't stop there, however! Kat also demonstrates where the use of LightWave's PRMB is essential vs. the use of Vector-Based motion blur in post, and what to do if you ever have to "mix and match" in a compositing program like Fusion.
If you have enjoyed the previous installments of Fusion for LightWave artists, then you are for sure going to want to grab this title as you can follow along with Kat as he breaks down the composite that made up the final shot and continues on improving it!
Kat also discusses how you can ensure that 'WYSIWYG' for input and output when working with LightWave's Linear Color Space workflow and how Fusion's LUTs should be used with sRGB rendered material.
Exclusively available from Liberty3d.com, Fusion for LightWave Artists: Volume 4 - Curse of the Phantom Shadow, includes the entire render results used in the tutorial. You can practice the techniques demonstrated by Kat without having to render a single frame out of LightWave! He's done that for you and the renders are included as a secondary download aside from the tutorial video so you can watch right away as the downloads for the renders come across to you in the background if you choose!
Practical Production Techniques Vol. 10 - Project Smoke Monster!
Kat is back with another installment in the highly popular Practical Production Techniques series. In Volume 10, Kat walks you through an entire shot featuring a Daz3D character model, taking the asset from Daz3D into LightWave, surfacing it using the maps from the asset, setting it up with animation applied via MDD, transferring in TurbulenceFD settings from another scene, lighting the character using some nifty tricks for realism in a photographic plate and then compositing the rendered results in Fusion.
With a runtime of almost 4.5 hours, this tutorial is jam-packed with lots of great tips and techniques pulled from Kat's experiences in production. The tutorial includes the rendered image files so you can follow along in the compositing process in Fusion or even AE and Nuke. You also get the scene files saved at every step along the way. Not included is the model which is a commercial asset but retails for 25 dollars on Daz3d.com and can be easily substituted for a character of your own design or any other Daz Character you may have laying about.
In part III of Fusion for LightWave Artists, Kelly "Kat" Myers breaks new ground in the series as he walks you through a complete shot to recreate a news broadcast style "playback" element using the assets from Iron Sky. SyntheyesTrackingMany years ago, Kat worked for a company that specialized in this area of film and television effects production working with Fusion and LightWave to produce video playback that would be used on set. This tutorial goes from start to finish including the tracking in Syntheyes of a plate shot using an everyday smart phone (in this case a Samsung Galaxy Note4), prepping the resulting footage for efficient use in Layout while getting the Iron Sky Valkyrie UFOs into the shot. From there this project takes a bit of a different turn as Kat demonstrates how to track elements in 2D using Fusions precise tracking tools and how to attach masks to these tracks providing for additional control of your composite. LightWave3DISValksThe tutorial finishes off with the introduction of several effects tools that you can use to "fake" broadcast TV interference or replicate the appearance of conventional television footage.
Learn how to deal with noisy "tracks" from a 3D tracking program by working with the data in Layout's graph editor while at the same time knowing what you can get away with due to the nature of the final target element. There are several tricks and tips in this tutorial that you simply will not find anywhere else covering an area of VFX creation that is rarely discussed if at all by visual effects artists.
With an approximate run time of 3.7 hours, Fusion for LightWave Artists Part III is a great companion title to the previous two parts in the series. With 20 video segments and all of the content included for you to follow along, this title is a must have for LightWave artists working with Fusion in their production work flows no FusionTrackingTwomatter what the tasks you may face. Visual Effects artists are sometimes asked to do some pretty odd things and creating "playback" for on-set shooting use is one of these odd ball jobs you are going to come across.
Do you need clouds in your shot? Hypervoxels got you down? Skytracer not cutting it?
No problem!
With "TFD Advanced Concepts and Projects - Clouds", learn how you can get awesome looking cloud formations that you can produce quickly with maximum control over their shape and appearance while rendering extremely fast compared to any other solutions available for LightWave3D.
Jawset's Turbulence FD for LightWave is the key! Award winning CG supervisor and VFX artist, Kelly "Kat" Myers walks you through the process of creating photorealistic cloud formations in this 3.6 hour 13 part tutorial specifically aimed at VFX artists who need to produce clouds for their shots.
Kat does it again!
Fusion for LightWave Artists Part II a 390 minute project based tutorial using the same techniques from Battle Star Galactica and Iron Sky for LightWave3D shot construction, Lighting, Rendering, Render Management, and Fusion Compositing that demonstrates how you can leverage the power of BlackMagic Design’s Fusion 7 (or 8) which is now free; into your LightWave production workflows.
Whether you use Mac or PC, Fusion is your best and most affordable compositing option available that provides absolutely uncompromising results and speed. Now, experience how you can take your LightWave work to the next level. Fusion and LightWave have a long history of being used together in top studios over the last two decades producing some of the most iconic television shows and films of our time.
In this video Kat takes you through an entire production level shot from "Battlestar Galactica" using freely downloadable assets (download links provided). Not only that, you get the complete renders from each lighting and buffer pass. That's 6500 frames from 16 different scene files to make up one awesome shot! No need to render at home! This package provides you with the content. That means you get all the the scenes, Fusion comp files and the renders in full!
This video is the second part in a series of videos designed specifically for LightWave artists in mind and is balanced between Layout and Fusion’s interface building up each element so the artist gets a firm grasp as to how to break out shots for compositing and how to manage renders in a network environment leveraging the power of Lightwave and Fusion network rendering technology.
This video gives you deep insight into how an entire shot would be produce on BSG or Iron Sky and can be applied to just about any product or project.
Get it now for only $39.49USD
Everything Chilton has created for game development, including modeling, animation, videos, Unity3D and LightWave3D assets.
Build Instant 3D turntables and navigable rooms and buildings using the free version of Unity 5 and LightWave3D.
This title is massive!
Fusion for LightWave Artists is a 420 minute exploration and project based tutorial that demonstrates how you can leverage the power of BlackMagic Design’s Fusion 7 (or 8) which is now free; into your LightWave production workflows. Whether you use Mac or PC, Fusion is your best and most affordable compositing option available that provides absolutely uncompromising results and speed. Now, experience how you can take your LightWave work to the next level. Fusion and LightWave have a long history of being used together in top studios over the last two decades producing some of the most iconic television shows and films of our time.
In this video learn how to make use of Fusion’s powerful workflow and LightWave render buffer system to integrate photographic (stills or video can be used) material producing photorealistic composites.
Kat masterfully walks you through the process over the course of 27 video clips and 4 project based examples demonstrating the use of Object ID, Surface ID, Depth (linear fog and z-Buffer techniques are covered) to gain maximum control over your shots. Learn how to produce color correction effects over distances using depth as well as DoF application and how to avoid “gotchas” when working with deep pixel data.
Take advantage of LightWave’s Shadow Catcher node and learn how you can precisely control the results in comp helping you to save time in render as well as remain flexible when it comes to your final look.
Learn how you can take advantage of LightWave’s native Composite Buffer tool or DB-W’s exrTrader buffer saver export plug-in to reduce the amount of image files you have to manage while getting the most out of each render pass to create your final composites. Learn how to use the power of motion vectors and work with them in comp without the need for any RSMB plug-ins or fancy tricks to make them work.
Over 1.64GB in size this video is a huge value and comes with rendered image content and scenes (The A-10 model/scenes are not included due to copyright reasons, but the renders are).
This video is the first part in a series of videos designed specifically for LightWave artists in mind and is balanced between Layout and Fusion’s interface building up each element so the artist gets a firm grasp as to how to break out shots for compositing later.
Get it now for only $39.49USD
Kelly "Kat" Myers is back with another installment in the Practical Production Techniques series. In this installment, "Capital ship combat techniques" Kat walks you through the process of building out a shot using BattleStar Galactica style methods to pit basestars against the Galactica herself with guns blazing along with missiles, flak shield effects, explosions and more. This video covers several unseen techniques from the show including the flak shield HV and PFX creation methods and demonstrates how the "big guns" on the Galactica were set up.
Jammed packed with goodies (scene files, HVs are included with the content!) this video runs 4.5 hours and Kat is just warming things up with the new TV and Film VFX series that Kat has been developing for release here on Liberty3D.com over the last couple of months. This is the first part of that series and there are more to come. So if you have ever wanted to throw metal against metal in a big ship dogfight, this video will help you along with your efforts.
World Machine Foundations [kp]
World Machine Foundations introduce all the core tools and techniques required for getting started creating your own amazing terrains for use in 3D projects, game engines and more! The videos cover everything from the utmost basics of operating the software, the modification of your terrain using World Machines' professional erosion and layout tools, and exporting custom texture maps, normals maps and basic geometry for use in your 3D applications.
- 14 Videos
- Running time : 1hr 8min
- Format : Mp4, 1280x720



![Practical Production Techniques Vol 26 - Damage Volume II[KAT]](https://www.liberty3d.com/wp-content/uploads/2025/06/PPTV_26_DamageVII_SpaceShipSmashy.jpg)
![Introduction to LW Flow [KAT]](https://www.liberty3d.com/wp-content/uploads/2025/02/LWFLow_TerminatorToridExample.jpg)
![Casio Edifice Watch Rendering in Octane Render [EB]](https://www.liberty3d.com/wp-content/uploads/2025/01/Casio_RENDER_Tutorial_Thumbnail.jpg)

![Practical Production Techniques Vol. 22 [KAT]](https://www.liberty3d.com/wp-content/uploads/2022/10/CPS_080_002_R01.jpg)
![Practical Production Techniques Vol. 21 [KAT]](https://www.liberty3d.com/wp-content/uploads/2022/05/PPTV21_VFXEditingExample-1.jpg)
![Model a Wheel in MoI 3D [PN]](https://www.liberty3d.com/wp-content/uploads/2021/01/wheel_300x169.png)
![Practical Production Techniques Vol. 17 [KAT]](https://www.liberty3d.com/wp-content/uploads/2020/12/PPTV17_Promo_08.jpg)
![Practical Production Techniques Vol. 16 [KAT]](https://www.liberty3d.com/wp-content/uploads/2020/10/PPTV16_Promo2-1.jpg)
![Practical Production Techniques Vol. 15 [KAT]](https://www.liberty3d.com/wp-content/uploads/2020/08/PPTV15Promo_02.jpg)
![Practical Production Techniques Vol. 14 [KAT]](https://www.liberty3d.com/wp-content/uploads/2020/06/PPTV14_Promo_07-1.jpg)
![Intro to Davinci Resolve Fusion - Vol. One [KAT]](https://www.liberty3d.com/wp-content/uploads/2020/06/IDRFS_04.jpg)
![Practical Production Techniques Vol. 13 [KAT]](https://www.liberty3d.com/wp-content/uploads/2020/01/PPTV13_Promo4-900x450.jpg)
![Practical Production Techniques Vol. 12 [KAT]](https://www.liberty3d.com/wp-content/uploads/2019/11/PPTV12_Promo2.jpg)
![House Modeling With LightWave & LWCad [PN]](https://www.liberty3d.com/wp-content/uploads/2018/12/title_card.png)
![Fusion for LightWave (2018) Artists - Vol. 6 [KAT]](https://www.liberty3d.com/wp-content/uploads/2018/05/FFLWAVI_PromoShots_8-900x450.jpg)
![AR Portfolio 2.2 [CW]](https://liberty3d.com/Artists/Videos/Chilton/ARPortfolioThumbnail.png)
![Adobe Fuse for LightWave Artists [PN]](https://www.liberty3d.com/wp-content/uploads/2018/03/title_card-300x169.png)
![Advanced TurbulenceFD For LightWave3D - Masks and Fuel Masks [KAT]](https://www.liberty3d.com/wp-content/uploads/2017/08/SimpleAnimatedFuelMask_R06.jpg)

![Practical Production Techniques Vol. 10 - Project Smoke Monster [kat]](https://www.liberty3d.com/wp-content/uploads/2017/01/PPTV10_FusionCompExample-150x150.png)
![Fusion for LightWave Artists Part III [KAT]](https://www.liberty3d.com/wp-content/uploads/2016/05/FusionCompOne.jpg)
![TFD Advanced Concepts and Projects - Clouds [KAT]](https://www.liberty3d.com/wp-content/uploads/2016/05/CloudOne_SoftPuffyLookR07_0065-300x169.png)
![Fusion for LightWave Artists Part II [KAT]](https://www.liberty3d.com/wp-content/uploads/2016/03/FFLWAPromo2.jpg)
![Instant 3D Turntable for LightWave Users [cw]](https://www.liberty3d.com/wp-content/uploads/2015/12/Screen-Shot-2015-12-15-at-5.38.22-PM.png)
![Fusion for LightWave Artists [KAT]](https://www.liberty3d.com/wp-content/uploads/2015/09/A10CompExample_01.png)
![Practical Production Techniques - Vol. 8 Capital ship combat techniques [KAT]](https://www.liberty3d.com/wp-content/uploads/2014/10/CapitalShipCombatTechniques_1-150x150.jpg)
![World Machine Foundations [kp]](https://www.liberty3d.com/wp-content/uploads/2012/11/WMF_splash1.jpg)