


Digital Bullet Hits: Bullet Holes in a Metal Door Part Two

Topics Covered:
- Differences Between Partigons and HV Particles
- Using a DP_Kit node and a Gradient to Color Partigon Particles by Age
- Setting up a Particle Emitter
- Surfacing Partigon Particles
- Cloning and Placing Emitters
- Setting the Start Time for Particles
- HyperVoxel Sprite Smoke
- Making Changes Using the Scene Editor
- Mapping a Photograph Onto Simple Geometry to Add Depth
- Adding a Volumetric Light
Chapters
- Introduction to Metal Door Part Two
- 12 Introduction to Particle Types in Lightwave
- 13 Adding Sparks with Partigon Emitters Part One
- 14 Adding Sparks with Partigon Emitters Part Two
- 15 Adding Sparks with Partigon Emitters Part Three
- 16 Adding Smoke with HV Emitters Part One
- 17 Adding Smoke with HV Emitters Part Two
- 18 Finishing the Smoke and Spark Particles
- 19 Making the Hangar Interior
- 20 Refining the Camera Move & Moving Inside Part One
- 21 Moving Inside Part Two
- 22 The Unholey Door
TRT: 1 hour 55 minutes – Lightwave version 9 and Up. (Scene files are for LW 9.3 and up)
Digital Bullet Hits: Bullet Holes in a Metal Door
Instant Download
![Digital Bullet Hits: Bullets in a Metal Door 2 [dwb]](https://www.liberty3d.com/wp-content/uploads/2011/03/MetalDoorTwoProductShot.jpg)
<p>Part Two of the Bullet Holes in a Metal Door tutorial picks up where part one left off by adding sparks and smoke (particle emitters), the interior of the hangar (very simple modeling), and making a couple of variations on the project. Project files are included so you can follow along even if you don't have Part One.</p>
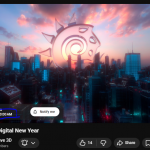
<iframe width="399" height="233" src="http://www.youtube.com/embed/4-TcYAJ_I9Q?rel=0&hd=1" frameborder="0" allowfullscreen></iframe>
</p>
<p>Video run time is 1hr 55 min</p>
<a href="https://www.liberty3d.com/citizens/d-w-burman/danas-videos/digital-bullet-hits-bullet-holes-in-a-metal-door-part-two/">Click for more details.</a>
Check Out D.W. Burman’s Other Tutorials