


Fusion Training
More Videos are coming soon! Please excuse us while we re-arrange the store sections.
![Advanced Space Scene Creation Vol 4. - Earth Rise {KAT]](https://www.liberty3d.com/wp-content/uploads/2024/12/FusionCompResult-scaled.jpg)
![Practical Production Techniques Vol. 24 Vampire Tricks [KAT]](https://www.liberty3d.com/wp-content/uploads/2024/10/PPTV24_VampTricks_Promo_01.jpg)
![Practical Production Techniques Vol. 22 [KAT]](https://www.liberty3d.com/wp-content/uploads/2022/10/CPS_080_002_R01.jpg)
![Practical Production Techniques Vol. 21 [KAT]](https://www.liberty3d.com/wp-content/uploads/2022/05/PPTV21_VFXEditingExample-1.jpg)
![Practical Production Techniques Vol. 20 [KAT]](https://www.liberty3d.com/wp-content/uploads/2021/06/PPTVol_20_RenderExample.jpg)
![Practical Production Techniques Vol. 14 [KAT]](https://www.liberty3d.com/wp-content/uploads/2020/06/PPTV14_Promo_07-1.jpg)
![Intro to Davinci Resolve Fusion - Vol. One [KAT]](https://www.liberty3d.com/wp-content/uploads/2020/06/IDRFS_04.jpg)
![Practical Production Techniques Vol. 13 [KAT]](https://www.liberty3d.com/wp-content/uploads/2020/01/PPTV13_Promo4-900x450.jpg)
![Practical Production Techniques Vol. 12 [KAT]](https://www.liberty3d.com/wp-content/uploads/2019/11/PPTV12_Promo2.jpg)
![Fusion for LightWave (2018) Artists - Vol. 6 [KAT]](https://www.liberty3d.com/wp-content/uploads/2018/05/FFLWAVI_PromoShots_8-900x450.jpg)
![Fusion for LightWave Artists Vol. 5 - Curse of the Phantom Shadow [KAT]](https://www.liberty3d.com/wp-content/uploads/2018/05/FFLWAV_3-150x150.jpg)
![TFD Advanced Concepts and Projects: Engine Fire [KAT]](https://www.liberty3d.com/wp-content/uploads/2018/05/TFDEngineFire_PromoImage1-150x150.jpg)
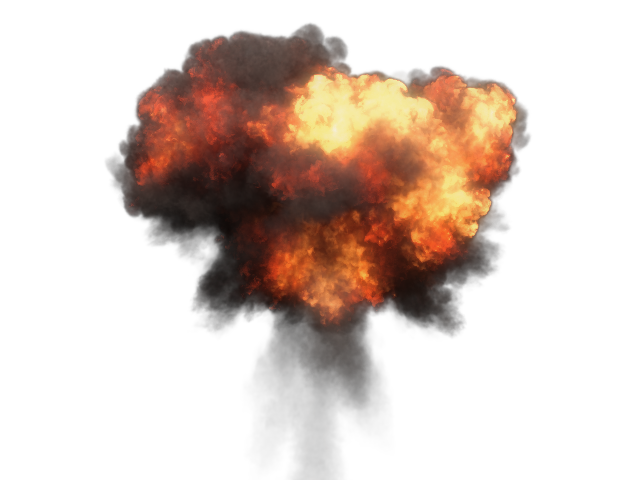
![Practical Production Techniques Vol. 10 - Project Smoke Monster [kat]](https://www.liberty3d.com/wp-content/uploads/2017/01/PPTV10_FusionCompExample-150x150.png)
![Fusion for LightWave Artists Part III [KAT]](https://www.liberty3d.com/wp-content/uploads/2016/05/FusionCompOne.jpg)
![Fusion for LightWave Artists Part II [KAT]](https://www.liberty3d.com/wp-content/uploads/2016/03/FFLWAPromo2.jpg)
![Fusion for LightWave Artists [KAT]](https://www.liberty3d.com/wp-content/uploads/2015/09/A10CompExample_01.png)
![Fusion VFX - Shooting and Compositing Green Screen [jh]](https://liberty3d.com/wp-content/uploads/2010/07/banner-300x168.jpg)
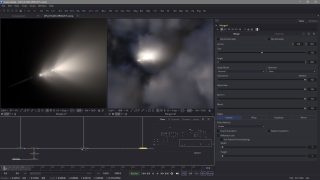
In this 4th volume of the Advanced Space Scene Creation Series, Kat brings forward ancient assets from pre LW 2015 era and updates them to LightWave3D 2024.1, incorporating PBR materials adapted from the original "standard" material surfaces in order to re-create the legendary Apollo 8 "Earth Rise" Photograph. This is a 90 minute tutorial that provides you insight on several surfacing and material properties techniques as well as Pixel Filter and Post Render (comp ie Fusion) tweaks to achieve the realism of the original 1968 Photo.
This is a great tutorial that reboots the ASSC series of videos as we move forward into the future with LightWave3D.
All content demonstrated in the video is included for realistic Earth and Moon celestial bodies utilizing high resolution imagery and techniques that you can't easily find anywhere else if at all.
This is a great video for anyone wanting to use LightWave3D (2023 and up) and Fusion (19 Studio, or Resolve Basic/Studio) to create vampire effects similar to those seen in movies like the original Blade series, Buffy the Vampire Slayer TV show or The "Thanos Snap" dissolving effect with some basic tweaks. Running at roughly 80 minutes, this video tutorial is a fast moving "Get the shot out the door now!" style instructional session using real world production examples for Visual Effects methods to achieve such shot types working with LightWave3D's TurbulenceFD Smoke/Fire fluid System in conjunction with Fusion/Resolve Fusion compositing methods + 3D particle system.
With the exception of the plates, this tutorial all LightWave3D Scene and Object Files and Fusion Comp Files are included, ready for you to follow along and pull apart and use in your own shots.
Kat is back with another in the Practical Production Techniques series, this time with Volume 22!
In this installment in the incredibly popular series, Kat walks you through a complete VFX shot for "Curse of The Phantom Shadow" and continues off of the back of Project TowTruck (see Kat's other titles for details). Everything from BG plate clean up and roto, animation, TurbulenceFD effect, to lighting, rendering and to final comp working in LightWave3D 2020.0.3 and Fusion 18, this video has it all!
Kat runs through everything needed to work with the live-action stock footage plate and elements including the perspective match tool. Texture refinement to get clean fast renders and the many "gotchas" that can sneak up are met head-on and overcome.
At just over 305 Minutes (approx), this is a great video for anyone looking to spend an afternoon learning how to take a shot like this from end to end using your favorite tools!
Almost all of the needed content is included in this video including models, modified BG plate, the renders out of LightWave3D, scene files, and the composite flow from Fusion.
As a result, this is a big download of 12, 460MB RAR files that decompress in a sequence (check our FAQ for instructions in the store section).
Practical Product Techniques Vol. 21 VFX Editing and Previs in Resolve Studio and LightWave3D is a 20-part (+ bonus videos) Tutorial on subject matter that Kat has been wanting to teach for sometime. The Art of VFX Editing and Previs within the context of a real production of shots for Curse of the Phantom Shadow as the last sequence in the short film to be tackled is at hand! Over 80 shots to be finished though, makes it on the surface, seem like a daunting task.
Fear not! Kat discussed in detail the process, logic behind VFX editing, shot count systems in popular use with LightWave3D for decades and why they are still used today, and how even a small team of artists needs it to stay organized and not discouraged.
Featuring new tool tips and tricks working in Davinci Resolve 18 Beta2 and LightWAve3D 2020.0.3 This video covers a lot and includes content!
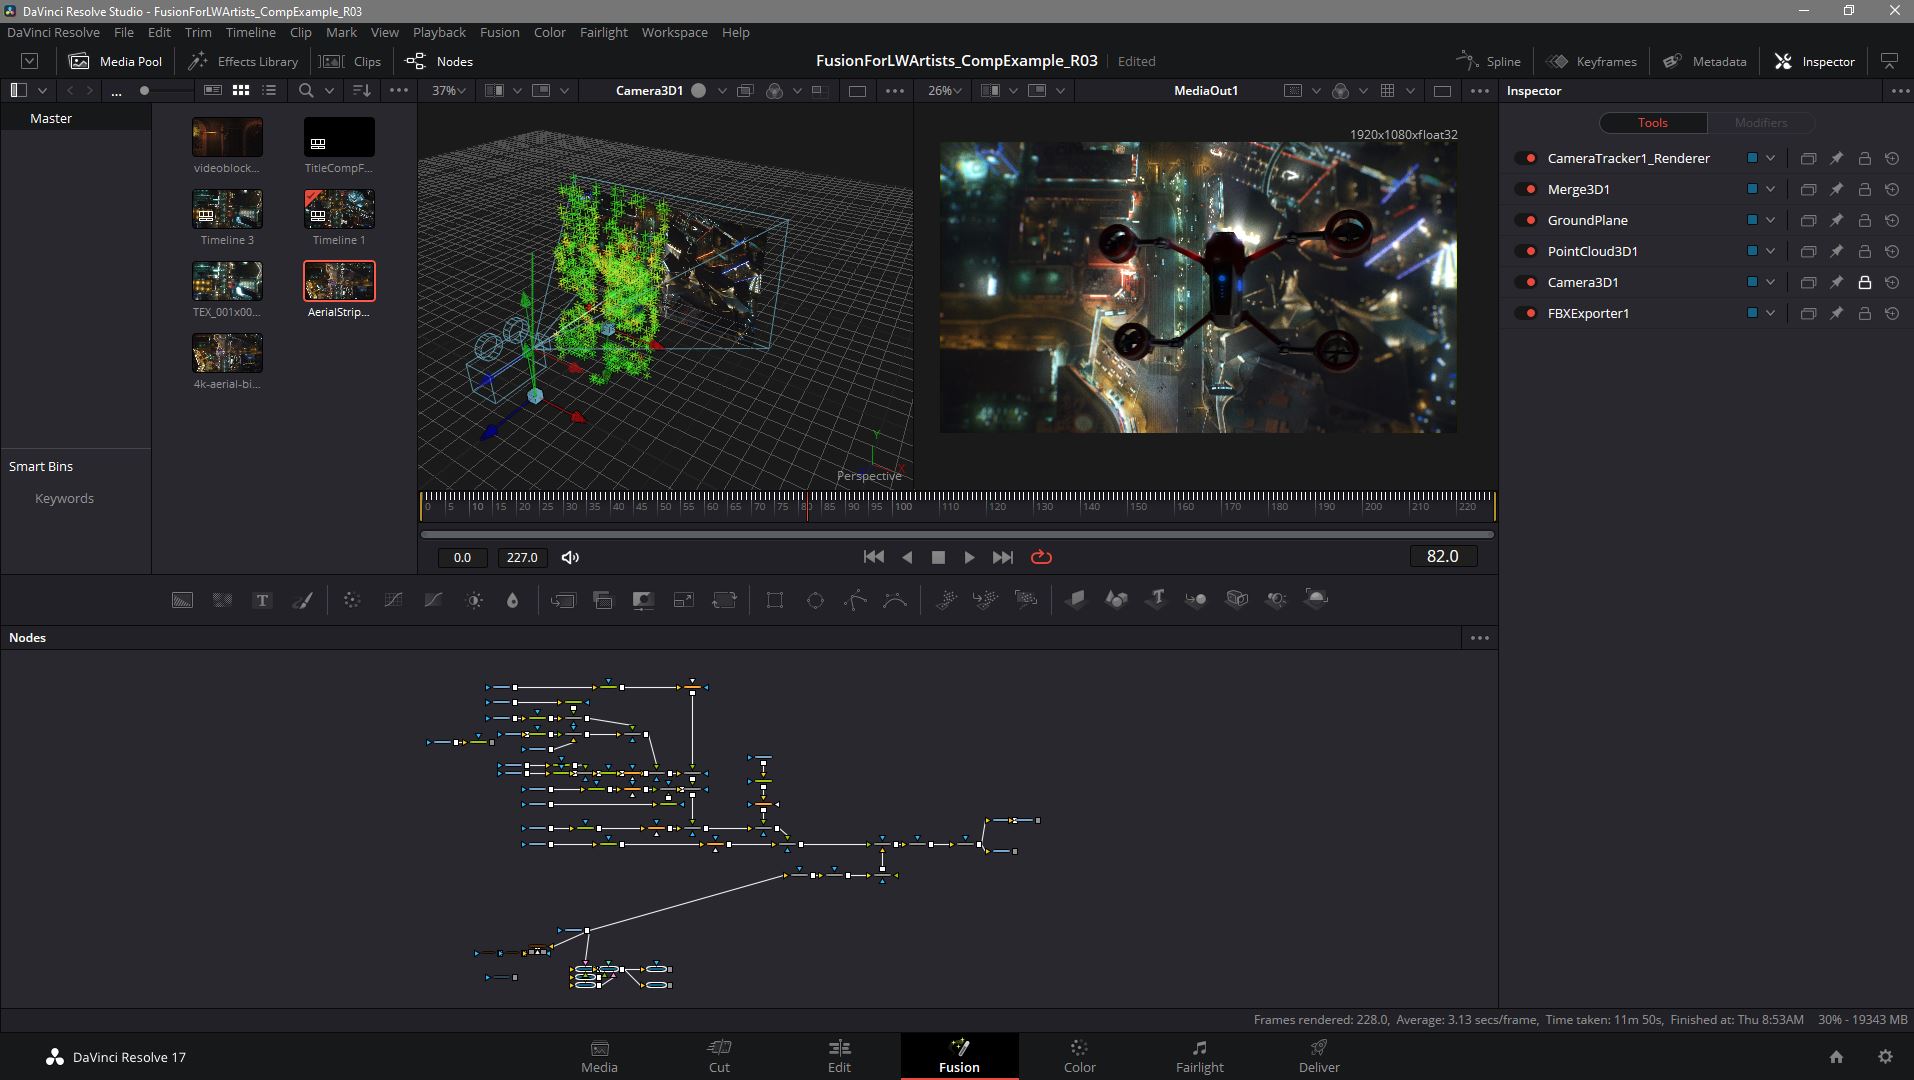
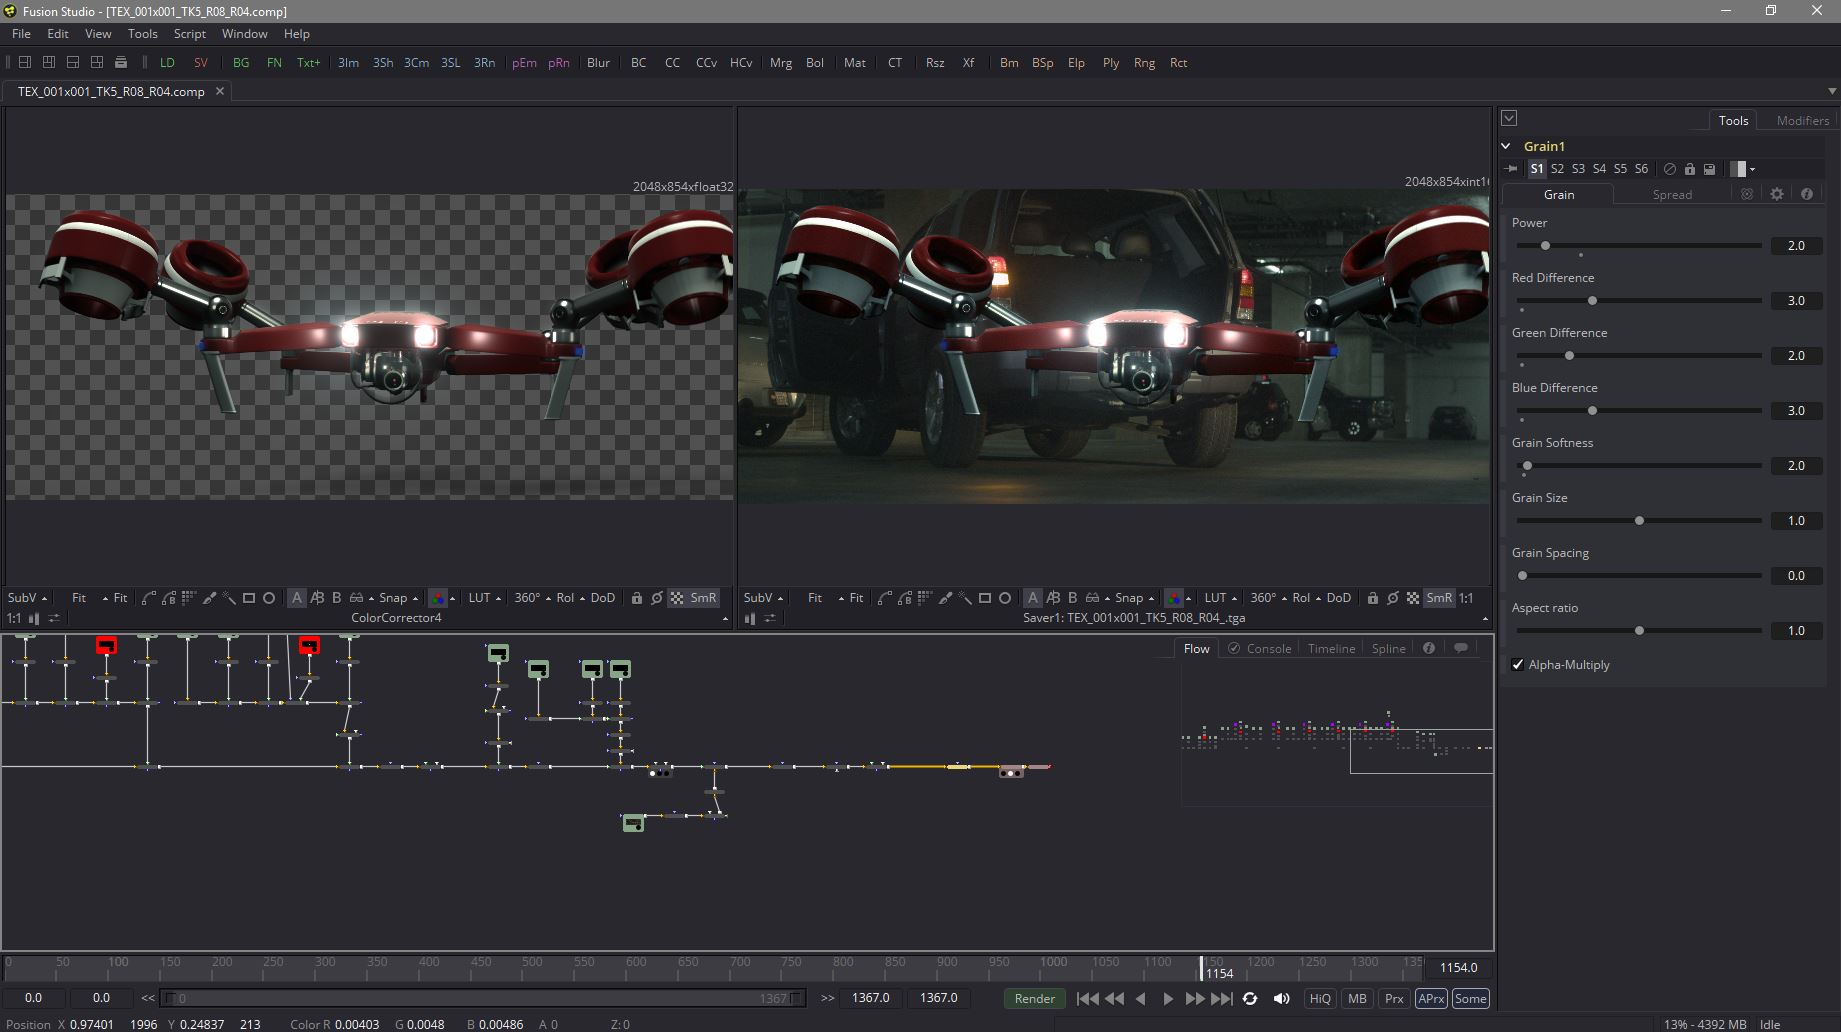
Fusion for LightWave Artists Volume Eight is a great tutorial for LightWave artists who want to explore Fusion inside of Davinci Resolve (ver 17.x) as Kelly "Kat" Myers walks the viewer through an entire VFX shot from start to finish. This title makes use of a StoryBlocks stock footage piece of the Las Vegas strip at night (not included, obviously) and is 3D camera tracked using Fusion's 3D Camera tracking tools. Once in LightWave3D, Kat shows how to set the 3D elements up in the shot and prepares it for lighting using some very unique tricks emulate light coming from the aerial BG plate in a way that he has not shown before and how this lighting helps "sell" the shot in VPR and later in Resolve Fusion Studio after rendering the shot out using LightGroups and Render Buffers for maximum control of the look of the CG elements. Using some of the tools unique to Resolve Fusion Studio for treating the BG plate and final composite over all, Kat demonstrates just how easy it can be to put a shot together using LightWave3D and Resolve Fusion Studio together to produce a wonderful film/cinematic look.
Video Run time is approximately 300 minutes and split into 15 easily digestible parts making it a perfect learning session for hobbyist and professional users, alike even if you have barely opened up Resolve+Fusion Studio. More in this series continues as Kat continues to produce training for VFX artists looking to ramp up their Fusion skills so as to be able to pull of high end TV series or Film VFX shots at will. Yes, the Fusion Comp file, exported from Resolve is included so you can rip it apart and see how things went together!
Now in the 20th installment of the highly popular and much loved Practical Production Techniques series of videos from Kelly "Kat" Myers, this title "Live Action and CG" is a quick get in and get out tutorial that tackles several tasks from tracking to lighting in order to ram through a high quality VFX shot in a morning or afternoon or less (much less).
This 13 part video covers all the bases and walks artists through a work flow to get a shot out the door fast without getting bogged down with finicky details with a run time of 146 minutes (approx.)
Assets are included with the exception of the BG stock footage plate. It is however available on VideoBlocks.
Kat is back with another exciting installment in the Practical Production Techniques Series!
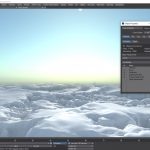
Now in the 14th volume of the series, Kat takes on a shot from a set of 3, from a low budget feature film out of Los Angeles that requires a full photo-realistic CG shot of a Boeing 747 flying over clouds in full 4K at 24 frames per second.
Not for the faint of heart, but by using a suite of tools that involves Black Magic Designs Davinci Resolve Studio 16, Andressen Technolgies Syntheyes, NewTek’s LightWave3D (2020.0.1) and finishing in Black Magic Designs Fusion Studio 16 plus a little bit of render help from the ultra powerful LightForge.cc rendering network; Kat makes quick work of the task using proven and battle tested methods for pulling off a fantastic looking shot from reference footage to previs to final in just 220 minutes! (Not including render time of course).
Working with a wonderful 3D model of a Boeing 747 (included!) provided by fellow LightWave3D artist who also happens to be a pilot, Catherine Smallwood; Kat walks you through each step while explaining many of the principles of taking a shot from previs to final and things to watch out for and factor in during the creation of feature film level Visual Effects that are photo-realistic using LightWave3D and the other complimentary tools to compete the shot. Learn how to produce a track of the plane out of Syntheyes quickly to produce a believable camera motion as it is based on real-world footage. From there Kat gets you into LightWave3D 2020.0.1 to set up the rest of the shot including the CG clouds and the process of making them from a single null object using the new Volumetric Primitive feature in Layout and then getting renders for both the CG plane and clouds ready for processing by the LightForge Render Network. Finally finishing in Fusion, working with the resulting “lightgroup” render buffers from LightWave3D’s rendering engine, Kat completes this VFX shot in a way that looks great!
Get this 220 minute long tutorial with LightWave3D assets, Fusion comp files, Syntheyes Project and of course the training videos today!
Renders are reference footage are unfortunately not included due to copyright reasons and because it would make the package over 100GB in size to download but everything else is included!
Do you want to get into Davinci Resolve Fusion? Are you a Fusion user now but not sure how to go about adjust your workflow to Resolve Fusion? Well, you are in luck with this new tutorial series from multiple awarding winning CG Supervisor and VFX artist, Kelly "Kat" Myers.
In this first installment, Kat takes on a VFX shot from the shot film "Curse of the Phantom Shadow", directed by Mark Ross, using Resolve Fusion 16 Studio. Originally shot many years ago on prosumer level equipment in 720p at 59.94fps, several challenges are overcome in this tutorial, working with 4:2:0 (Mpeg-4) based footage shot against a green screen under less than ideal conditions.
With a run time of 250 minutes, this tutorial is a complete journey from start to finish of a VFX shot that covers how to deal with keying material that typically doesn't key well due to its lack of color information in the format as well as being heavily compressed to footage stabilization, noise reduction tricks without turning your footage into mush, adding "beautifying" effects to the actors in the scene and over all Fusion flow "solving".
Davinci Resolve Fusion 16 (and Studio) is an amazingly powerful product but is not free of bugs! Learn how to overcome these bugs while marching towards a finished shot!
Award Wining CG/VFX Artist and Supervisor, Kelly "Kat" Myers brings you everything you need to know to get started with the Blackmagic Designs Fusion or Resolve tracking tools and start making really cool VFX shots, easily. In this tutorial, Kat breaks down the tips and tricks on how to use Fusions 3 tracking tools. Tracker, Planar Tracker and Camera Tracker. Every VFX artist needs to know how to do tracking. It's inescapable and to some, daunting. But it doesn't need to be. It's actually really straight forward to do if you have some basic knowledge to start with and this tutorial title!
Ever want to learn how to do a proper "screen burn-in"? Don't know what to do? It's easy with Fusion or Resolve's Fusion tracking tools. Kat shows you how to do this in minutes!
It doesn't matter if you use Davinci Resolve or Fusion, the tools are the same (with some small caveats), you can immediately get great results with the tracking tools included in either program including 3D tracks, planar tracks or single trackers to achieve wonderful visual effects.
Get this tutorial now with content including some sample videos and composite .comp files and LightWave3d scenes (showing the 3d tracking side of the tutorial) today!
In this title, VFX artist and CG supervisor of Declaration Pictures Inc., and founder of Liberty3d.com - Kelly Lee Myers (aka Kat), shows you how to take a VFX shot from end-to-end using SynthEyes, LightWave3D and Fusion.
Starting with tracking the shot in Syntheyes, Kat walks you through the basics of getting a 3D track done fast using a manual method that produces extremely solid tracks every time. From there he will show you how to set up a LightWave3D based particle snow storm, snowflakes and more before proceeding to the final stages in Fusion where he discussed the ins and outs of Rotoscoping, the caveats involved when dealing with bugs in Fusions Rototools (which are being fixed right now if not already by the time you read this), and how Keyers can work to your advantage if all else fails.
This 31 part video includes assets used in the original VFX shot that was part of a real-world VFX job for the feature film "The Christmas Cabin" which Kat and Wes Sargent completed in a very short time in November/December of 2018 on order to make a tight deadline for the producers to successfully sell the film at a film market conference.
More in the practical production techniques series feature this film as subject matter are in the works and will be available here on Liberty3d.com exclusively.
Kat is back with another installment of the Fusion for LightWave (2018) Artists series!
Now in Volume VII (7), Kat walks you through a different workflow that will allow for extremely fast compositing build outs in Fusion 9.02. This method provides artists with an easy way to tackle very complex sets of render passes with multiple buffers in each pass being used, to bring together a photorealistic, real-world VFX shot (although a test) working with the complete footage and asset package from his upcoming short film, "The Exchange".
With over 21GB of additional support materials which include the renders from Lightwave 2018 as well as the footage shot using a RED Scarlet (optional download), the scene and object files, the Fusion comp work-up files and of course the video recordings (primary product download), everything is ready for you to play with, take apart and study. Everything is included. At roughly 266 minutes or just under 4.5 hours in length, this video is jammed packed with helpful workflow techniques for LightWave artists getting into Fusion, working with the new PBR render engine output from LightWave3D 2018 and the "additive/normal" blending mode compositing formula process.
Kelly "Kat" Myers is back once again with the first LightWave 2018 specific tutorial in the Fusion for LightWave Artists series.
In "Fusion for LightWave (2018) Artists - Vol. 6" Kat breaks down a huge amount of information regarding the new AOV (Arbitrary Object Value) buffer system in LightWave3D 2018. This 11 part video tutorial contains information not covered in Kat's previous videos in this series or any of his other titles to date.
Areas covered include the new coverage buffer and how to make use of it in Fusion and the power of masks. Learn how to relight objects using Normals saved from LightWave3D 2018 while getting up to speed on how to compositing using material generated from the new shading and rendering engine to achieve true, "back to beauty" results exported from exrTrader 2018 and showing how the buffers correspond to the native buffer saving system. Kat takes it even further however with demonstrating different uses for the shadow buffer that many artists unaware of.
Learn about the power of Light Groups in LightWave 2018 and how to properly composite them together and why this functionality is so important to the CG pipeline process.
Using just a single render pass with buffers, Kat builds out a composite in Fusion that will blow your mind as to what can be achieved in the compositing process!
At a runtime of approximately 333 minutes, this title is an essential "must have" for anyone who is looking to take the next step into advanced VFX work using CG imagery from LightWave3D 2018 as well as many other packages that produce AOVs.
In Fusion for LightWave Artists Vol. 5 - "Curse of the Phantom Shadow", Kelly "Kat" Myers takes you through a CG+Live action footage mixed VFX shot from the short film by Mark Ross. This tutorial is rather advanced but even first time users of Fusion can benefit from this title and the massive amount of information that Kat passes onto you while he builds out the composite in Black Magic Designs Fusion 9.02
Every LightWave artist needs to learn how to composite CG footage into a live action shot and this title is a perfect way to get into doing exactly that. But more importantly, is learning how to deal with footage that is not of the best quality, as Curse of the Phantom Shadow was shot on a first generation Panasonic Lumix GH1 Camera at 720p in 4:2:0 MPEG format on a shoe-string budget in Mark Ross' living room. This is where Rotoscoping comes in and some creative problem solving is needed. Rotoscoping is an essential skill all compositors must have in their tool belt and Kat shows you how to work with Rotosplines for masking of shot video as well as still photographic elements and where and how to make use of them correctly in matte control and keying tools. Corner positioner and lens distortion tools are also discussed as they are used in the comp in rather creative ways to compensate for the way the material was shot in order to get it to "line up" with the CG rendered portion produced in LightWave3D.
On the CG elements side of the comp workflow demonstrated in full in this video title, Kat shows you how to take a single render pass from LightWave3D rendered with several basic buffers (provided through exrTrader although LW's native solution works just fine) into Fusion and create bitmap masks for use on Surface/ObjectID tagged portions of the rendered image sequence to isolate them for further independent adjustment. STOP TRYING TO GET EVERYTHING PERFECT IN CAMERA! Do it in comp! Save time by making use of LightWave's render buffer technology and Fusion's ultra-powerful compositing engine, leveraging them both to your advantage and making you a better VFX artist as a result.
In this tutorial with an approximate runtime of 165 minutes, Kat takes the shot from "Zero to Hero" and you can follow along every step of the way. Provided as an optional download of just over 4GB of bonus content, the rendered image sequence, live-action blue screen footage and photographic elements as well as the Fusion Flow Comp files used to create the final shot are included. As an extra bonus, for those of you with After Effects and Optical Flares from Video Co-pilot is also provided. This is for a small final element requested by the director to finish off the shot.
Kat is back with a new installment in the TurbulenceFD Advanced Concepts and Projects Series. This time in “Project Engine Fire”, Kat shows you what goes into setting up a WWII era USAF B-25 with an engine fire effect.
This is a real-world shot from the upcoming feature-film (direct-to-video) “Behind the Lines” which is currently in post-production. With a run time of approximately 105 minutes, you get all the info you need to recreate such an effect using LightWave3D (works in 2015.x and 2018.x) and TurbulenceFD from Jawset.com
You also get the renders and the Fusion composite flows from Kat for this project so you can play with the render results instead of having to render out things on your own (which can take a wee bit of time). Don’t worry though, if you want to play around with things in LightWave3D and tweak settings and sim things for yourself, we have you covered there, too. The basic geometry and the scene files are included so you have everything you need to follow along and get the exact results you want using the provided materials as a guide!
You get almost 4GB of content and learning material, ready to go for just $24.95USD
Kat has put together 10 of his Practical Production Techniques videos into a super bundle!
Get up to speed fast on everything from surface baking to polygon reduction for games and VR/AR production as well as how to construct your shots for big space battles or mysterious nebula scenes and much much more in this bundle for a great low price!
Here is a list of the videos you get!
Practical Production Techniques Vol. One
Practical Production Techniques Vol. Two
Practical Production Techniques Vol. Three
Practical Production Techniques Vol. Four
Practical Production Techniques Vol. Five
Practical Production Techniques - Vol. 6 Advanced Surface Baking
Practical Production Techniques - Vol. 7 Advanced Surface Baking Part II
Practical Production Techniques - Vol. 8 Capital Ship Combat Techniques
Practical Production Techniques - Vol. 9 Polygon Reduction
Practical Production Techniques Vol. 10 - Project Smoke Monster
Fusion for LightWave Artists: Volume 4 - Curse of the Phantom Shadow
Award winning VFX artist and CG Supervisor, Kelly "Kat" Myers is back in his latest installment in the Fusion for LightWave Artists series.
This time Kat walks you through a real-world production shot from the low-budget 30+ minute short film written and directed by Mark Ross; "Curse of the Phantom Shadow"
With over 396 VFX shots in the current edit of the film, the daunting challenge of completing the task at hand is met through the use of LightWave3D and Fusion!
In this tutorial, Kat demonstrates how one can employ creative uses of volumetrics supplied by LightWave3D natively as well as via TurbulenceFD From Jawset.com and mix them together in Fusion 8 in a way that "sells the shot".
It doesn't stop there, however! Kat also demonstrates where the use of LightWave's PRMB is essential vs. the use of Vector-Based motion blur in post, and what to do if you ever have to "mix and match" in a compositing program like Fusion.
If you have enjoyed the previous installments of Fusion for LightWave artists, then you are for sure going to want to grab this title as you can follow along with Kat as he breaks down the composite that made up the final shot and continues on improving it!
Kat also discusses how you can ensure that 'WYSIWYG' for input and output when working with LightWave's Linear Color Space workflow and how Fusion's LUTs should be used with sRGB rendered material.
Exclusively available from Liberty3d.com, Fusion for LightWave Artists: Volume 4 - Curse of the Phantom Shadow, includes the entire render results used in the tutorial. You can practice the techniques demonstrated by Kat without having to render a single frame out of LightWave! He's done that for you and the renders are included as a secondary download aside from the tutorial video so you can watch right away as the downloads for the renders come across to you in the background if you choose!
Practical Production Techniques Vol. 10 - Project Smoke Monster!
Kat is back with another installment in the highly popular Practical Production Techniques series. In Volume 10, Kat walks you through an entire shot featuring a Daz3D character model, taking the asset from Daz3D into LightWave, surfacing it using the maps from the asset, setting it up with animation applied via MDD, transferring in TurbulenceFD settings from another scene, lighting the character using some nifty tricks for realism in a photographic plate and then compositing the rendered results in Fusion.
With a runtime of almost 4.5 hours, this tutorial is jam-packed with lots of great tips and techniques pulled from Kat's experiences in production. The tutorial includes the rendered image files so you can follow along in the compositing process in Fusion or even AE and Nuke. You also get the scene files saved at every step along the way. Not included is the model which is a commercial asset but retails for 25 dollars on Daz3d.com and can be easily substituted for a character of your own design or any other Daz Character you may have laying about.
In part III of Fusion for LightWave Artists, Kelly "Kat" Myers breaks new ground in the series as he walks you through a complete shot to recreate a news broadcast style "playback" element using the assets from Iron Sky. SyntheyesTrackingMany years ago, Kat worked for a company that specialized in this area of film and television effects production working with Fusion and LightWave to produce video playback that would be used on set. This tutorial goes from start to finish including the tracking in Syntheyes of a plate shot using an everyday smart phone (in this case a Samsung Galaxy Note4), prepping the resulting footage for efficient use in Layout while getting the Iron Sky Valkyrie UFOs into the shot. From there this project takes a bit of a different turn as Kat demonstrates how to track elements in 2D using Fusions precise tracking tools and how to attach masks to these tracks providing for additional control of your composite. LightWave3DISValksThe tutorial finishes off with the introduction of several effects tools that you can use to "fake" broadcast TV interference or replicate the appearance of conventional television footage.
Learn how to deal with noisy "tracks" from a 3D tracking program by working with the data in Layout's graph editor while at the same time knowing what you can get away with due to the nature of the final target element. There are several tricks and tips in this tutorial that you simply will not find anywhere else covering an area of VFX creation that is rarely discussed if at all by visual effects artists.
With an approximate run time of 3.7 hours, Fusion for LightWave Artists Part III is a great companion title to the previous two parts in the series. With 20 video segments and all of the content included for you to follow along, this title is a must have for LightWave artists working with Fusion in their production work flows no FusionTrackingTwomatter what the tasks you may face. Visual Effects artists are sometimes asked to do some pretty odd things and creating "playback" for on-set shooting use is one of these odd ball jobs you are going to come across.
Kat does it again!
Fusion for LightWave Artists Part II a 390 minute project based tutorial using the same techniques from Battle Star Galactica and Iron Sky for LightWave3D shot construction, Lighting, Rendering, Render Management, and Fusion Compositing that demonstrates how you can leverage the power of BlackMagic Design’s Fusion 7 (or 8) which is now free; into your LightWave production workflows.
Whether you use Mac or PC, Fusion is your best and most affordable compositing option available that provides absolutely uncompromising results and speed. Now, experience how you can take your LightWave work to the next level. Fusion and LightWave have a long history of being used together in top studios over the last two decades producing some of the most iconic television shows and films of our time.
In this video Kat takes you through an entire production level shot from "Battlestar Galactica" using freely downloadable assets (download links provided). Not only that, you get the complete renders from each lighting and buffer pass. That's 6500 frames from 16 different scene files to make up one awesome shot! No need to render at home! This package provides you with the content. That means you get all the the scenes, Fusion comp files and the renders in full!
This video is the second part in a series of videos designed specifically for LightWave artists in mind and is balanced between Layout and Fusion’s interface building up each element so the artist gets a firm grasp as to how to break out shots for compositing and how to manage renders in a network environment leveraging the power of Lightwave and Fusion network rendering technology.
This video gives you deep insight into how an entire shot would be produce on BSG or Iron Sky and can be applied to just about any product or project.
Get it now for only $39.49USD
This title is massive!
Fusion for LightWave Artists is a 420 minute exploration and project based tutorial that demonstrates how you can leverage the power of BlackMagic Design’s Fusion 7 (or 8) which is now free; into your LightWave production workflows. Whether you use Mac or PC, Fusion is your best and most affordable compositing option available that provides absolutely uncompromising results and speed. Now, experience how you can take your LightWave work to the next level. Fusion and LightWave have a long history of being used together in top studios over the last two decades producing some of the most iconic television shows and films of our time.
In this video learn how to make use of Fusion’s powerful workflow and LightWave render buffer system to integrate photographic (stills or video can be used) material producing photorealistic composites.
Kat masterfully walks you through the process over the course of 27 video clips and 4 project based examples demonstrating the use of Object ID, Surface ID, Depth (linear fog and z-Buffer techniques are covered) to gain maximum control over your shots. Learn how to produce color correction effects over distances using depth as well as DoF application and how to avoid “gotchas” when working with deep pixel data.
Take advantage of LightWave’s Shadow Catcher node and learn how you can precisely control the results in comp helping you to save time in render as well as remain flexible when it comes to your final look.
Learn how you can take advantage of LightWave’s native Composite Buffer tool or DB-W’s exrTrader buffer saver export plug-in to reduce the amount of image files you have to manage while getting the most out of each render pass to create your final composites. Learn how to use the power of motion vectors and work with them in comp without the need for any RSMB plug-ins or fancy tricks to make them work.
Over 1.64GB in size this video is a huge value and comes with rendered image content and scenes (The A-10 model/scenes are not included due to copyright reasons, but the renders are).
This video is the first part in a series of videos designed specifically for LightWave artists in mind and is balanced between Layout and Fusion’s interface building up each element so the artist gets a firm grasp as to how to break out shots for compositing later.
Get it now for only $39.49USD
Kat's Disco In-fur-no Turbulence for LightWave3D Bundle (Newly expanded!)
*Newly expanded in June 2017!*
The Disco In-Fur-No bundle is now better than ever!
It's been expanded to include two more videos not previously included in this bundle for a total of 7 kick ass tutorials for TurbulenceFD.
This includes the video tutorial that goes along with the dozens of Nuclear Weapons Detonations that are ready to load into your LightWave shots. Simply find a Nuclear detonation that's to your liking out of the dozens included in the collection, load it into your shot, simulate it, and you're pretty much good to go! Kat's done the heavy lifting for you and now you can get it all and up to speed. Fast.
Does it get better than this? Absolutely. Every single person who participated in the TFD group buy-in this spring needs to pay attention here!
Get these great videos of Kat's at one low price to get...
Introduction to Turbulence FD
Advanced Concepts and Projects: Fireball
Advanced Concepts and Projects: Atmospherics
The complete Nuclear Weapons Pack (which includes a training video and of course the dozens of pre-built nuclear weapons detonations made with TurbulenceFD and LightWave3D)
Advanced Concepts and Projects - Clouds
Practical Production Techniques Vol. 10 - Project Smoke Monster
Fusion for LightWave Artists: Volume 4 - Curse of the Phantom Shadow
All together that's $193.65USD in awesome product from Liberty3D.com, but it gets more awesome with the bundle pricing of $139.65USD!
That's 53.70USD saving if bought separately and this bundle is discountable so if we have a sale on and you want to use a sale coupon to get even a further discount - you can use on this product!
While coupons can't be mixed with each other in our store... some of you have a really, really extra special coupon and you should use it for this exact bundle!
This means you, recent TFD Group Buy-in Participants! Do I have your attention still? Good. Because the Liberty3D.com Coupon code I issued you during the last phase of the Buy-in can be applied to discount this bundle while your coupon remains active!
Even if you have picked up a couple of these titles since picking up TFD during the spring 2017 buy-in, the discount possible with your coupon code top of the bundle discount will more than likely still you big savings!
Fusion - Digital Matte Painting [jh]
There’s a lot of training out there on how to use software and techniques to get a job in the industry. But what about how to create your own effects that you would use inside your own movies? Welcome to the start of the Low-Budget VFX Series. In this first video, you’ll learn how to create professional matte paintings you can actually do yourself without spending massive amounts of time. Its a mindset that gets drilled in here called “get it done…”. You’ll learn how to use what you have available including 3D, Photoshop techniques, free image resources and more. You’ll also learn how to quickly break down photos, cut them up and build out a base, work in 3D elements and blend them seamlessly. Finally, you’ll see how to take that painting you just made and get it ready to take into your favorite compositing program. Over 4 hours of training. (includes video in WMV 720p and all project files)Fusion VFX - 3D Matte Compositing [jh]
We continue where we left off on our matte creation and take it inside Fusion where we turn it into a fully functioning shot. We’ll take the layers we created in Photoshop and split them up into 3D space and add in our camera. We’ll then add in cherry blossom sequences we rendered out in Lightwave and learn how to comp them in including defocus and vector motion blur. (Includes video in WMV 720p and all project files)Eyeon Fusion 2D and 3D Particles [jh]
Eyeon Fusion has one of the best particle systems out there. Both among compositing and 3D applications. Learn how to quickly harness its power in both 2D compositing as well as in a 3D environment.
You’ll learn how to create particle effects similar to the music video Red – Ordinary World including creating particles from an image sequence, moving and shaping them and working around processing issues to get the job done as fast as possible.
3D particles in this video are a lot of fun. Not only will we be messing with particles in a 3D space but we’re also going to pull FBX objects right in from Lightwave, camera info and a textures. We’re then going to get that stuff generating particles AND interacting with them. Did I mention that’s all right inside Fusion? (Includes video in WMV 720p and all project files).![Fusion VFX - Shooting and Compositing Green Screen [jh]](https://liberty3d.com/wp-content/uploads/2010/07/banner.jpg)
Fusion VFX - Shooting and Compositing Green Screen [jh]
Low-Budget VFX Series: Shooting and Compositing Greenscreen
We wrap up our first series with not just how to key and composite greenscreen in Fusion, but how to shoot it in our garage too! We cover how to setup your screen, properly light it and light your subject. We get into all the things you need to know to get started including noise, color temperature, contrast ratios and matching the shot with the matte. Inside Fusion we go over keying, rotoscoping and blending the footage into the shot to get some beautiful touches on our scene and bring it to life. (Includes video in WMV 720p and all project files).