


Adam Gibson
Adam Gibson is a 3D artist from Bowmanville, Ontario, Canada. He’s been doing freelance work using Lightwave 3D and various other 3D/2D applications since the early Commodore Amiga/Video-Toaster days. He enjoys doing creature and sci-fi style modeling/texturing projects and has a passion for digital compositing using blue/green screens.
Adam is also a 3 x time published book author and has earned a Masters Degree in Taekwondo under the legendary Bill “Superfoot” Wallace-Undefeated World Kickboxing Champion.
Please feel free to contact Adam directly using his email adam@liberty3d.com
or Skype id : adamgibson2

Lightwave 3D 9.6 Rigging a T-Rex with Skelegons (Part 1)
Lightwave 3D 9.6 Rigging a T-Rex with Skelegons-by Adam Gibson
In this 6 hour rigging course Lightwave Instructor Adam Gibson shows the student how to easily set-up a Tyrannosaurus base skeleton using Lightwave's "Skelegons" Tool in modeler and then how to convert it to Bones in Layout. The video then continues to show the set-up process in Layout as well as how to apply Weight Maps for more control over your mesh. Problem solving, test deformations, and IK (Inverse Kinematics) are also shown in great detail. A perfect video for a beginner 3D student to get started rigging characters quickly.
Table of Contents for Rigging a T-Rex with Skelegons
Chapter 1- Intro
Chapter 2- Checking Your Mesh for Errors and Problems
Chapter 3- Setting Up Layers for Skelegons
Chapter 4- COG (Center of Gravity) Skelegon
Chapter 5- Tail Skelegons
Chapter 6- Head and Body Skelegons
Chapter 7- Leg Skelegons
Chapter 8- Hip Skelegon
Chapter 9- Arm and Claw Skelegons
Chapter 10- Adjusting Arm and Claw Skelegons
Chapter 11- Hold Bone and Chest Plate Skelegons
Chapter 12- Hold Bones
Chapter 13- Renaming Skelegons Part One
Chapter 14- Renaming Skelegons Part Two
Chapter 15- Renaming Skelegons Part Three
Chapter 16- Mirroring Arm Leg Chains
Chapter 17- Renaming Mirrored Skelegons
Chapter 18- Eye Ball Skelegons
Chapter 19- Eye Ball Weight Maps
Chapter 20- Leg Weight Maps
Chapter 21- Merge Items to One Layer
Chapter 22- Lower Jaw Weight Map
Chapter 23- Upper Jaw Weight Map
Chapter 24- Converting Skelegons to Bones
Chapter 25- How to Save Bones to a Scene File
Chapter 26- Parenting the Eyes to the Head Bone
Chapter 27- Eye Bones Test
Chapter 28- Tail Bones Test
Chapter 29- Leg Bones Tests
Chapter 30- Subdivision Order Setting
Chapter 31- Re-Checking Deformations
Chapter 32- Body and Leg Weight Maps
Chapter 33- Problem Solving and Locking Off Channels
Chapter 34- Locking Off Channels
Chapter 35- Parenting Bone Chains to COG (Center of Gravity) Bone
Chapter 36- Adding Foot Goals (Object Nulls)
Chapter 37- Positioning Foot Goals
Chapter 38- Setting Up the Leg IK (Inverse Kinematics)
Chapter 39- Enabling and Testing the IK Chains in the Legs
High Quality (Screen-Res 1440 x 900 pixels) Quicktime Video
Level: Beginner
Running Time: 6 Hour Rigging Course
Price: $29.00
3D Coat 3.5 for Lightwave Users-UV Mapping (Part-2)
3D Coat 3.5 for Lightwave Users-UV Mapping-by Adam Gibson
In this videos series we show 3D students how to use 3D Coat and Lightwave 3D together as an easy and functional workflow and pipeline in your 3D projects. Although this video series uses Lightwave 3D as the final output for your 3D Coat work, the concepts and principles used here will work with all the most popular 3D programs like 3D Max, Maya, Softimage, Modo, Cinema 4D and many others.
In this Video Tutorial Adam Gibson shows a full blown project based session on how to perfectly UV Map a Suchomimus Dinosaur. The techniques and tools are shown to create UV maps with no overlapping UV's. Good UV mapping skills are needed to create great texture maps for your characters and 3D object. This video holds the information you need to start making great UV maps for your own projects.
Table of Contents for UV Mapping
Chapter 1- Intro
Chapter 2- Importing Meshes for UV Mapping in 3D Coat -Part One
Chapter 3- Renaming UV Maps
Chapter 4- Importing Meshes for UV Mapping in 3D Coat -Part Two
Chapter 5- Importing Meshes for UV Mapping in 3D Coat -Part Three
Chapter 6- How to Import Multiple UV Maps into 3D Coat
Chapter 7- Adding UV Seams-Part One
Chapter 8- Adding UV Seams-Part Two
Chapter 9- Adding UV Seams-Part Three
Chapter 10- Adding UV Seams-Part Four
Chapter 11- Adding UV Seams-Part Five
Chapter 12- Unwrap Test
Chapter 13- UV Seam Adjustment
Chapter 14- 3D Coat Crashes
Chapter 15- Work Around Exporting Method of Layered UV Mapped Object to Lightwave 3D
Level: Beginner
Running Time: 1 hr. 56 mins.
High Quality (Screen-Res 1440 x 900 pixels) Quicktime Video
Price: $19.00
3D Coat 3.5 for Lightwave Users-UV Mapping (Part-1)
3D Coat 3.5 for Lightwave Users-UV Mapping-by Adam Gibson
In this videos series we show 3D students how to use 3D Coat and Lightwave 3D together as an easy and functional workflow and pipeline in your 3D projects. Although this video series uses Lightwave 3D as the final output for your 3D Coat work, the concepts and principles used here will work with all the most popular 3D programs like 3D Max, Maya, Softimage, Modo, Cinema 4D and many others.
In this Video Tutorial Adam Gibson shows a full blown project based session on how to perfectly UV Map a Suchomimus Dinosaur. The techniques and tools are shown to create UV maps with no overlapping UV's. Good UV mapping skills are needed to create great texture maps for your characters and 3D object. This video holds the information you need to start making great UV maps for your own projects.
Table of Contents for UV Mapping
Chapter 1- Intro
Chapter 2- Importing Meshes for UV Mapping in 3D Coat -Part One
Chapter 3- Renaming UV Maps
Chapter 4- Importing Meshes for UV Mapping in 3D Coat -Part Two
Chapter 5- Importing Meshes for UV Mapping in 3D Coat -Part Three
Chapter 6- How to Import Multiple UV Maps into 3D Coat
Chapter 7- Adding UV Seams-Part One
Chapter 8- Adding UV Seams-Part Two
Chapter 9- Adding UV Seams-Part Three
Chapter 10- Adding UV Seams-Part Four
Chapter 11- Adding UV Seams-Part Five
Chapter 12- Unwrap Test
Chapter 13- UV Seam Adjustment
Chapter 14- 3D Coat Crashes
Chapter 15- Work Around Exporting Method of Layered UV Mapped Object to Lightwave 3D
Level: Beginner
Running Time: 1 hr. 56 mins.
High Quality (Screen-Res 1440 x 900 pixels) Quicktime Video
Price: $19.00

3D Coat 3.5 for Lightwave Users-Retopology II (Part-5)
3D Coat 3.5 for Lightwave Users-Retopology II-Project Suchomimus-by Adam Gibson
In this videos series we show 3D students how to use 3D Coat and Lightwave 3D together as an easy and functional workflow and pipeline in your 3D projects. Although this video series uses Lightwave 3D as the final output for your 3D Coat work, the concepts and principles used here will work with all the most popular 3D programs like 3D Max, Maya, Softimage, Modo, Cinema 4D and many others.
In this second retopology volume of 3D Coat 3.5 for Lightwave Users Adam Gibson demonstrates the full retopology of a Suchomimus Dinosaur model to create a mesh with better polygonal edge flow. Retopology of your models is designed to make models easier to apply UV Maps, texturing, and animating. Models with bad topology can create a great deal of problems in a production pipeline. This video combines the strength of both programs to create a clean streamlined character model with all the steps revealed.
Table of Contents for Retopology II
Chapter 1- Intro
Chapter 2- Importing Lightwave Objects Into 3D Coat
Chapter 3- Claws Part-One
Chapter 4- Claws Part-Two
Chapter 5- Claws Part-Three
Chapter 6- Hand and Arm Geometry
Chapter 7- Inner Toe Geometry Part-One
Chapter 8- Inner Toe Geometry Part-Two
Chapter 9- Feet Part-One
Chapter 10- Feet Part-Two
Chapter 11- Feet Part-Three
Chapter 12- Feet Part-Four
Chapter 13- Feet Part-Five
Chapter 14- Feet Part-Six
Chapter 15- Feet Part-Seven
Chapter 16- Feet Part-Eight
Chapter 17- Feet Part-Nine
Chapter 18- What to do if 3D Coat Crashes
Chapter 19- Leg Editing
Chapter 20- Creating Eye Geometry
Chapter 21- Creating the Eye Socket
Chapter 22- Creating Nostrils
Chapter 23- Head Geometry Part-One
Chapter 24- Head Geometry Part-Two
Chapter 25- Head Geometry Part-Three
Chapter 26- Head Geometry Part-Four
Chapter 27- Head Geometry Part-Five
Chapter 28- Connecting Body Geometry Together Part-One
Chapter 29- Connecting Body Geometry Together Part-Two
Chapter 30- Making the Tail
Chapter 31- Connecting the Head to the Body Part-One
Chapter 32- Connecting the Head to the Body Part-Two
Chapter 33- Final Tweaks in 3D Coat
Chapter 34- Importing the Retopologized Mesh into Lightwave
Chapter 35- Editing the Tail
Chapter 36- Setting Up Symmetry in Lightwave
Chapter 37- Matching the Retopo Mesh with a Background Mesh
Chapter 38- Inner Mouth Creation
Chapter 39- Building the Throat
Chapter 40- Building the Tongue
Chapter 41- Adding the Teeth and Eye Balls to the Retopo Mesh
Running Time: 8 hrs 34 mins.
High Quality (Screen-Res 1440 x 900 pixels) Quicktime Video
Price: $19.00
3D Coat 3.5 for Lightwave Users-Retopology II (Part-4)
3D Coat 3.5 for Lightwave Users-Retopology II-Project Suchomimus-by Adam Gibson
In this videos series we show 3D students how to use 3D Coat and Lightwave 3D together as an easy and functional workflow and pipeline in your 3D projects. Although this video series uses Lightwave 3D as the final output for your 3D Coat work, the concepts and principles used here will work with all the most popular 3D programs like 3D Max, Maya, Softimage, Modo, Cinema 4D and many others.
In this second retopology volume of 3D Coat 3.5 for Lightwave Users Adam Gibson demonstrates the full retopology of a Suchomimus Dinosaur model to create a mesh with better polygonal edge flow. Retopology of your models is designed to make models easier to apply UV Maps, texturing, and animating. Models with bad topology can create a great deal of problems in a production pipeline. This video combines the strength of both programs to create a clean streamlined character model with all the steps revealed.
Table of Contents for Retopology II
Chapter 1- Intro
Chapter 2- Importing Lightwave Objects Into 3D Coat
Chapter 3- Claws Part-One
Chapter 4- Claws Part-Two
Chapter 5- Claws Part-Three
Chapter 6- Hand and Arm Geometry
Chapter 7- Inner Toe Geometry Part-One
Chapter 8- Inner Toe Geometry Part-Two
Chapter 9- Feet Part-One
Chapter 10- Feet Part-Two
Chapter 11- Feet Part-Three
Chapter 12- Feet Part-Four
Chapter 13- Feet Part-Five
Chapter 14- Feet Part-Six
Chapter 15- Feet Part-Seven
Chapter 16- Feet Part-Eight
Chapter 17- Feet Part-Nine
Chapter 18- What to do if 3D Coat Crashes
Chapter 19- Leg Editing
Chapter 20- Creating Eye Geometry
Chapter 21- Creating the Eye Socket
Chapter 22- Creating Nostrils
Chapter 23- Head Geometry Part-One
Chapter 24- Head Geometry Part-Two
Chapter 25- Head Geometry Part-Three
Chapter 26- Head Geometry Part-Four
Chapter 27- Head Geometry Part-Five
Chapter 28- Connecting Body Geometry Together Part-One
Chapter 29- Connecting Body Geometry Together Part-Two
Chapter 30- Making the Tail
Chapter 31- Connecting the Head to the Body Part-One
Chapter 32- Connecting the Head to the Body Part-Two
Chapter 33- Final Tweaks in 3D Coat
Chapter 34- Importing the Retopologized Mesh into Lightwave
Chapter 35- Editing the Tail
Chapter 36- Setting Up Symmetry in Lightwave
Chapter 37- Matching the Retopo Mesh with a Background Mesh
Chapter 38- Inner Mouth Creation
Chapter 39- Building the Throat
Chapter 40- Building the Tongue
Chapter 41- Adding the Teeth and Eye Balls to the Retopo Mesh
Running Time: 8 hrs 34 mins.
High Quality (Screen-Res 1440 x 900 pixels) Quicktime Video
Price: $19.00
3D Coat 3.5 for Lightwave Users-Retopology II (Part-3)
3D Coat 3.5 for Lightwave Users-Retopology II-Project Suchomimus-by Adam Gibson
In this videos series we show 3D students how to use 3D Coat and Lightwave 3D together as an easy and functional workflow and pipeline in your 3D projects. Although this video series uses Lightwave 3D as the final output for your 3D Coat work, the concepts and principles used here will work with all the most popular 3D programs like 3D Max, Maya, Softimage, Modo, Cinema 4D and many others.
In this second retopology volume of 3D Coat 3.5 for Lightwave Users Adam Gibson demonstrates the full retopology of a Suchomimus Dinosaur model to create a mesh with better polygonal edge flow. Retopology of your models is designed to make models easier to apply UV Maps, texturing, and animating. Models with bad topology can create a great deal of problems in a production pipeline. This video combines the strength of both programs to create a clean streamlined character model with all the steps revealed.
Table of Contents for Retopology II
Chapter 1- Intro
Chapter 2- Importing Lightwave Objects Into 3D Coat
Chapter 3- Claws Part-One
Chapter 4- Claws Part-Two
Chapter 5- Claws Part-Three
Chapter 6- Hand and Arm Geometry
Chapter 7- Inner Toe Geometry Part-One
Chapter 8- Inner Toe Geometry Part-Two
Chapter 9- Feet Part-One
Chapter 10- Feet Part-Two
Chapter 11- Feet Part-Three
Chapter 12- Feet Part-Four
Chapter 13- Feet Part-Five
Chapter 14- Feet Part-Six
Chapter 15- Feet Part-Seven
Chapter 16- Feet Part-Eight
Chapter 17- Feet Part-Nine
Chapter 18- What to do if 3D Coat Crashes
Chapter 19- Leg Editing
Chapter 20- Creating Eye Geometry
Chapter 21- Creating the Eye Socket
Chapter 22- Creating Nostrils
Chapter 23- Head Geometry Part-One
Chapter 24- Head Geometry Part-Two
Chapter 25- Head Geometry Part-Three
Chapter 26- Head Geometry Part-Four
Chapter 27- Head Geometry Part-Five
Chapter 28- Connecting Body Geometry Together Part-One
Chapter 29- Connecting Body Geometry Together Part-Two
Chapter 30- Making the Tail
Chapter 31- Connecting the Head to the Body Part-One
Chapter 32- Connecting the Head to the Body Part-Two
Chapter 33- Final Tweaks in 3D Coat
Chapter 34- Importing the Retopologized Mesh into Lightwave
Chapter 35- Editing the Tail
Chapter 36- Setting Up Symmetry in Lightwave
Chapter 37- Matching the Retopo Mesh with a Background Mesh
Chapter 38- Inner Mouth Creation
Chapter 39- Building the Throat
Chapter 40- Building the Tongue
Chapter 41- Adding the Teeth and Eye Balls to the Retopo Mesh
Running Time: 8 hrs 34 mins.
High Quality (Screen-Res 1440 x 900 pixels) Quicktime Video
Price: $19.00
3D Coat 3.5 for Lightwave Users-Retopology II (Part-2)
3D Coat 3.5 for Lightwave Users-Retopology II-Project Suchomimus-by Adam Gibson
In this videos series we show 3D students how to use 3D Coat and Lightwave 3D together as an easy and functional workflow and pipeline in your 3D projects. Although this video series uses Lightwave 3D as the final output for your 3D Coat work, the concepts and principles used here will work with all the most popular 3D programs like 3D Max, Maya, Softimage, Modo, Cinema 4D and many others.
In this second retopology volume of 3D Coat 3.5 for Lightwave Users Adam Gibson demonstrates the full retopology of a Suchomimus Dinosaur model to create a mesh with better polygonal edge flow. Retopology of your models is designed to make models easier to apply UV Maps, texturing, and animating. Models with bad topology can create a great deal of problems in a production pipeline. This video combines the strength of both programs to create a clean streamlined character model with all the steps revealed.
Table of Contents for Retopology II
Chapter 1- Intro
Chapter 2- Importing Lightwave Objects Into 3D Coat
Chapter 3- Claws Part-One
Chapter 4- Claws Part-Two
Chapter 5- Claws Part-Three
Chapter 6- Hand and Arm Geometry
Chapter 7- Inner Toe Geometry Part-One
Chapter 8- Inner Toe Geometry Part-Two
Chapter 9- Feet Part-One
Chapter 10- Feet Part-Two
Chapter 11- Feet Part-Three
Chapter 12- Feet Part-Four
Chapter 13- Feet Part-Five
Chapter 14- Feet Part-Six
Chapter 15- Feet Part-Seven
Chapter 16- Feet Part-Eight
Chapter 17- Feet Part-Nine
Chapter 18- What to do if 3D Coat Crashes
Chapter 19- Leg Editing
Chapter 20- Creating Eye Geometry
Chapter 21- Creating the Eye Socket
Chapter 22- Creating Nostrils
Chapter 23- Head Geometry Part-One
Chapter 24- Head Geometry Part-Two
Chapter 25- Head Geometry Part-Three
Chapter 26- Head Geometry Part-Four
Chapter 27- Head Geometry Part-Five
Chapter 28- Connecting Body Geometry Together Part-One
Chapter 29- Connecting Body Geometry Together Part-Two
Chapter 30- Making the Tail
Chapter 31- Connecting the Head to the Body Part-One
Chapter 32- Connecting the Head to the Body Part-Two
Chapter 33- Final Tweaks in 3D Coat
Chapter 34- Importing the Retopologized Mesh into Lightwave
Chapter 35- Editing the Tail
Chapter 36- Setting Up Symmetry in Lightwave
Chapter 37- Matching the Retopo Mesh with a Background Mesh
Chapter 38- Inner Mouth Creation
Chapter 39- Building the Throat
Chapter 40- Building the Tongue
Chapter 41- Adding the Teeth and Eye Balls to the Retopo Mesh
Running Time: 8 hrs 34 mins.
High Quality (Screen-Res 1440 x 900 pixels) Quicktime Video
Price: $19.00
3D Coat 3.5 for Lightwave Users-Retopology II (Part-1)
3D Coat 3.5 for Lightwave Users-Retopology II-Project Suchomimus-by Adam Gibson
In this videos series we show 3D students how to use 3D Coat and Lightwave 3D together as an easy and functional workflow and pipeline in your 3D projects. Although this video series uses Lightwave 3D as the final output for your 3D Coat work, the concepts and principles used here will work with all the most popular 3D programs like 3D Max, Maya, Softimage, Modo, Cinema 4D and many others.
In this second retopology volume of 3D Coat 3.5 for Lightwave Users Adam Gibson demonstrates the full retopology of a Suchomimus Dinosaur model to create a mesh with better polygonal edge flow. Retopology of your models is designed to make models easier to apply UV Maps, texturing, and animating. Models with bad topology can create a great deal of problems in a production pipeline. This video combines the strength of both programs to create a clean streamlined character model with all the steps revealed.
Table of Contents for Retopology II
Chapter 1- Intro
Chapter 2- Importing Lightwave Objects Into 3D Coat
Chapter 3- Claws Part-One
Chapter 4- Claws Part-Two
Chapter 5- Claws Part-Three
Chapter 6- Hand and Arm Geometry
Chapter 7- Inner Toe Geometry Part-One
Chapter 8- Inner Toe Geometry Part-Two
Chapter 9- Feet Part-One
Chapter 10- Feet Part-Two
Chapter 11- Feet Part-Three
Chapter 12- Feet Part-Four
Chapter 13- Feet Part-Five
Chapter 14- Feet Part-Six
Chapter 15- Feet Part-Seven
Chapter 16- Feet Part-Eight
Chapter 17- Feet Part-Nine
Chapter 18- What to do if 3D Coat Crashes
Chapter 19- Leg Editing
Chapter 20- Creating Eye Geometry
Chapter 21- Creating the Eye Socket
Chapter 22- Creating Nostrils
Chapter 23- Head Geometry Part-One
Chapter 24- Head Geometry Part-Two
Chapter 25- Head Geometry Part-Three
Chapter 26- Head Geometry Part-Four
Chapter 27- Head Geometry Part-Five
Chapter 28- Connecting Body Geometry Together Part-One
Chapter 29- Connecting Body Geometry Together Part-Two
Chapter 30- Making the Tail
Chapter 31- Connecting the Head to the Body Part-One
Chapter 32- Connecting the Head to the Body Part-Two
Chapter 33- Final Tweaks in 3D Coat
Chapter 34- Importing the Retopologized Mesh into Lightwave
Chapter 35- Editing the Tail
Chapter 36- Setting Up Symmetry in Lightwave
Chapter 37- Matching the Retopo Mesh with a Background Mesh
Chapter 38- Inner Mouth Creation
Chapter 39- Building the Throat
Chapter 40- Building the Tongue
Chapter 41- Adding the Teeth and Eye Balls to the Retopo Mesh
Running Time: 8 hrs 34 mins.
High Quality (Screen-Res 1440 x 900 pixels) Quicktime Video
Price: $19.00

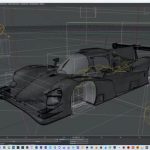
Learn the secrets of box modeling using SUB-Ds in Lightwave 3D. Creature and animal modeling can be a difficult task without the proper knowledge of where to start by pre-planning your character. In this video Adam Gibson shows how to set-up a backdrop image for reference and then starting with a single polygon create a fully detailed dinosaur. Learn the secrets of creating new geometry and detail from awkward positions during the modeling process. A powerful training video for the aspiring 3D modeler.
Price: $19.00

Adam Gibson shows how to UV Unwrap a Velociraptor style dinosaur from head to toe. Very few Lightwave tutorials show the whole process of UV Unwrapping a character and organizing the all the UV islands into one "Giant UV Island" in preparation for 2D digital painting programs such as Adobe Photoshop or 3D Painting Programs like ZBrush, Modo, 3D Coat and others.
If you are looking to learn the art of UV Mapping quickly this is the video you need to get you there. And since this a project based video you'll actually get to see how to use these tools in full production environment. Also at the end of the video Adam Gibson shows how to import your UV Map into Adobe Photoshop for Digital Painting of your character.
If you are looking to learn the art of UV Mapping quickly this is the video you need to get you there. And since this a project based video you'll actually get to see how to use these tools in full production environment. Also at the end of the video Adam Gibson shows how to import your UV Map into Adobe Photoshop for Digital Painting of your character.
Price: $20.00
![LightWave 3D 9.6 Modeler- Volume #4 [AG]](http://www.learn3dsoftware.com/LW_96_Modeler_Vol_4_200pix.jpg)
This is the fourth volume in a tool-based learning series on Lightwave 9.6's Modeler taught by Lightwave Instructor Adam Gibson. Each tool is broken into it's own video for quick and easy reference. The Modeler Series is designed so that you can find the tool you want to learn about instantly by looking at the name of each video clip. You don't have to watch the whole volume in one sitting or be searching through hours of content to find the tool you want to learn about.
Price: $19.00
![LightWave 3D 9.6 Modeler- Volume #3 [AG]](http://www.learn3dsoftware.com/LW_96_Modeler_Vol_3_400Pix.jpg)
LightWave 3D 9.6 Modeler Volume #3- by Adam Gibson
This is the third volume in a tool-based learning series on LightWave 9.6's Modeler taught by LightWave Instructor Adam Gibson. Each tool is broken into it's own video for quick and easy reference. The Modeler Series is designed so that you can find the tool you want to learn about instantly by looking at the name of each video clip. You don't have to watch the whole volume in one sitting or be searching through hours of content to find the tool you want to learn about. Project based video training is great but this video is designed so that the beginner and advanced LightWave student can learn the software in small chunks and get a better understanding of what each tool does before attempting a project. No point in teaching someone how to build a house if they've never used a hammer. Here we start at the basic so the student is better prepared for more advanced applications of their LightWave tool set.
Table of Contents for Volume #3
Chapter 1- Intro
Chapter 2- FlipIt Tool
Chapter 3- FlipIt Fast Tool
Chapter 4- Aligner Tool (World Mode)
Chapter 5- Aligner Tool (Foreground to Background Mode)
Chapter 6- Aligner Tool (Background to Foreground Mode)
Chapter 7- Aligner Tool (Absolute Mode)
Chapter 8- Smooth Scale Tool
Chapter 9- Segment Scale Tool
Chapter 10- BG Conform Tool
Chapter 11- Wrap Sphere Tool- Part One
Chapter 12- Wrap Sphere Tool- Part Two
Chapter 13- Mirror Tool
Chapter 14- Mirror X Tool
Chapter 15- Mirror Y Tool
Chapter 16- Mirror Z Tool
Chapter 17- Spin It Tool
Chapter 18- Knife Tool
Chapter 19- Subdivide Tool
Chapter 20- Triple Tool
Chapter 21- Divide Tool
Chapter 22- Fractalize Tool
Chapter 23- Symmetrize Tool
Chapter 24- Split Tool
Chapter 25- Band Saw Tool
Chapter 26- Band Saw Pro Tool
Chapter 27- Make Pole Tool
Chapter 28- Julienne Tool
Chapter 29- Julienne 2 Tool
Chapter 30- Add Points Tool
Chapter 31- Quick Saw Tool
Running Time: 3 hrs. 19 mins.
High Quality (Screen-Res 1440 x 900 pixels) Quicktime Video
Price: $19.00
![LightWave 3D 9.6- Modeler Volume #2 [AG]](/wp-content/uploads/2010/08/LW_96_Modeler_Vol_2_DVD_Box_1.jpg)
This is the second volume in a tool-based learning series on LightWave 9.6's Modeler taught by LightWave Instructor Adam Gibson. Each tool is broken into it's own video for quick and easy reference. The Modeler Series is designed so that you can find the tool you want to learn about instantly by looking at the name of each video clip. You don't have to watch the whole volume in one sitting or be searching through hours of content to find the tool you want to learn about. Project based video training is great but this video is designed so that the beginner and advanced LightWave student can learn the software in small chunks and get a better understanding of what each tool does before attempting a project. No point in teaching someone how to build a house if they've never used a hammer. Here we start at the basic so the student is better prepared for more advanced applications of their LightWave tool set.
Price: $19.00
Lightwave 3D Spacecraft Modeling-by Adam Gibson
This video is great for those of you who wish to get into Sci-Fi or Vehicle modeling. In this training tutorial you will how to create an organic style spaceship that combines both smooth and hard edged Sub-D surfaces in one mesh. There are very few videos which show how to do this. It also shows traditional Polygonal modeling to create certain details and parts of the spaceship.
3D Students will greatly benefit from this fully detailed tutorial which shows all parts of the production process in modeling an advanced-level model of this kind.
Software Used: Lightwave 3D 9.3.1
User Level: Beginner to Novice
Video Codec: Quicktime Video
Price: $19.00
![LightWave 3D 9.6 Modeler- Volume #1 [AG]](/wp-content/uploads/2010/08/LW_96_Modeler_Vol_1_DVD_Box_1.jpg)
This is the first volume in a tool-based learning series on LightWave 9.6's Modeler taught by LightWave Instructor Adam Gibson. Each tool is broken into it's own video for quick and easy reference. The Modeler Series is designed so that you can find the tool you want to learn about instantly by looking at the name of each video clip. You don't have to watch the whole volume in one sitting or be searching through hours of content to find the tool you want to learn about. Project based video training is great but this video is designed so that the beginner and advanced LightWave student can learn the software in small chunks and get a better understanding of what each tool does before attempting a project. No point in teaching someone how to build a house if they've never used a hammer. Here we start at the basic so the student is better prepared for more advanced applications of their LightWave tool set.
Price: $19.00
![Lightwave 9.6-Advanced UV Mapping & Texturing-Vol.#1 [AG]](http://www.learn3dsoftware.com/LW_ADV_UV_Vol_1_400pix_Product_Shot_1.jpg)
Lightwave 9.6-Advanced UV Mapping & Texturing-Vol.#1 [AG]
Video Contents of Volume 1
* Advanced UV Unwrapping Techniques
* Advanced use of the PLG UV Tools-A FREE Tool for Download.
* Advanced UV EDITING
* UV Island Creation
* How to take Multiple UV Islands and Create 1 Giant UV Island.
* How to fix OVERLAPPING UV's using basic tools like the Drag and Move Tool.
* How to Unwrap UV's Objects/Meshes without have to break it into different layers.
* How to Unwrap UV's with the help of the Surface Editor and Create Parts tool.
* How to break down your model into logical parts for easier UV Unwrapping.
* Where to logically create UV Seams when UV Unwrapping.
* How to Apply Checkerboard Patterns
* How to Edit your UV Map using Checkerboard Patterns.
* Understanding UV Space in relation to Image Map/Pixel space.
* And much much more.
Running Time: Approx. 6.5 Hours
High Quality Quicktime Files for clean and sharp viewing on your Computer Monitor.
$29.00 USD - Instant DownloadPrice: $29.00
![LightWave 9 - Surfacing for Beginners- Volume #1- Essentials [AG]](/wp-content/uploads/2010/05/Surfacing_for_Beginners_Vol_1_MAIN.jpg)
A detailed introduction to Lightwave's powerful Surface Editor.
* Learn how to name surfaces/polygons.
* Learn how to load preset surfaces.
* Learn how to make your own surfaces and save them as surface preset.
* Learn how to make a save all your own pre-made surfaces in their own special directory.
* Discover Lightwave's collection of built-in pre-made/pre-set surfaces like: rock, metal, glass, chrome, nature, organic.....and tons more!!!
* Learn how to edit a surface preset made and create whole new surface based on the original.
* Learn how to rename surfaces.
* Learn how to preview surfaces in the Surface Editor.
* Learn how to use the search command to find textures quickly.
* Introduction to the Viper Preview Renderer.
Running Time: 2 Hours-Approx.
Instant Download
Price: $19.00