


Adam Gibson
Adam Gibson is a 3D artist from Bowmanville, Ontario, Canada. He’s been doing freelance work using Lightwave 3D and various other 3D/2D applications since the early Commodore Amiga/Video-Toaster days. He enjoys doing creature and sci-fi style modeling/texturing projects and has a passion for digital compositing using blue/green screens.
Adam is also a 3 x time published book author and has earned a Masters Degree in Taekwondo under the legendary Bill “Superfoot” Wallace-Undefeated World Kickboxing Champion.
Please feel free to contact Adam directly using his email adam@liberty3d.com
or Skype id : adamgibson2
![3D Coat 4.5- Volume #20- PBR & Smart Materials III [AG]](https://www.liberty3d.com/wp-content/uploads/2018/11/3DC_4_Vol_20_PBR_SM_III_Product_Box_400pix.jpg)
3D Coat 4.5- Volume #20- PBR & Smart Materials III [AG]
In this twentieth video volume of 24 volumes 3D Instructor Adam Gibson introduces the 3D student to the exciting new Smart Materials in 3D Coat 4.5. Learn to texture your models faster than ever before!! Super powerful for detailing and dirtying up vehicles, machines, robots, spaceships, architecture and list goes on and on!! Learn how to modify and create your own massive library of Smart Materials for your own projects!! Table of Contents for Volume #20: Chapter 1- Intro, Chapter 2- How to Create a Smart Material from Scratch, Chapter 3- Roughness and Metalness Parameters, Chapter 4- Export: Roughness/Metalness (Also Ambient Occlusion, Curvature, and Color Maps), Chapter 5- Export: Specular/Metalness (Also Ambient Occlusion, Curvature, and Color Maps), Chapter 6- Export: Gloss/Color Specular (Non-PBR Output), Chapter 7- Lightwave Import and Image Map Set-Up, Chapter 8- AO (Ambient Occlusion) Layer Export, Chapter 9- Final. Running Time: 1 hr. 49 mins., High Quality (Screen-Res 1920 x 1080 pixels) , Video Format: MP4 (.mp4), Level: Beginner.Price: $19.00
![3D Coat 4.5- Volume #19- PBR & Smart Materials II [AG]](https://www.liberty3d.com/wp-content/uploads/2018/11/3DC_4_Vol_19_PBR_SM_II_Product_Shot_400pix.jpg)
3D Coat 4.5- Volume #19- PBR & Smart Materials II [AG]
In this nineteenth video volume of 24 volumes 3D Instructor Adam Gibson introduces the 3D student to the exciting new Smart Materials in 3D Coat 4.5. Learn to texture your models faster than ever before!! Super powerful for detailing and dirtying up vehicles, machines, robots, spaceships, architecture and list goes on and on!! Learn how to modify and create your own massive library of Smart Materials for your own projects!! In this volume some of the topics covered are: Transparency Smart Matierials (Dust, Dirt, Rust, Scratches), Paint Layer Settings (Layer Opacity, Blend Modes), Fill Brush Modes for Smart Materials (Layer, Surface Material, Object). Table of Contents for Volume #19: Chapter 1- Intro, Chapter 2- Transparency Smart Materials (Part One), Chapter 3- Transparency Smart Materials (Part Two), Chapter 4- Combining Transparency Smart Materials and Paint Layer Settings, Chapter 5- How to Name UVs, Surfaces, and Layers in Lightwave for use with the Fill Tool, Chapter 6- How Lightwave Attribute Naming Converts to 3D Coat, Chapter 7- Fill Tool (Layer Mode), Chapter 8- Fill Tool (Surface Material Mode), Chapter 9- Fill Tool (Object Mode), Chapter 10- How to Hide, Mesh Items by Surface Materials or Paint Object (Layers), Chapter 11- Final. Running Time: 1 hr. 49 mins., High Quality (Screen-Res 1920 x 1080 pixels) , Video Format: MP4 (.mp4), Level: Beginner.Price: $19.00
![3D Coat 4.5- Volume #18- PBR & Smart Materials I [AG]](https://www.liberty3d.com/wp-content/uploads/2018/11/3DC_4_Vol_18_PBR_SM_I_Product_Shot_400pix.jpg)
3D Coat 4.5- Volume #18- PBR & Smart Materials I [AG]
In this eighteenth video volume of 24 volumes 3D Instructor Adam Gibson introduces the 3D student to the exciting new Smart Materials in 3D Coat 4.5. Learn to texture your models faster than ever before!! Super powerful for detailing and dirtying up vehicles, machines, robots, spaceships, architecture and list goes on and on!! Learn how to modify and create your own massive library of Smart Materials for your own projects!! Table of Contents for Volume #18: Chapter 1- Intro, Chapter 2- What is PBR (Physically Based Rendering) ?, Chapter 3- Evironment Maps Introduction, Chapter 4- How to Import an Evironment Map, Chapter 5- Evironment Map Controls (Blur, Angle, Intensity), Chapter 6- What are Smart Materials?, Chapter 7- Smart Material Preview Window, Chapter 8- How to Paint and Erase Smart Materials, Chapter 9- Smart Material Editor Introduction, Chapter 10- How to Create a Smart Material Preset, Chapter 11- Final. Running Time: 1 hr. 42 mins., High Quality (Screen-Res 1920 x 1080 pixels) , Video Format: MP4 (.mp4), Level: Beginner.Price: $19.00
![Substance Painter for Lightwave Users-Vol.#5-Smart Materials II [AG]](https://www.liberty3d.com/wp-content/uploads/2018/10/Substance_Painter_for_LW_Users_Vol_5_400pix.jpg)
Substance Painter for Lightwave Users-Vol.#5-Smart Materials II [AG]
What is Substance Painter? Substance Painter is an extremely powerful 3D Painting Software package that is becoming very popular in the 3D Industry. It comes fully loaded with eye-popping materials to paint on your 3D models. Metals, Stone, Rock, Fabric, Wood and more. It also has a huge collection of tools and brushes to create weathering, dirt, scratches, corrosion, rust, skin, lizard scale detail (and more) with great speed and quality. A must have piece of software for those who want to add huge amounts of detail to their 3d Models. Table of Contents for Volume #5: Chapter 1- Intro, Chapter 2- Image Viewer Settings Vs. Final Map Output, Chapter 3- Height Force Setting Vs. Normal Map Amplitude Setting in Lightwave, Chapter 4- How Environment Map Lighting Affects Texture's Appearence, Chapter 5- Image World in Lightwave, Chapter 6- Textured Evironment in Lightwave and Light Tweaking, Chapter 7- How To Import Environment Maps into the Substance Painter Shelf, Chapter 8- Tips onHow to Figure Our Smart Material Controls, Chapter 9- Weapon Metal (Smart Material Preset), Chapter 10- Glossy Plastic (Smart Material Preset), Chapter 11- Monster Skin (Smart Material Preset), Chapter 12- Sand (Smart Material Preset), Chapter 13- Where Substance Painter Stores Newly Created Smart Materials, Chapter 14- Final. Running Time: 2 hrs. 9 mins., High Quality (Screen-Res 1920 x 1080 pixels), Video Format: MP4 (.mp4), Level: Beginner.Price: $19.00
![Substance Painter for Lightwave Users-Vol.#4-Smart Materials [AG]](https://www.liberty3d.com/wp-content/uploads/2018/10/Substance_Painter_for_LW_Users_Vol_4_400pix.jpg)
Substance Painter for Lightwave Users-Vol.#4-Smart Materials [AG]
What is Substance Painter? Substance Painter is an extremely powerful 3D Painting Software package that is becoming very popular in the 3D Industry. It comes fully loaded with eye-popping materials to paint on your 3D models. Metals, Stone, Rock, Fabric, Wood and more. It also has a huge collection of tools and brushes to create weathering, dirt, scratches, corrosion, rust, skin, lizard scale detail (and more) with great speed and quality. A must have piece of software for those who want to add huge amounts of detail to their 3d Models. Table of Contents for Volume #4: Chapter 1- Intro, Chapter 2- What are Smart Materials and Input Maps?, Chapter 3- How to Bake Input Maps (Ambient Occlusion, World Space Normal, and more), Chapter 4- How to Add a Smart Material and Adjusting the Smart Material Settings, Chapter 5- Result of Not Having Input Maps Explained, Chapter 6- How to Import a Premade Normal Map from Other Software Packages, Chapter 7- Modifying a Preset to Create a New Preset, Chapter 8- How to Create a Preset Preview Image in Photoshop, Chapter 9- How to Build a Smart Material from Scratch, Chapter 10- Final. Running Time: 2 hrs. 14 mins., High Quality (Screen-Res 1920 x 1080 pixels) , Video Format: MP4 (.mp4). Level: Beginner.Price: $19.00
![Substance Painter for Lightwave Users-Vol.#3- Lightwave Import & Emissive Maps [AG]](https://www.liberty3d.com/wp-content/uploads/2018/10/Substance_Painter_for_LW_Users_Vol_3_Product_Box_400pix.jpg)
Substance Painter for Lightwave Users-Vol.#3- Lightwave Import & Emissive Maps [AG]
What is Substance Painter? Substance Painter is an extremely powerful 3D Painting Software package that is becoming very popular in the 3D Industry. It comes fully loaded with eye-popping materials to paint on your 3D models. Metals, Stone, Rock, Fabric, Wood and more. It also has a huge collection of tools and brushes to create weathering, dirt, scratches, corrosion, rust, skin, emissive-glow, lizard scale detail (and more) with great speed and quality. A must have piece of software for those who want to add huge amounts of detail to their 3d Models. Table of Contents for Volume #3: Chapter 1- Intro, Chapter 2- Texture Set-Up in Lightwave (Color, Specular, Gloss, Normal, Luminosity/Emissive), Chapter 3- Emissive Map Glow Options (Radiosity and Corona Image Filter Set-Up), Chapter 4- How to Create Emissive Channels in Substance Painter (Layer Settings), Chapter 5- Emissive Alpha Brushes, Chapter 6- Emissive Color Image Stamp Brush, Chapter 7- Final. Running Time: 2 hrs. 24 mins., High Quality (Screen-Res 1920 x 1080 pixels), Video Format: MP4 (.mp4), Level: Beginner.Price: $19.00
![DAZ 3D Model Creation- The Dark Art [AG]](https://www.liberty3d.com/wp-content/uploads/2018/10/DAZ_3D_Model_Creation_Product_Box_400pix.jpg)
Would you like to Earn Money from Selling 3D Models on the Internet? If so, this video course is designed to teach you how to do just that. One of the largest 3D content market places on the internet is www.daz3d.com. DAZ Studio is a "FREE" piece of 3D Software that you can download from DAZ3D.com that is used by thousands and thousands of people all over the world.
Sounds complicated? Well don't worry in this course we will take you step-by-step on: Getting started with DAZ Studio UI (User Interface), Optimizing/Exporting Your Models for Import into DAZ, Converting/Adjusting your Models in DAZ Studio, Submission Guidelines, Dealing with the tricky DAZ File/Runtime(Texture) Folder Structure, Marketing and more!!
Although this course is designed for anyone who wishes to create models for DAZ3D.com we will be using Lightwave 3D as our starting point demonstrate model/optimization and object file export. But once again the principles shown can be used in all other software packages to get your 3D models into DAZ Studio.
*Please Note: Although this video tutorial is meant as a "Stand-Alone" Product it is also considered as Volume #5 of the "DDO for Lightwave Users" Series. Converting models and textures over to DAZ Studio for the purpose of Selling them on DAZ3D.com is part of the DDO series.
Table of Contents for DAZ 3D Model Creation
Chapter 1- Intro, Chapter 2- Basic DAZ Publishing Info Orientation, Chapter 3- DAZ UI (User Interface) Layouts and Menu Tabs, Chapter 4- IPR (Interactive Progressive Rendering) Image Preview, View Modes, Add Camera, Chapter 5- Draw Style Options Menu and Deleting Cameras, Chapter 6- Navigating View Modes (Pan, Orbit, Dolly Zoom, Frame Selection), Chapter 7- Item Selection and Transforms (Translation, Rotation, Scale), Chapter 8- Multiple Item Selection, Item Groups, Parenting Items, Chapter 9- Surface Selection Tool, Chapter 10- Item Duplication and Node Instances, Chapter 11- Create Primitives, Surfacing Primitives, Grouping Primitives, Chapter 12- Lights and Glowing Surfaces (Ambient Color and Strength), Chapter 13- Diffuse Color Vs Ambient Color (Glow Issue), Chapter 14- Rendering Product Images, Chapter 15- DAZ Content Library and Submission File Folder Structure, Chapter 16- Mesh Optimization (Tips on Triangles, Quads, Non-Planer Polys, UVs, and More), Chapter 17- FBX Export from Lightwave 3D and Proper UV Islands, Chapter 18- Import FBX into DAZ and Tweaking Surfaces, Chapter 19- Creating a Product Base Directory for your Files, Chapter 20- Runtime Texture Folder Structure Set-Up, Chapter 21- Setting Your Author/Artist Name in the Preferences Menu, Chapter 22- Props/Environments and Materials Folder Structure Creation, Chapter 23- Saving Prop Assets with Correct File Path and Settings, Chapter 24- Reassigning Texture File Paths to the Runtime Texture Folder, Chapter 25- Creating a Material Preset in the Materials Folder, Chapter 26- Zipping Up Your Product Folder and DAZ PASS Website, Chapter 27- Saving Multiple Item Products, Chapter 28- Helpful Websites for Selling Products on the Internet. Chapter 29- Final. Running Time: 7 hrs. 0 mins., High Quality (Screen-Res 1920 x 1080 pixels) . Video Format: MP4 (.mp4), Level: Beginner.
Price: $29.00
![MODO 701 Modeling Tools-Volume #9- UV Mapping a Human [AG]](http://www.learn3dsoftware.com/Modo_701_Modeling_Tools_Vol_9_Product_Shot_400pix.jpg)
MODO 701 Modeling Tools-Volume #9- UV Mapping a Human [AG]
In this ninth volume of 12 volumes 3D Instructor Adam Gibson demonstrates how to get started using Modo 701's UV Mapping tools. This course starts off familiarizing the student with UV mapping basics/concepts and the Modo User Interface (UI). Then to finish things off a fully detailed Project Session commences where a Human Female model is UV Unwrapped and the UV Map is edited using Modo's powerful UV Editing Tools. A great tutorial for beginners to start learning how UV Map 3D models for Surfacing and Texturing. Table of Contents for Volume #9- UV Mapping a Human: Chapter 1- Intro, Chapter 2- UV Orientation in Modo, Chapter 3- Adding an Image to Paint on with a UV Map, Chapter 4- Adding Premade Images to Paint on with a UV Map, Chapter 5- UV Unwrap by Edge Selection, Chapter 6- UV Unwrap by Material/Surface, Chapter 7- Blocking Out Initial UV Islands on Human Model, Chapter 8- UV Seam Edge Selection on Human Model, Chapter 9- UV Unwrap Test and UV Check, Chapter 10- UV Unwrap Tool Settings Fixes, Chapter 11- UV Map Editing and Final. Running Time: 4 hrs. 18 mins. Resolution: 1920 x 1080 pixels, Video Format: MP4 Video (.mp4), Level: Beginner.Price: $19.00
![ZBrush Bootcamp- Volume #7- Lightwave Integration III- GoZ Concepts [AG]](https://www.liberty3d.com/wp-content/uploads/2018/10/ZB_2014_Bootcamp_Series_Product_Box_Vol_7_400pix.jpg)
ZBrush Bootcamp- Volume #7- Lightwave Integration III- GoZ Concepts [AG]
In this seventh video volume of 12 volumes 3D Instructor Adam Gibson introduces the beginner 3D student how to get up and started quickly with ZBrush 4R7's GoZ Plugin. Learn how to import/export Multi-Layered Meshes and Subtools between ZBrush and Lightwave. Table of Contents for Volume #7: Chapter 1- Intro, Chapter 2- How to Install the GoZ Plugin, Chapter 3- Lightwave Layers Vs ZBrush Subtools, Chapter 4- How to Convert Multiple Lightwave Layers to Multiple Subtools in ZBrush, Chapter 5- Splitting Subtools with Masking, Chapter 6- Exporting Individual Subtools to Lightwave Using GoZ, Chapter 7- Export All Subtools Button Using GoZ, Chapter 8- Export Visible Subtools Button Using GoZ, Chapter 9- GoZ Export to Layout, Chapter 10- Final. Running Time: 1 hrs. 39 mins., High Quality (Screen-Res 1920 x 1080 pixels) , Video Format: MP4 (.mp4), Level: Beginner.Price: $19.00
![Substance Painter for Lightwave Users- Volume #2- Getting Started II [AG]](https://www.liberty3d.com/wp-content/uploads/2018/10/Substance_Painter_for_LW_Users_Vol_2_400pix.jpg)
Substance Painter for Lightwave Users- Volume #2- Getting Started II [AG]
What is Substance Painter? Substance Painter is an extremely powerful 3D Painting Software package that is becoming very popular in the 3D Industry. It comes fully loaded with eye-popping materials to paint on your 3D models. Metals, Stone, Rock, Fabric, Wood and more. It also has a huge collection of tools and brushes to create weathering, dirt, scratches, corrosion, rust, skin, lizard scale detail (and more) with great speed and quality. A must have piece of software for those who want to add huge amounts of detail to their 3d Models. Table of Contents for Volume #2: Chapter 1- Intro, Chapter 2- Lazy Mouse, Chapter 3- Bump Material Mode and Brush Settings, Chapter 4- Particle Brush Introduction, Chapter 5- Tool Presets, Chapter 6- Creating your own Brush and Material Presets, Chapter 7- Exporting Textures from Substance Painter to Use in Lightwave and Final. Running Time: 1 hrs. 39 mins., High Quality (Screen-Res 1920 x 1080 pixels) , Video Format: MP4 (.mp4), Level: Beginner.Price: $19.00
![Substance Painter for Lightwave Users- Volume #1- Getting Started I [AG]](https://www.liberty3d.com/wp-content/uploads/2018/10/Substance_Painter_for_LW_Users_Vol_1_Product_Box_400pix.jpg)
Substance Painter for Lightwave Users- Volume #1- Getting Started I [AG]
What is Substance Painter? Substance Painter is an extremely powerful 3D Painting Software package that is becoming very popular in the 3D Industry. It comes fully loaded with eye-popping materials to paint on your 3D models. Metals, Stone, Rock, Fabric, Wood and more. It also has a huge collection of tools and brushes to create weathering, dirt, scratches, corrosion, rust, skin, lizard scale detail (and more) with great speed and quality. A must have piece of software for those who want to add huge amounts of detail to their 3d Models. Table of Contents for Volume #1, Chapter 1- Intro, Chapter 2- What is Substance Painter?, Chapter 3- User Interface (UI) Orientation, Chapter 4- 3D Viewer Navigation (Rotate, Move, and Zoom-In/Out), Chapter 5- 2D Viewer Navigation (Rotate, Move, Zoom-In/Out, Show Entire Mesh), Chapter 6- How to Rotate the Environment Map, Chapter 7- Viewer Setting Modes, Chapter 8- Mesh Normal View, Chapter 9- Environment Map Settings, Chapter 10- How to Open and Close a Project, Chapter 11- Preparing Models in Lightwave, Chapter 12- Importing Box Primitive into Substance Painter, Chapter 13- Correcting the Smoothing Issue for the Ball Primitive, Chapter 14- Correcting NGons in your Models, Chapter 15- Correcting Non-Planar Polygons in your Models, Chapter 16- Painting Introduction (Layers and Fill Layers), Chapter 17- Final. Running Time: 2 hrs. 7 mins., High Quality (Screen-Res 1920 x 1080 pixels), Video Format: MP4 (.mp4), Level: Beginner.Price: $19.00
![DDO for Lightwave Users- Volume #4- Getting Started IV [AG]](https://www.liberty3d.com/wp-content/uploads/2018/10/dDo_for_Lightwave_Users_Vol_4_Product_Box_400pix.jpg)
DDO for Lightwave Users- Volume #4- Getting Started IV [AG]
What is dDo? dDo is an extremely powerful 3D texturing plugin for Adobe Photoshop used by top Video Game Companies and Movie Studios around the world. Imagine being able to detail your Sci-Fi and Industrial style models with adjustable rust, scratches, corrosion, water damage, dirt, leakage, dust, mud spattering, paint wear...and much more...all within a few seconds instead of spending hours and hours or weeks painting and tweaking texture maps by hand. The software also comes with a library of surfacing presets and the ability to create and save out your own. In this course we will step-by-step show you how to get up and running fast using this amazing and powerful tool that you get at the following website: www.quixel.se. It's very affordable. Only $50 US Funds and can do amazing things. In this fourth volume we'll be demonstrating how to create amazing "input normal maps" with another external software package called "NDO" which is part of the Quixel Suite. Techniques on how to create Sci-Fi Detail (Nurnies, Panels and Plates) will be demonstrated using NDO's unique normal map creation tools. In Volumes #5 to #12 of the course we will be going through a wide variety of tools in dDo, doing some basic and advanced project work, modeling & uv mapping(with dDo in mind), and how to create your own 3D models to sell on the internet on websites like Daz3D.com and Turbosquid, and more!! Table of Contents for Volume #4: Chapter 1- Intro, Chapter 2- Input Map Creation, Chapter 3- NDO Introduction (Part One), Chapter 4- NDO Introduction (Part Two), Chapter 5- NDO Introduction (Part Three), Chapter 6- NDO Introduction (Part Four), Chapter 7- Wall Panel Creation (Part One), Chapter 8- Wall Panel Creation (Part Two), Chapter 9- Wall Panel Creation (Part Three), Chapter 10- Wall Panel Test in DDO, Chapter 11- Export Final Baked Images, Chapter 12- Testing Images in Lightwave, Chapter 13- Final. Running Time: 2 hrs. 31 mins., High Quality (Screen-Res 1920 x 1080 pixels) , Video Format: MP4 (.mp4), Level: Beginner.Price: $19.00
![DDO for Lightwave Users- Volume #3- Getting Started III [AG]](https://www.liberty3d.com/wp-content/uploads/2018/10/dDo_for_Lightwave_Users_Vol_3_Product_Box_400pix.jpg)
DDO for Lightwave Users- Volume #3- Getting Started III [AG]
What is dDo? dDo is an extemely powerful 3D texturing plugin for Adobe Photoshop used by top Video Game Companies and Movie Studios around the world. Imagine being able to detail your Sci-Fi and Industrial style models with adjustable rust, scratches, corrosion, water damage, dirt, leakage, dust, mud spattering, paint wear...and much more...all within a few seconds instead of spending hours and hours or weeks painting and tweaking texture maps by hand. The software also comes with a library of surfacing presets and the ability to create and save out your own. In this course we will step-by-step show you how to get up and running fast using this amazing and powerful tool that you get at the following website: www.quixel.se. It's very affordable. Only $50 US Funds and can do amazing things. In this third volume we'll be demonstrating how to create amazing "input normal maps" with an external software package called "3D Coat". Techniques on how to create Sci-Fi Detail (Nurnies, Panels and Plates) will be demonstrated using 3D Coats powerful paint tools. In Volumes #4 to #12 of the course we will be going through a wide variety of tools in dDo, doing some basic and advanced project work, modeling & uv mapping (with dDo in mind), introduction to NDO (Normal Mapping Plugin that can be used with DDO, and how to create your own 3D models to sell on the internet on websites like Daz3D.com and Turbosquid, and more!! Table of Contents for Volume #3: Chapter 1- Intro, Chapter 2- Creating Input Normal Maps Using Other Software Packages, Chapter 3- Creating Normal Maps in 3D Coat for DDO Introduction, Chapter 4- Painting Normal Maps in 3D Coat for DDO (Part One), Chapter 5- Painting Normal Maps in 3D Coat for DDO (Part Two), Chapter 6- Painting Normal Maps in 3D Coat for DDO (Part Three), Chapter 7- Painting Normal Maps in 3D Coat for DDO (Part Four), Chapter 8- Exporting Normal Map from 3D Coat, Chapter 9- Exporting Normal Map from 3D Coat, Chapter 10- Loading Input Maps in DDO, Chapter 11- Testing Normal Map with Smart Textures, Chapter 12- Normal Map Error, Chapter 13- Normal Map Input Fix, Chapter 14- Exporting Textures in DDO, Chapter 15- Testing Final Textures in Lightwave, Chapter 16- Final. Running Time: 3 hrs. 0 mins., High Quality (Screen-Res 1920 x 1080 pixels), Video Format: MP4 (.mp4), Level: Beginner.Price: $19.00
![DDO for Lightwave Users- Volume #2- Getting Started II [AG]](https://www.liberty3d.com/wp-content/uploads/2018/10/dDo_for_Lightwave_Users_Vol_2_Product_Shot_400pix.jpg)
DDO for Lightwave Users- Volume #2- Getting Started II [AG]
What is dDo? dDo is an extemely powerful 3D texturing plugin for Adobe Photoshop used by top Video Game Companies and Movie Studios around the world. Imagine being able to detail your Sci-Fi and Industrial style models with adjustable rust, scratches, corrosion, water damage, dirt, leakage, dust, mud spattering, paint wear...and much more...all within a few seconds instead of spending hours and hours or weeks painting and tweaking texture maps by hand. The software also comes with a library of surfacing presets and the ability to create and save out your own. In this course we will step-by-step show you how to get up and running fast using this amazing and powerful tool that you get at the following website: www.quixel.se. It's very affordable. Only $50 US Funds and can do amazing things. In this second volume we'll continue to cover what's involved to set-up, creating input maps (Color ID Maps, Normal Maps, etc) and further your understanding of the interface and get you started making awesome textures for your model for use in Lightwave and other pieces of 3D software. In Volumes #3 to #12 of the course we will be going through a wide variety of tools in dDo, doing some basic and advanced project work, modeling & uv mapping(with dDo in mind), introduction to NDO (Normal Mapping Plugin that can be used with DDO, and how to create your own 3D models to sell on the internet on websites like Daz3D.com and Turbosquid, and more!! Table of Contents for Volume #2: Chapter 1- Intro, Chapter 2- Assigning Polygon Colors to Create a Color ID Map, Chapter 3- Using Surface Baker in Layout to Bake Color ID Map, Chapter 4- Saving Extra File Formats of Color ID Map, Chapter 5- Creating Other Input Maps in XNormal, Chapter 6- Baking a Curvature Map in XNormal, Chapter 7- Multiple Surfaces Gotcha, Chapter 8- Select Surfaces in DDO, Chapter 9- ReBaking the Color ID Map with Anti-Aliasing Fix, Chapter 10- Import Corrected Color ID Map, Chapter 11- Baking Out Image Maps in DDO, Chapter 12- Testing Baked Image Maps in Lightwave, Chapter 13- How to Create a Color ID Map in a 3D Paint Program (3D Coat), Chapter 14- Testing the Color ID Map Created in 3D Coat, Chapter 15- Final. Running Time: 2 hrs. 17 mins., High Quality (Screen-Res 1920 x 1080 pixels) , Video Format: MP4 (.mp4), Level: Beginner.Price: $19.00
![DDO for Lightwave Users- Volume #1- Getting Started I [AG]](https://www.liberty3d.com/wp-content/uploads/2018/10/dDo_for_Lightwave_Users_Vol_1_Product_Shot_400pix.jpg)
DDO for Lightwave Users- Volume #1- Getting Started I [AG]
What is dDo? dDo is an extemely powerful 3D texturing plugin for Adobe Photoshop used by top Video Game Companies and Movie Studios around the world. Imagine being able to detail your Sci-Fi and Industrial style models with adjustable rust, scratches, corrosion, water damage, dirt, leakage, dust, mud spattering, paint wear...and much more...all within a few seconds instead of spending hours and hours or weeks painting and tweaking texture maps by hand. The software also comes with a library of surfacing presets and the ability to create and save out your own. In this course we will step-by-step show you how to get up and running fast using this amazing and powerful tool that you get at the following website: www.quixel.se. It's very affordable. Only $50 US Funds and can do amazing things. In this first volume we'll be covering what's involved to set-up and optimize you meshes so that they are ready for loading into dDo and also take you through the interface and get you started making awesome textures for your model for use in Lightwave and other pieces of 3D software.
In Volumes #2 to #12 of the course we will be going through a wide variety of tools in dDo, doing some basic and advanced project work, modeling & uv mapping(with dDo in mind), introduction to NDO (Normal Mapping Plugin that can be used with DDO, and how to create your own 3D models to sell on the internet on websites like Daz3D.com and Turbosquid, and more!! Table of Contents for Volume #1: Chapter 1- Intro, Chapter 2- What is DDO?, Chapter 3- DDO Workflow/Pipeline for Lightwave, Chapter 4- Where to Download XNormal Software for Free, Chapter 5- Baking Input Maps in XNormal: Tangent Space Normal Map, Chapter 6- Baking Input Maps in XNormal: Object Space Normal Map, Chapter 7- Baking Input Maps in XNormal: Ambient Occlusion Map, Chapter 8- Loading Input Map and Object File into DDO for Texturing, Chapter 9- How to Add a Material , Chapter 10- How to Add a Smart Material and Export your Baked Maps, Chapter 11- Testing Baked Maps in Lightwave, Chapter 12- How to Create Your Own Custom "Smart Materials", Chapter 13- Re-Using a Smart Material Preset on another Model, Chapter 14-Final. Running Time: 2 hrs. 36 mins. High Quality (Screen-Res 1920 x 1080 pixels) , Video Format: MP4 (.mp4), Level: Beginner.Price: $19.00
![3D Coat 4 Mega-Bundle (17 Volumes) [AG]](https://www.liberty3d.com/wp-content/uploads/2014/10/3D_Coat_4_Mega_Bundle_001.jpg)
3D Coat 4 Mega-Bundle (17 Volumes) [AG]
This 3D Coat 4 Mega-Bundle contains 17 volumes of training covering everything you need to get started and productive using this powerful piece of software. Covers: Painting Color, Normal/Displacement Maps, Specular Maps, Import/Export to Lightwave 3D, Voxel Sculpting Tools, Alpha Brushes, Masking Tools, Texture Baking, Retopology Tools, Autoretopology and more!!Price: $129.00
![3D Coat 4.1- Volume #17-Texture Baking II [AG]](https://www.liberty3d.com/wp-content/uploads/2018/11/3DC_4_Vol_17_Texture_Baking_II_Product_Shot_400pix.jpg)
3D Coat 4.1- Volume #17-Texture Baking II [AG]
In this seventeenth video volume of 24 volumes 3D Instructor Adam Gibson introduces the 3D student to 3D Coat's powerful texture baking tools. Covers: Baking Voxel Displacement Maps, Baking Scan-Depth (Inner-Outer) Shell, Baking Voxel Shader Attributes (Color, Normal, and Specular Maps), Baked Layers in the Paint Room, Lightwave Import/Setup, and Lightwave Displacement Node. Table of Contents for Volume #17: Chapter 1- Intro, Chapter 2- Baking Voxel Shaders (Part One), Chapter 3- Baking Voxel Shaders (Part Two), Chapter 4- Exporting the Mesh and Image Maps from 3D Coat, Chapter 5- Importing Baked Voxel Maps into Lightwave, Chapter 6- Adjust Ambient Intensity, Chapter 7- Baking the Voxel Displacement Map (Part One), Chapter 8- Baking the Voxel Displacement Map (Part Two), Chapter 9- Importing the Voxel Displacement Map into Lightwave, Chapter 10- Adjusting the Displacement Node in Lightwave, Chapter 11- Final. Running Time: 1 hr. 40 mins., High Quality (Screen-Res 1920 x 1080 pixels), Video Format: MP4 (.mp4), Level: Beginner.Price: $19.00
![3D Coat 4- Volume #16- Texture Baking I [AG]](https://www.liberty3d.com/wp-content/uploads/2018/11/3DC_4_Vol_16_Texture_Baking_I_Product_Shot_400pix.jpg)
3D Coat 4- Volume #16- Texture Baking I [AG]
In this sixteenth video volume of 24 volumes 3D Instructor Adam Gibson introduces the 3D student to 3D Coat's powerful texture baking tools. Learn how to Bake Voxel Color, Voxel Displacement and Voxel Ambient Occlusion Data to your models. Table of Contents for Volume #16: Chapter 1- Intro, Chapter 2- Voxel Detail to Normal Map and Ambient Occlusion Map, Chapter 3- Export AO Map, Chapter 4- Import Model and Normal Map into Lightwave, Chapter 5- Color Baking (Part One), Chapter 6- Color Baking (Part Two), Chapter 7- Final. Running Time: 1 hrs. 26 mins., High Quality (Screen-Res 1920 x 1080 pixels) , Video Format: MP4 (.mp4), Level: Beginner.Price: $19.00
![Modo 701- Modeling Tools- Volume #8- Topology II [AG]](http://www.learn3dsoftware.com/Modo_701_Modeling_Tools_Vol_8_Product_Shot_400pix.jpg)
Modo 701- Modeling Tools- Volume #8- Topology II [AG]
In this eighth volume of 12 volumes 3D Instructor Adam Gibson demonstrates how to get started using Modo 701's powerful Topology tools. Retopology is a very powerful method to generate clean and optimized meshes for any piece of 3D software and work pipeline. Cleaner meshes means: 1) Less UV Stretching/Errors, Cleaner Texture Maps, Characters that are easier to Rig and Animate (better deformations), and less render errors/artifacts.
This project based tutorial will guide through the techniques and concepts of retopologizing your own 3D models by demonstrating on a Parasaurolophus Dinosaur.
This series is great for beginner 3D students or if you new to Modo and want to learn your way around Modo quickly.
Table of Contents for Modeling Tools Volume #8
Chapter 1- Intro
Chapter 2- Retopology Concepts
Chapter 3- Background Mesh Set-Up
Chapter 4- Eye Socket Loop Creation
Chapter 5- Eye Area Creation
Chapter 6- Ear Socket Area Creation
Chapter 7- Nostril Area Creation
Chapter 8- Initial Mouth Loop Creation
Chapter 9- Connect Upper Mouth and Nostril Retopology Sections
Chapter 10- Lower Jaw Creation
Chapter 11- Connect Mouth and Eye, Chapter 12- Connect Eye and Ear, Chapter 13- Lower Head Creation, Chapter 14- Horn Base Loop Creation, Chapter 15- Back of Head Creation, Chapter 16- Horn Creation, Chapter 17- Neck Creation, Chapter 18- Mirror Head and Final. Running Time: 3 hrs. 2 mins., Resolution: 1920 x 1080 pixels, Video Format: MP4 Video (.mp4), Level: Beginner.Price: $19.00
![3D Coat 4- Volume #15- Photo Painting & Masking Tools [AG]](https://www.liberty3d.com/wp-content/uploads/2018/11/3DC_4_Vol_15_Photo_and_Mask_Paint_400pix.jpg)
3D Coat 4- Volume #15- Photo Painting & Masking Tools [AG]
In this fifteenth video volume of 24 volumes 3D Instructor Adam Gibson introduces the 3D student to 3D Coat's powerful photo painting and masking tools. Table of Contents for Volume #15: Chapter 1- Intro, Chapter 2- Model and Image Set-Up, Chapter 3- Image Preview Options (Part One), Chapter 4- Image Preview Options (Part Two), Chapter 5- Image Preview Options (Part Three), Chapter 6- Distort Image Mode, Chapter 7- Edit Material Panel, Chapter 8- Masking Part One, Chapter 9- Masking Part Two, Image Gizmo, and Final. Running Time: 2 hrs. 5 mins., High Quality (Screen-Res 1920 x 1080 pixels) , Video Format: MP4 (.mp4), Level: Beginner.Price: $19.00
![3D Coat 4- Volume #14- Auto-Retopology Secrets [AG]](https://www.liberty3d.com/wp-content/uploads/2018/11/3DC_4_Vol_14_Autoretopo_Secrets_Product_Shot_400pix.jpg)
3D Coat 4- Volume #14- Auto-Retopology Secrets [AG]
In this fourteenth video volume of 24 volumes 3D Instructor Adam Gibson introduces the 3D student to 3D Coat's powerful Auto-Retopology Tools. So why is Auto-Retopology a needed process? The best 3D texture artists in the world know that in order to have flawless textures you need near perfect UV maps. The problem is that with Organic Sub-D models a process called "Retopology" is usually needed to do that. But the other problem that lies within that is that "Manual Retopology" is just as time consuming as UV Mapping, if not more in some cases. So this is where "Auto-Retopology" comes in to help speed up the process. Table of Contents for Volume #14: Chapter 1- Intro, Chapter 2- What is Auto-Retopology?, Chapter 3- How to Access the Auto-Retopology Wizard for Polygonal and Voxel Objects (Part One), Chapter 4- How to Access the Auto-Retopology Wizard for Polygonal and Voxel Objects (Part Two), Chapter 5- Poly Density Masking, Chapter 6- Guide Strokes for Redirecting Poly Flow, Chapter 7- How to Export your Mesh to Other Software and Clean-Up, Chapter 8- Hard Surface Hard Edge Auto-Retopology, Chapter 9- Applying Auto-Retopology to a Parasaurolophus Dinosaur, Chapter 10- Final. Running Time: 2hrs. 10 mins., High Quality (Screen-Res 1920 x 1080 pixels), Video Format: MP4 (.mp4), Level: Beginner.Price: $19.00
![3D Coat 4- Volume #13-Dinosaur Detailing I [AG]](https://www.liberty3d.com/wp-content/uploads/2018/11/3DC_4_Vol_13_Dinosaur_Detailing_I_Product_Box_400pix.jpg)
3D Coat 4- Volume #13-Dinosaur Detailing I [AG]
In this thirteenth video volume of 24 volumes 3D Instructor Adam Gibson goes through a fun project based tutorial on how to add detail through Normal and Displacement maps onto a Giganatosuarus dinosaur in 3D Coat Version 4. A great tutorial for beginners and those who want to create their own Jurassic Park. Table of Contents for Volume #13: Chapter 1- Intro, Chapter 2- Lightwave Model Review in Lightwave, Chapter 3- How to Import Mesh Layers and UVs into 3D Coat, Chapter 4- How Set-Up Alpha Brushes for Creating Scales and Creatng your Own Alpha Brushes, Chapter 5- Creating Body Scales, Chapter 6- Creating Tail Scales, Chapter 7- How to Fix and Touch Up Bad Scales, Chapter 8- Creating Arm and Finger Scales, Chapter 9- Head Detailing (Part One), Chapter 10- Head Detailing (Part Two), Chapter 11- Gum Detailing, Chapter 12- Gum Detail Review, Chapter 13- Horn Detail, Chapter 14- Exporting Model and Maps from 3D Coat, Chapter 15- Checking the Normal Maps in Lightwave in VPR Mode, Chapter 16- Connecting Displacement Map Node and Final. Running Time: 3 hrs. 15 mins., High Quality (Screen-Res 1920 x 1080 pixels), Video Format: MP4 (.mp4), Level: Beginner.Price: $19.00
![ZBrush Bootcamp 2014 Series -Volume #6-Lightwave Integration II [AG]](https://www.liberty3d.com/wp-content/uploads/2018/10/ZB_2014_Bootcamp_Series_Product_Box_Vol_6_400pix.jpg)
ZBrush Bootcamp 2014 Series -Volume #6-Lightwave Integration II [AG]
In this sixth video volume of 12 volumes 3D Instructor Adam Gibson introduces the beginner 3D student to a hands on project on how to detail a sci-fi prop that was modeled in Lightwave 3D. The main goal is to show how to take a basic model created in Lightwave, detail it in ZBrush, and then import it seamlessly back into Lightwave with all the ZBrush created maps (Color, Displacement, Normal) in tact. Table of Contents for Volume #6: Chapter 1- Intro, Chapter 2- Optimizing the Mesh in Lightwave for Export to ZBrush, Chapter 3- Importing Mesh into ZBrush and Initial Set-up (Morph Target, UV's), Chapter 4- How to Import Custom Alpha Brushes into ZBrush, Chapter 5- Adding Panels and Details in Projection Master, Chapter 6- Exiting Projection Master, Chapter 7- Creating the Maps (Color, Displacement, and Normal), Chapter 8- Exporting and Set-Up in Lightwave, Test Renders, and Final. Running Time: 1 hrs. 22 mins., High Quality (Screen-Res 1920 x 1080 pixels) , Video Format: MP4 (.mp4), Level: Beginner.Price: $19.00
![3D Coat Monster Bundle (27 Titles) [AG]](http://adamgibson3dtraining.com/wp-content/uploads/2014/07/3D_Coat_Monster_Bundle_27_Titles_400pix.jpg)
3D Coat Monster Bundle (27 Titles) [AG]
This bundle contains all 15 "3D Coat Version 3 Titles" and "3D Coat Version 4 Titles (Volumes #1 to #12). Various Topics include: UV Mapping, Voxel Sculpting, 3D Painting, Painting with Photos, Retopology, Auto-Retopology, Color Maps, Normal Maps, Displacement Maps, Lightwave Integration and more!!!Price: $159.00
![ZBrush Bootcamp 2014- Volume #5- Lightwave Integration I [AG]](https://www.liberty3d.com/wp-content/uploads/2018/10/ZB_2014_Bootcamp_Series_Product_Box_Vol_5_400pix.jpg)
ZBrush Bootcamp 2014- Volume #5- Lightwave Integration I [AG]
In this fifth video volume of 12 volumes 3D Instructor Adam Gibson introduces how to integrate Lightwave 3D with ZBrush and how to use the GoZ system. The main focus of this beginner integration tutorial is how to optimize hard surface meshes for sculpting and painting in ZBrush and how to export that data back into Lightwave as seamlessly as possible. Zbrush is a very powerful 3D package but there are also some gotchas and pitfalls along the way that require some extra knowledge to get the best results possible. This tutorial covers those hidden items in great detail. Table of Contents for Volume #5: Chapter 1- Intro, Chapter 2- GoZ Import to Zbrush from Lightwave, Chapter 3- NGon Import Issues to ZBrush, Chapter 4- Unified Skin Option, Chapter 5- Sci-Fi Prop Optimized, Chapter 6- Adding Details in ZBrush, Chapter 7- Creating Maps in ZBrush (Color, Normal, and Displacement Maps), Chapter 8- GoZ Export to Lightwave, Chapter 9- Delete Lower Subdivision Level Fix, Chapter 10- More Displacement Gotchas, Chapter 11- Morph Target Solution, Chapter 12- Final. Running Time: 2 hrs. 52 mins., High Quality (Screen-Res 1920 x 1080 pixels) , Video Format: MP4 (.mp4), Level: Beginner.Price: $19.00
![3D Coat 4 Bundle Pack I - Volumes #1 to #12 [AG]](http://adamgibson3dtraining.com/wp-content/uploads/2014/06/3D_Coat_4_Bundle_Pack_I_Vol_1_to_12_400pix.jpg)
3D Coat 4 Bundle Pack I - Volumes #1 to #12 [AG]
This 3D Coat Version 4 Bundle Pack I Includes: 1) 3D Coat 4- Volume #1-Getting Started, 2) 3D Coat 4- Volume #2-Getting Started II, 3) 3D Coat V4-Volume #3-UV Mapping I, 4) 3D Coat 4- Volume #4- UV Mapping II, 5) 3D Coat 4- Volume #5-Retopology I, 6) 3D Coat 4- Volume #6-Retopology II, 7) 3D Coat Version 4- Volume #7- VOXELS I, 8) 3D Coat 4- Volume #8- Voxels II, 9) 3D Coat 4- Volume #9-Voxels III, 10)
3D Coat 4- Volume #10-Voxels IV, 11) 3D Coat 4- Volume #11-Voxels V, 12) 3D Coat 4- Volume #12-Voxels VI. Running Time: 28 hours 51 mins.Price: $99.00
![3D Coat 4- Volume #12-Voxels VI [AG]](https://www.liberty3d.com/wp-content/uploads/2018/11/3DC_4_Vol_12_Voxels_VI_400pix.jpg)
3D Coat 4- Volume #12-Voxels VI [AG]
In this twelfth video volume of 12 volumes 3D Instructor Adam Gibson introduces the 3D student to Voxels in 3D Coat Version 4. A great tutorial for beginners. Table of Contents for Volume #12: Chapter 1- Intro, Chapter 2- Vox Layer Option Panel, Chapter 3- Logo Tool, Chapter 4- Save Volume to 3B File, Chapter 5- Merge 3B File, Chapter 6- Clone Layer, Chapter 7- Clone Layer Instance, Chapter 8- Vox Layer: Merge To, Chapter 9- Vox Layer: Move To, Chapter 10- Vox Layer: Auto-Retopology Intro, Chapter 11- Vox Layer: Export Object, Chapter 12- Vox Layer: Import Merge Object, Chapter 13- Vox Layer: Export Scene, Chapter 14- Vox Layer: Extract Skin, Chapter 15- Vox Layer: Flip XYZ Mirror, Chapter 16- Vox Layer: Extrude Tool, Chapter 17- Final. Running Time: 1 hrs. 51 mins., High Quality (Screen-Res 1920 x 1080 pixels) , Video Format: MP4 (.mp4), Level: Beginner.Price: $19.00
![3D Coat 4- Volume #11-Voxels V [AG]](https://www.liberty3d.com/wp-content/uploads/2018/11/3DC_4_Vol_11_Voxels_V_Product_Box_400pix.jpg)
3D Coat 4- Volume #11-Voxels V [AG]
In this eleventh video volume of 12 volumes 3D Instructor Adam Gibson introduces the 3D student to Voxels in 3D Coat Version 4. A great tutorial for beginners. Table of Contents for Volume #11: Chapter 1- Intro, Chapter 2- Merge Tool: Importing Sub-D Objects from Other 3D Packages, Chapter 3- Merge Tool: Importing Polygonal Objects and Hard Surface Models, Chapter 4- Merge Tool: Add Boolean, Chapter 5- Merge Tool: Subtract Boolean, Chapter 6- Merge Tool: Booleans (Add and Subtract) Using Symmetry, Chapter 7- Merge Tool: Boolean Intersect, Chapter 8- Merge Tool: Boolean Split, Chapter 9- Final. Running Time: 1 hrs. 48 mins. High Quality (Screen-Res 1920 x 1080 pixels) , Video Format: MP4 (.mp4), Level: Beginner.Price: $19.00
![3D Coat 4- Volume #10-Voxels IV [AG]](https://www.liberty3d.com/wp-content/uploads/2018/11/3DC_4_Vol_10_Voxels_IV_Product_Box_400pix.jpg)
3D Coat 4- Volume #10-Voxels IV [AG]
In this tenth video volume of 12 volumes 3D Instructor Adam Gibson introduces the 3D student to Voxels in 3D Coat Version 4. A great tutorial for beginners. Table of Contents for Volume #10: Chapter 1- Intro, Chapter 2- Sketch Tool (Part One), Chapter 3- Sketch Tool (Part Two), Chapter 4- Voxel Representation Mode and Surface Representation Mode, Chapter 5- Vox Tree: How to Add Sub-Objects, Chapter 6- Vox Tree: How to Import Custom Polygon Objects, Chapter 7- Vox Tree: How to Add a New Layer, Chapter 8- Vox Tree: How to Delete a Layer, Chapter 9- Vox Tree: Duplicate Layer, Chapter 10- Vox Tree: Shader Edit Settings, Chapter 11- Vox Tree: Symmetrical Copy, Chapter 12- Vox Tree: Increase Voxel Resolution, Chapter 13- Vox Tree: Clone and Decrease Resolution x 2, Chapter 14- Vox Tree: Clear Voxel Layer, Chapter 15- Final. Running Time: 1 hrs. 47 mins., High Quality (Screen-Res 1920 x 1080 pixels), Video Format: MP4 (.mp4), Level: Beginner.Price: $19.00
![3D Coat 4- Volume #9-Voxels III [AG]](https://www.liberty3d.com/wp-content/uploads/2018/11/3DC_4_Vol_9_Voxels_III_Product_Shot_400pix.jpg)
3D Coat 4- Volume #9-Voxels III [AG]
In this ninth video volume of 12 volumes 3D Instructor Adam Gibson introduces the 3D student to Voxels in 3D Coat Version 4. A great tutorial for beginners. Table of Contents for Volume #9: Chapter 1- Intro, Chapter 2- Stamp Mode, Chapter 3- Stamp Mode with Moveable Brush, Chapter 4- Clone Tool, Chapter 5- Cut and Clone Tool, Chapter 6- Vox Extrude Tool and the Freeze Tool, Chapter 7- Vox Layer Tool, Chapter 8- Axial Tool, Chapter 9- Instancer Tool, Chapter 10- Curves Tool, Chapter 11- Spikes Tool, Chapter 12- Snake Tool, Chapter 13- Final. Running Time: 1 hrs. 50 mins., High Quality (Screen-Res 1920 x 1080 pixels) , Video Format: MP4 (.mp4), Level: Beginner.Price: $19.00
![3D Coat 4- Volume #8- Voxels II [AG]](https://www.liberty3d.com/wp-content/uploads/2018/11/3DC_4_Vol_8_Voxels_II_Product_Box_400pix.jpg)
3D Coat 4- Volume #8- Voxels II [AG]
In this eighth video volume of 12 volumes 3D Instructor Adam Gibson introduces the 3D student to Voxels in 3D Coat Version 4. A great tutorial for beginners. Table of Contents for Volume #8: Chapter 1- Intro, Chapter 2- Cut-Off Tool, Chapter 3- Measure Tool, Chapter 4- Pick Tool, Chapter 5- Pose Tool, Chapter 6- Move Tool, Chapter 7- Hide Tool, Chapter 8- Cell Tool, Chapter 9- Transform Tool, Chapter 10- Split Tool, Chapter 11- Final. Running Time: 1 hrs. 49 mins., High Quality (Screen-Res 1920 x 1080 pixels) , Video Format: MP4 (.mp4), Level: Beginner.Price: $19.00
![3D Coat 4- Volume #7- VOXELS I [AG]](https://www.liberty3d.com/wp-content/uploads/2018/11/3DC_4_Vol_7_Voxels_I_Product_Box_400pix.jpg)
3D Coat 4- Volume #7- VOXELS I [AG]
In this seventh video volume of 12 volumes 3D Instructor Adam Gibson introduces the 3D student to Voxels in 3D Coat Version 4. A great tutorial for beginners. Table of Contents for Volume #7: Chapter 1- Intro, Chapter 2- Voxel Orientation, Chapter 3- Grow Tool, Chapter 4- Smooth Tool, Chapter 5- Fill Tool, Chapter 6- Clay Tool, Chapter 7- Carve Tool, Chapter 8- Blob Tool, Chapter 9- Build and Extrude Tool, Chapter 10- Sphere Tool, Chapter 11- Plane Tool, Chapter 12- Scrape Tool, Chapter 13- Smudge Tool, Chapter 14- Final. Running Time: 1 hrs. 42 mins., High Quality (Screen-Res 1920 x 1080 pixels), Video Format: MP4 (.mp4), Level: Beginner.Price: $19.00

ZBrush Bootcamp Series Volume #4-Getting Started IV
In this fourth video volume of 12 volumes 3D Instructor Adam Gibson introduces the beginner 3D student how to get up and started quickly with ZBrush 4R6. Table of Contents for Volume #4: Chapter 1- Intro, Chapter 2- Dynamesh Intro (Part One), Chapter 3- Dynamesh Intro (Part Two), Chapter 4- Making a Critter/Creature Using Dynamesh (Part One), Chapter 5- Making a Critter/Creature Using Dynamesh (Part Two), Chapter 6- Dynamesh Groups Button and Slice Curve Brush, Chapter 7- Groups Splits Tool and Close Holes Tool, Chapter 8- How to Convert a Mask to a Poly Group, Chapter 9- GroupsLoops Tool, Chapter 10- PolyGroup Selection and the Move Tool, Chapter 11- Group Panels Button and Split Parts Tool, Chapter 12- Merge Visible Subtools Button. Running Time: 1 hrs. 53 mins., High Quality (Screen-Res 1920 x 1080 pixels) , Video Format: MP4 (.mp4), Level: Beginner.Price: $19.00
Modo 701-Modeling Tools-Volume #7-Topology I
In this seventh volume of 12 volumes 3D Instructor Adam Gibson demonstrates how to get started using Modo 701's powerful Topology tools. Retopology is a very powerful method to generate clean and optimized meshes for any piece of 3D software and work pipeline. Cleaner meshes means: 1) Less UV Stretching/Errors, Cleaner Texture Maps, Characters that are easier to Rig and Animate (better deformations), and less render errors/artifacts. This series is great for beginner 3D students or if you new to Modo and want to learn your way around Modo quickly. Table of Contents for Modeling Tools Volume #7: Chapter 1- Intro, Chapter 2- What is Topology and Retopology?, Chapter 3- How to Set-up Your Model for Retopology, Chapter 4- New Pen Tool Vs Old Pen Tool, Chapter 5- Topology Pen-Move Mode (Part One), Chapter 6- Topology Pen-Move Mode (Part Two), Chapter 7- Topology Pen-Move Mode with "Edge Loop" or "Slide Edge" selected, Chapter 8- Topology Pen- Duplicate Mode, Chapter 9- Topology Pen- Delete Mode, Chapter 10- Topology Pen- Delete Edge Loop, Chapter 11- Topology Tweak Tool, Chapter 12- Topology Sketch Tool, Chapter 13- Edge Slice Tool, Chapter 14- Add Loop Tool, Chapter 15- Bridge Tool, Chapter 16- Contour Tool, Chapter 17- Smooth Tool, Chapter 18- Convert to Triangles, Chapter 19- Convert to Quadrangles, Chapter 20- Grow Quads Tool, Chapter 21- Subdivide Tool and Final. Running Time: 1 hrs. 54 mins., Resolution: 1920 x 1080 pixels, Video Format: MP4 Video (.mp4), Level: Beginner.Price: $19.00
![3D Coat 4- Volume #6-Retopology II [AG]](https://www.liberty3d.com/wp-content/uploads/2018/11/3DC_4_Vol_6_Retopology_II_Product_Box_400pix.jpg)
3D Coat 4- Volume #6-Retopology II [AG]
In this sixth video volume of 12 volumes 3D Instructor Adam Gibson goes through a project based tutorial of Retopologizing a Triceratops dinosaur head with 3D Coat Version 4's powerful Retopology tools. Table of Contents for Volume #6: Chapter 1- Intro, Chapter 2- Preparing your Model for Retopology, Chapter 3- Importing your Mesh into 3D Coat for Retopology, Chapter 4- Where to Start and Initial Project Set-Up, Chapter 5- Creating the Initial Polygons for the Eye Socket and Nasal Passage, Chapter 6- Top Skull Horn, Chapter 7- Top Nose Horn, Chapter 8- Mouth Loop, Chapter 9- Frill Horns, Chapter 10- Connecting Base Retopo Areas (Part One), Chapter 11- Connecting Base Retopo Areas (Part Two), Chapter 12- Connecting Base Retopo Areas (Part Three), Chapter 13- Connecting Base Retopo Areas (Part Four), Chapter 14- Connecting Base Retopo Areas (Part Five), Chapter 15- Connecting Base Retopo Areas (Part Six), Chapter 16- Connecting Base Retopo Areas (Part Seven), Chapter 17- Connecting the Frill Horn Retopo Areas, Chapter 18- Converting High Poly to Low Poly Mesh Areas, Chapter 19- Fill Polys into the Frill Front Area, Chapter 20- Neck Retopo, Chapter 21- Top Horn Completion, Chapter 22- Fill Polys in Eye Socket, Chapter 23- Finish Frill Horn, Chapter 24- Export Final Retopo Mesh to Lightwave, Chapter 25- Import Retopo Mesh into Lightwave, Mirror Head, and Final. Running Time: 5 hrs. 49 mins., High Quality (Screen-Res 1920 x 1080 pixels) , Video Format: MP4 (.mp4), Level: Beginner.Price: $19.00

ZBrush Bootcamp Series Volume #3-Getting Started III
In this third video volume of 12 volumes 3D Instructor Adam Gibson introduces the beginner 3D student how to get up and started quickly with ZBrush 4R6. Table of Contents for Volume #3: Chapter 1- Intro, Chapter 2- Backface Masking Button for Sculpting on Thin Meshes/Objects, Chapter 3- Topological Brush Settings, Chapter 4- How to Paint a Mask, Chapter 5- How to Inverse a Mask, Chapter 6- How to Clear a Mask, Chapter 7- How to Erase a Mask, Chapter 8- Mask All, Chapter 9- Blur Mask, Chapter 10- Sharpen Mask, Chapter 11- Grow Mask, Chapter 12- Shrink Mask, Chapter 13- Extract Polys to New Subtool, Chapter 14- Append and Insert Tool (Part One), Chapter 15- Append and Insert Tool (Part Two), Chapter 16- Final. Running Time: 1 hr. 53 mins., High Quality (Screen-Res 1920 x 1080 pixels), Video Format: MP4 (.mp4), Level: Beginner.Price: $19.00
ZBrush Bootcamp Series Volume #2-Getting Started II
In this second video volume of 12 volumes 3D Instructor Adam Gibson introduces the beginner 3D student how to get up and started quickly with ZBrush 4R6. Table of Contents for Volume #2: Chapter 1- Intro, Chapter 2- How to Clear the Canvass, Chapter 3- Primitives Introduction and Make PolyMesh 3D, Chapter 4- Cube Primitive, Chapter 5- Cylinder Primitive, Chapter 6- Cone Primitive, Chapter 7- Ring3D Primitive, Chapter 8- Star3D Primitive, Chapter 9- Arrow3D Primitive, Chapter 10- Spiral3D Primitive, Chapter 11- Helix3D Primitive, Chapter 12- Gear3D Primitive, Chapter 13- Spherinder3D Primitive, Chapter 14- Terrain3D Primitive, Chapter 15- Plane3D Primitive, Chapter 16- Circle3D Primitive, Chapter 17- SweepProfile3D Primitive, Chapter 18- Initialize Primitives (Part One), Chapter 19- Initialize Primitives (Part Two), Chapter 20- Orthagonal Perspective Views, Chapter 21- How to Move Objects/Meshes, Chapter 22- Combine Masking and the Move Tool. Running Time: 2 hrs. 8 mins., High Quality (Screen-Res 1920 x 1080 pixels) , Video Format: MP4 (.mp4), Level: Beginner.Price: $19.00

Modo 701 Modeling Tools- Volume #6
In this sixth volume of 12 volumes 3D Instructor Adam Gibson demonstrates how to get started using Modo 701 powerful modeling tools. This series is great for beginner 3D students or if you new to Modo and want to learn your way around Modo quickly. Table of Contents for Modeling Tools Volume #6: Chapter 1- Intro, Chapter 2- Edge Slide Tool, Chapter 3- Add Loop Tool, Chapter 4- Add Point Tool, Chapter 5- Spin Quad Pairs Tool, Chapter 6- Collapse Edges Tool, Chapter 7- Remove Edges Tool, Chapter 8- Edge Split Tool, Chapter 9- Grow Quads Tool, Chapter 10- Fill Quads Tool, Chapter 11- Join Edges Tool, Chapter 12- Edge Bevel Tool, Chapter 13- Final. Running Time: 2 hrs. 3 mins., Resolution: 1920 x 1080 pixels, Video Format: MP4 Video (.mp4), Level: Beginner.Price: $19.00
![3D Coat 4- Volume #5-Retopology I [AG]](https://www.liberty3d.com/wp-content/uploads/2018/11/3DC_4_Vol_5_Retopology_I_Product_Box_400pix.jpg)
3D Coat 4- Volume #5-Retopology I [AG]
In this fifth video volume of 12 volumes 3D Instructor Adam Gibson introduces the beginner 3D student how to get up and started quickly with 3D Coat Version 4's powerful Retopology tools. Table of Contents for Volume #5: Chapter 1- Intro, Chapter 2- Importing and Retopology Room, Chapter 3- Virtual Mirror Mode, Chapter 4- Points and Faces Tool, Chapter 5- Quads Tool, Chapter 6- Cap Tool, Chapter 7- Strokes Tool (Part One), Chapter 8- Strokes Tool (Part Two), Chapter 9- Delete Polygons, Chapter 10- Brush Tool, Chapter 11- Delete Edges Tool, Chapter 12- Collapse Tool, Chapter 13- Split Rings Tool, Chapter 14- Move Vertices Tool, Chapter 15- Slide Edges Tool, Chapter 16- Add Split Tool, Chapter 17- Relax Tool, Chapter 18- Subdivide Tool, Chapter 19- Symmetry Tool, Chapter 20- Clear Tool, Chapter 21-Import and Export Retopo Meshes, Chapter 22- Final. Running Time: 2 hrs. 20 mins., High Quality (Screen-Res 1920 x 1080 pixels) , Video Format: MP4 (.mp4)Price: $19.00

ZBrush Bootcamp Series Volume #1-Getting Started I
In this first video volume of 12 volumes 3D Instructor Adam Gibson introduces the beginner 3D student how to get up and started quickly with ZBrush 4R6. Table of Contents for Volume #1: Chapter 1- Intro, Chapter 2- Purpose, Chapter 3- General Orientation to User Interface, Chapter 4- Poly Paint Introduction, Chapter 5- Switch Color, Chapter 6- Alternate Colors Button, Chapter 7- Color Picker, Chapter 8- Eraser Brush Alternative, Chapter 9- Draw Size, Chapter 10- Focal Shift, Chapter 11- Premade Models ZTools, Chapter 12- How to Import OBJ Models, Chapter 13- How to Add Scales to a Dinosaur , Chapter 14- How to Save Your Work and Final. Running Time: 2 hrs. 43 mins., High Quality (Screen-Res 1920 x 1080 pixels) , Video Format: MP4 (.mp4), Level: Beginner.Price: $19.00
Lightwave 11.5 Super Bundle-19 Video Titles (AG)
This Bundle Contains 19 Lightwave 11.5 video titles: 1) Lightwave 11.5 Genoma Rigging Bundle (Vol. #1,2,3,4), 2) Lightwave 11.5 Modeler Tools Bundle Volumes #1 to 12, Lightwave 11.5 UV Mapping Essentials, Lightwave 11.5 UV Mapping a Creature, and Lightwave 11.5- UV Mapping a Human.Price: $159.00

LightWave 11.5 Modeler Tools Bundle- Volumes #1 to 12 (AG)
This bundle contains all 12 volumes of "Lightwave 11.5 Modeler Tools".
Volumes #1 to 8 is designed for Tool-Based training. Volumes #9 to 12 are Project Based training. In the Project-Based section Lightwave Instructor Adam Gibson shows how to create a Gigantanosaurus dinosaur using Sub-D's. Price: $99.00
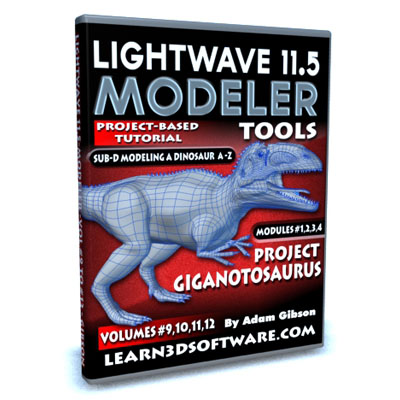
LightWave 11.5 Modeler Tools- Volumes #9 to 12- Project Gigantanosaurus (AG)
In Volumes 9, 10, 11, and 12 of our Lightwave 11.5 Modeler Series Lightwave Instructor Adam Gibson will take you through a complete Sub-D Character Modeling project broken up into four Modules (1 to 4) .
From A to Z the creation of a Gigantonosaurus Dinosaur will be taught step by step in great detail all starting from a simple box primitive.
The concepts and techniques used here in this extensive training course will give you the knowledge on how to create amazing characters, animals, beasts and monsters of your own.
Some of the things you will learn from this course: 1) Sub-D Theory, 2) Setting Up Backdrop Images, Using the Internet to find useful images for your own projects, Box-Modeling Concepts, Quad-Patching, Creating Complex Geometry Starting from Basic Shapes, Redirecting Polygon Flow, Mesh Prepping/Cleaning/Optimizing/Tweaking and more.
A great series for beginner 3D students or those who wish to improve their Sub-D Modeling skills with a minimal amount of tools.
Bonus Content: 1) All Lightwave model files, Back-Drop Reference Images, and absolutely free our "Creature Eye Pack" texture collection (Retail Value- $19.00 US Funds). Running Time: Approx 12 hrs. 0 mins., Resolution: 1920 x 1080 pixels, Video Format: MP4 Video (.mp4), Level: Beginner.Price: $35.00
![LightWave 11.5 Modeler Tools- Volume #8 [AG]](http://www.learn3dsoftware.com/LW_11_5_Modeler_Product_Box_Vol_8_400pix.jpg)
LightWave 11.5 Modeler Tools- Volume #8 [AG]
In this Eighth Volume of 12 Volumes Lightwave Instructor Adam Gibson introduces the 3D student to Lightwave's Powerful Modeler. A great series for beginner 3D students. Table of Contents for Modeler Volume #8: Chapter 1- Intro, Chapter 2- Multi Text Tool, Chapter 3- Mirror X Tool, Chapter 4- Mirror Y Tool, Chapter 5- Mirror Z Tool, Chapter 6- Mirror Tool (Part One), Chapter 7- Mirror Tool (Part Two), Chapter 8- Clone Tool, Chapter 9- Rail Clone Tool, Chapter 10- Array Tool, Chapter 11- Final. Running Time: 2 hrs. 0 mins., Resolution: 1920 x 1080 pixels, Video Format: MP4 Video (.mp4), Level: Beginner.
Price: $19.00
![3D Coat 4- Volume #4- UV Mapping II [AG]](https://www.liberty3d.com/wp-content/uploads/2018/11/3DC_4_Vol_4_UV_Mapping_II_Product_Box_400pix.jpg)
3D Coat 4- Volume #4- UV Mapping II [AG]
In this fourth video volume of 12 volumes 3D Instructor Adam Gibson introduces the beginner 3D student how to get up and started quickly with 3D Coat Version 4's powerful UV Mapping tools. In this tutorial a Dilophosaurus Dinosaur is UVed in preparation for painting and detailing. Table of Contents for Volume #4: Chapter 1- Intro, Chapter 2- Project Review, Chapter 3- UV Unwrap of a Basic Character, Chapter 4- Sub-D Levels and Overlapping Sub-D Issue Analysis, Chapter 5- Preparing Mesh in Lightwave 3D for UV Unwrapping in 3D Coat, Chapter 6- Marking UV Seams for the Body, Chapter 7- Marking Seams for the Claws, Chapter 8- Marking Seams for the Hands and the Feet, Chapter 9- UV Unwrap Test and Analyzing UV Unwrap Errors, Chapter 10- Correcting Claw UV Errors, Chapter 11- Final UV Clean Up. Running Time: 3 hrs. 23 mins., High Quality (Screen-Res 1920 x 1080 pixels) , Video Format: MP4 (.mp4), Level: Beginner.Price: $19.00
![3D Coat V4-Volume #3-UV Mapping I [AG]](https://www.liberty3d.com/wp-content/uploads/2018/11/3DC_4_Vol_3_UV_Mapping_Product_Shot_400pix.jpg)
3D Coat V4-Volume #3-UV Mapping I [AG]
In this third video volume of 12 volumes 3D Instructor Adam Gibson introduces the beginner 3D student how to get up and started quickly with 3D Coat Version 4's powerful UV Mapping tools. Table of Contents for Volume #3: Chapter 1- Intro, Chapter 2- How to Mark UV Seams, UV Checker, UV Preview, Chapter 3- Edge Loops Vs. Mark Seams Tool, Chapter 4- How to Select and Deselect UV Seams, Chapter 5- Auto Seams Tool, Chapter 6- Sharp Seams Tool, Chapter 7- UV Preview Window Navigation (Zoom In, Zoom Out, Pan Left, Right, Up, Down), Chapter 8- Polygon, Edge,Vertice Selection, Chapter 9- Manipulator Tool, Chapter 10- Brush and Tweak Modes, Chapter 11- Adjust UVs with Checkerboard Tool, Chapter 12- Final. Running Time: 1 hr. 50 mins. High Quality (Screen-Res 1920 x 1080 pixels) , Video Format: MP4 (.mp4), Level: Beginner.Price: $19.00
![3D Coat 4- Volume #2-Getting Started II [AG]](https://www.liberty3d.com/wp-content/uploads/2018/11/3DC_4_Vol_2_Get_Started_II_Product_Shot_400pix.jpg)
3D Coat 4- Volume #2-Getting Started II [AG]
In this second video volume of 12 volumes 3D Instructor Adam Gibson introduces the beginner 3D student how to get up and started quickly with 3D Coat Version 4. Topics Covered: Importing and Exporting Sub-D Models, Working with Subdivision Levels, Understanding Settings and Data between 3D Coat and Lightwave, Displacement Maps, Creating a Displacement Map Node in Lightwave, Exporting Single Color, Normal and Displacement Maps from the Textures Drop Down Tab. Table of Contents for Volume #2: Chapter 1- Intro, Chapter 2- Polygonal Vs. Sub-D Objects in 3D Coat, Chapter 3- Importance of Using the Source Positions Setting with Sub-D Objects, Chapter 4- Sub-D Import for "Per Pixel Painting" and "Micro Vertex Painting", Chapter 5- How to Export Low and High Polygon Sub-D Meshes, Chapter 6- How to Export a Displacement Maps in 3DC, Chapter 7- How to Set-Up a Displacement Node in Lightwave 3D, Chapter 8- How to Import Textures from other Sources for Use in 3D Coat, Chapter 9- How to Export a Single Color and Normal Map in 3D Coat, Chapter 10- How to Export a Single Displacement Map in 3D Coat. Running Time: 2 hrs. 48 mins., High Quality (Screen-Res 1920 x 1080 pixels), Video Format: MP4 (.mp4), Level: Beginner.Price: $19.00

MODO 701 Modeling Tools-Volume #5
In this fifth volume of 12 volumes 3D Instructor Adam Gibson demonstrates how to get started using Modo 701 modeling tools. This series is great for beginner 3D students or if you new to Modo and want to learn your way around Modo quickly. Table of Contents for Modeling Tools Volume #5: Chapter 1- Intro, Chapter 2- Selection Modes and Options, Chapter 3- Lasso Style Select Modes, Chapter 4- Material Selection Mode, Chapter 5- Connected Selection, Chapter 6- Invert Selection, Chapter 7- Loop Select, Chapter 8- Close Loop Select, Chapter 9- Grow and Shrink Select, Chapter 10- More and Less Select, Chapter 11- Next and Previous Loop, Chapter 12- Final. Running Time: 1 hrs. 36 mins., Resolution: 1920 x 1080 pixels, Video Format: MP4 Video (.mp4), Level: Beginner.Price: $19.00
![LightWave 11.5 Modeler Tools- Volume #7 [AG]](http://www.learn3dsoftware.com/LW_11_5_Modeler_Product_Box_Vol_7_400pix.jpg)
LightWave 11.5 Modeler Tools- Volume #7 [AG]
In this Seventh Volume of 12 Volumes Lightwave Instructor Adam Gibson introduces the 3D student to Lightwave's Powerful Modeler. A great series for beginner 3D students. Table of Contents for Modeler Volume #7: Chapter 1- Intro, Chapter 2- Selection Modes, Chapter 3- Connected Tool, Chapter 4- Invert Selection Tool, Chapter 5- Expand and Contract Tool, Chapter 6- Select Loop Tool, Chapter 7- Select Next and Previous Loop, Chapter 8- Select Outline and Sel Switch, Chapter 9- Select Points, Edges, Polygons, Chapter 10- Change Selection Mode and Drop Selection, Chapter 11- Sel Outline Points and Sel Outline Edges, Chapter 12- Edges: Loop Expand and Loop Contract, Chapter 13- Sel Outline Edges and Sel Edge Border, Chapter 14- Sel Open Edges, Chapter 15- Pick Surface Tool, Chapter 16- Select Drop-down List, Chapter 17- Final. Running Time: 1 hrs. 37 mins., Resolution: 1920 x 1080 pixels, Video Format: MP4 Video (.mp4), Level: BeginnerPrice: $19.00
![3D Coat 4- Volume #1-Getting Started [AG]](https://www.liberty3d.com/wp-content/uploads/2018/11/3DC_4__Vol_1_Get_Started_Product_Shot_400pix.jpg)
3D Coat 4- Volume #1-Getting Started [AG]
In this first video volume of 12 volumes 3D Instructor Adam Gibson introduces the beginner 3D student how to get up and started quickly with 3D Coat Version 4. Topics Covered: Importing and Exporting or Models, Creating Quick UV Maps, Voxel Sculpting Introduction, Retopology Introduction, and Exporting Color, Specular and Normals Maps. Table of Contents for Volume #1: Chapter 1- Intro, Chapter 2- Quick Start Panel, Chapter 3- How to Import and Auto-UV Map Models in 3D Coat, Chapter 4- How to Import a Model and Keep the Original UV Map, Chapter 5- How to Save a 3D Coat Project, Chapter 6- How to Export Color, Specular, and Normal Maps to use in other 3D Software, Chapter 7- How to Rename the Surface Node, Chapter 8- Voxels Introduction, Chapter 9- Retopology Introduction, Chapter 10- Mirror Head in Lightwave 3D, Chapter 11- Import Retopology Mesh into 3D Coat, Chapter 12- Final. Running Time: 1 hr. 54 mins., High Quality (Screen-Res 1920 x 1080 pixels), Video Format: MP4 (.mp4), Level: Beginner.Price: $19.00
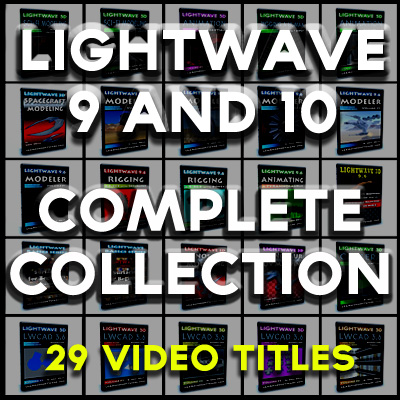
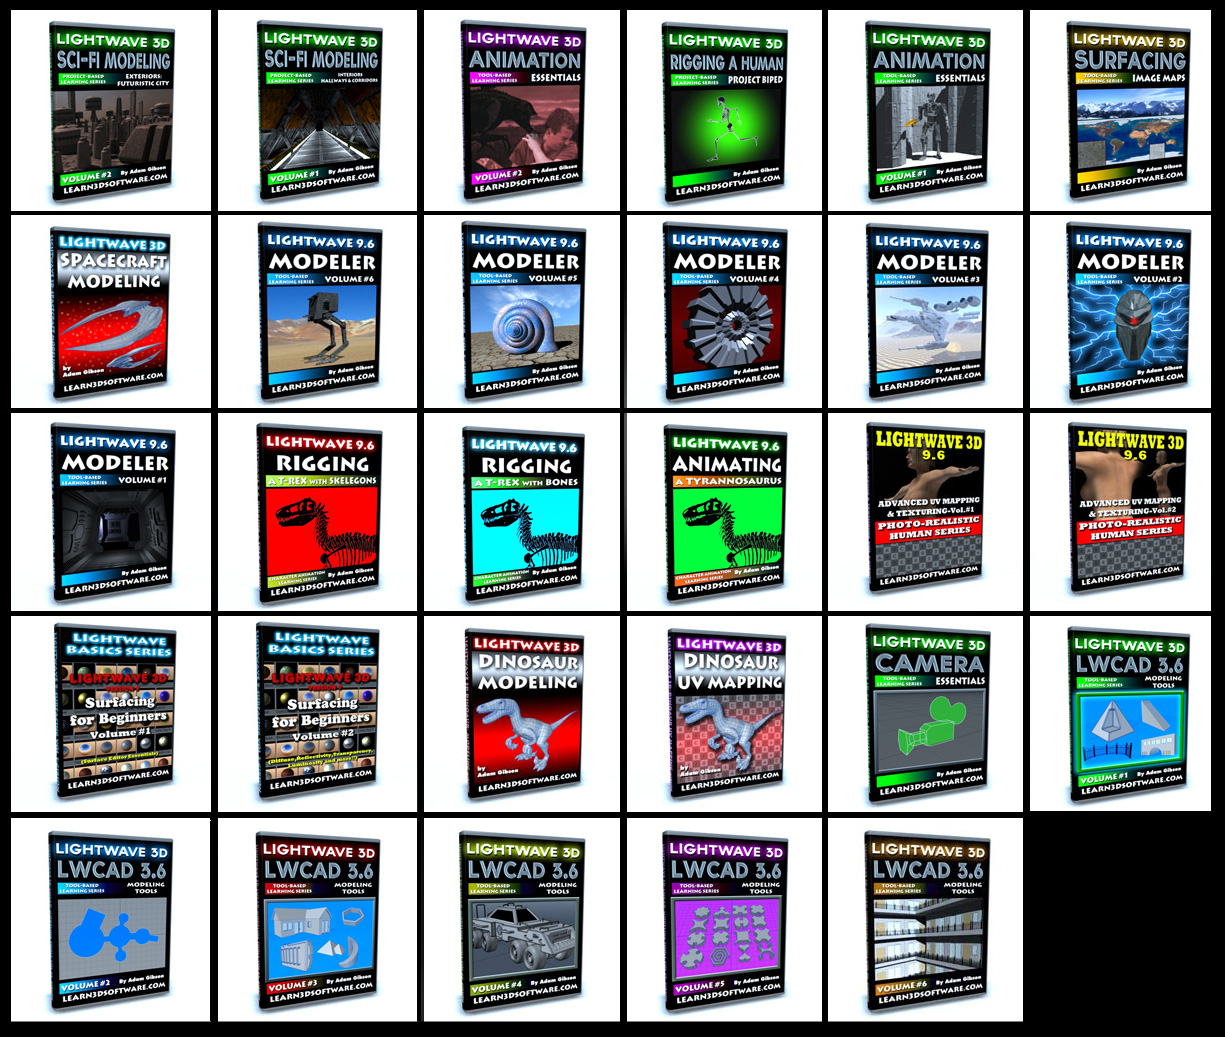
Lightwave Version 9 and 10 Complete Collection
The Total Lightwave Bundle is a collection of 29 Video Instructional Titles by Adam Gibson. This offer will be available for a Limited Time only.Lightwave Titles
- Dinosaur Sub-D Modeling
- Dinosaur UV Mapping
- Spacecraft Modeling
- Surfacing for Beginners Volume #1
- Surfacing for Beginners Volume #2
- Surfacing for Beginners Volume #3
- Advanced UV Mapping Volume #1
- Advanced UV Mapping Volume #2
- Modeler Volume #1
- Modeler Volume #2
- Modeler Volume #3
- Modeler Volume #4
- Modeler Volume #5
- Modeler Volume #6
- Rigging a T-Rex with Skelegons
- Rigging a T-Rex with Bones
- Animating a Tyrannosaurus
- Sci-Fi Modeling-Interiors Hallways and Corridors
- LW CAD 3.6 Modeling Tools Volume #1
- LW CAD 3.6 Modeling Tools Volume #2
- LW CAD 3.6 Modeling Tools Volume #3
- LW CAD 3.6 Modeling Tools Volume #4
- LW CAD 3.6 Modeling Tools Volume #5
- LW CAD 3.6 Modeling Tools Volume #6
- Rigging a Human
- Animation Essentials-Vol. #1
- Animation Essentials-Vol. #2
- Camera Essentials
- Sci-Fi Modeling (Volume #2)-Exteriors: Futuristic City
Price: $99.00

3D Coat Version 3 -Complete Collection (15 Titles)
This Video Collection contains 15 of our "3D Coat Version 3" titles. Hours and hours of detailed training covering: Voxel Sculpting, Retopology, Autoretopology, Normal Maps, Displacement Maps, Color Maps, Painting with Photos, Paint Tools, Brushes, Alpha Brushes and full Project Based Tutorials. The Project Based Tutorials include: Dinosaur Detailing, Voxel Sculpting a Dragon, Elephant Detailing, Female Character Texturing and Sci-Fi Detailing a Space Fighter. The ultimate collection to get you started using this powerful piece of software.Price: $129.00

Modo 701 Modeling Tools- Volume #3
In this third volume of 12 volumes 3D Instructor Adam Gibson demonstrates how to get started using Modo 701 modeling tools. This series is great for beginner 3D students or if you new to Modo and want to learn your way around Modo quickly. Table of Contents for Modeling Tools Volume #3: Chapter 1- Intro, Chapter 2- Taper Tool, Chapter 3- Twist Tool, Chapter 4- Bend Tool, Chapter 5- Vortex Tool, Chapter 6- Swirl Tool, Chapter 7- Push Tool, Chapter 8- Curve Extrude Tool, Chapter 9- Curve Clone Tool, Chapter 10- Clone Tool, Chapter 11- Array Tool, Chapter 12- SDS Subdivide Tool, Chapter 13- Final. Running Time: 2 hrs. 15 mins., Resolution: 1920 x 1080 pixels, Video Format: MP4 Video (.mp4), Level: Beginner.Price: $19.00
Modo 701 Modeling Tools- Volume #2
In this second volume of 12 volumes 3D Instructor Adam Gibson demonstrates how to get started using Modo 701 modeling tools. This series is great for beginner 3D students or if you are new to Modo and want to learn your way around Modo quickly. Table of Contents for Modeling Tools Volume #2: Chapter 1- Intro, Chapter 2- Element Move, Chapter 3- Bevel Tool, Chapter 4- Thicken Tool (Part One), Chapter 5- Thicken Tool (Part Two), Chapter 6- Mirror Tool, Chapter 7- Bridge Tool (Part One), Chapter 8- Bridge Tool (Part Two), Chapter 9- Slice Tool, Chapter 10- Curve Slice Tool, Chapter 11- Tack Tool, Chapter 12- Pen Slice Tool, Chapter 13- Loop Slice Tool, Chapter 14- Axis Slice Tool, Chapter 15- Final, Running Time: 2 hrs. 9 mins., Resolution: 1920 x 1080 pixels, Video Format: MP4 Video (.mp4), Level: BeginnerPrice: $19.00
![LightWave 11.5 Modeler Tools -Volume #6 [AG]](http://www.learn3dsoftware.com/LW_11_5_Modeler_Product_Box_Vol_6_400pix.jpg)
LightWave 11.5 Modeler Tools -Volume #6 [AG]
In this Sixth Volume of 12 Volumes Lightwave Instructor Adam Gibson introduces the 3D student to Lightwave's Powerful Modeler. A great series for beginner 3D students. Table of Contents for Modeler Volume #6: Chapter 1- Intro, Chapter 2- Merge Points Tool, Chapter 3- Weld Tool, Chapter 4- Set Value Tool, Chapter 5- Extrude Tool, Chapter 6- Taper Tool, Chapter 7- Magnet Tool, Chapter 8- Unweld Tool, Chapter 9- Bridge Tool (Part One), Chapter 10- Bridge Tool (Part Two), Chapter 11- Connect Tool, Chapter 12- Delete Tool, Chapter 13- Final, Running Time: 2 hrs. 7mins., Resolution: 1920 x 1080 pixels, Video Format: MP4 Video (.mp4), Level: BeginnerPrice: $19.00
![LightWave 11.5 Modeler Tools -Volume #5 [AG]](http://www.learn3dsoftware.com/LW_11_5_Modeler_Product_Box_Vol_5_400pix.jpg)
LightWave 11.5 Modeler Tools -Volume #5 [AG]
In this Fifth Volume of 12 Volumes Lightwave Instructor Adam Gibson introduces the 3D student to Lightwave's Powerful Modeler. A great series for beginner 3D students. Table of Contents for Modeler Volume #5: Chapter 1- Intro, Chapter 2- Rounder Tool, Chapter 3- Bevel Tool, Chapter 4- Extender Plus Tool, Chapter 5- Knife Tool, Chapter 6- Straighten Tool, Chapter 7- Edit Edges Tool, Chapter 8- Spin Edge Tool, Chapter 9- Border Slice Quad Tool, Chapter 10- Border Slice Tool, Chapter 11- Add Edges Tool, Chapter 12- Bend Tool, Chapter 13- Final. Running Time: 2 hrs. 20 mins., Resolution: 1920 x 1080 pixels, Video Format: MP4 Video (.mp4), Level: BeginnerPrice: $19.00

Lightwave 11.5 UV Mapping Essentials
In this video tutorial Lightwave Instructor Adam Gibson introduces the 3D student the basics of UV Mapping in Lightwave 11.5. Table of Contents for UV Mapping Essentials: Chapter 1- Intro, Chapter 2- UV Interface Tour, Chapter 3- UV Mapping Primitives, Chapter 4- Spherical UV Mapping Options, Chapter 5- UV Mapping Text Objects, Chapter 6- UV Mapping a Cigarette Box, Chapter 7- Create Artwork for UV Map in Adobe Photoshop, Chapter 8- Apply Artwork in Lightwave for the UV Map, Chapter 9- How to Copy and Paste UVs and Final, Running Time: 3 hrs. 3 mins., Resolution: 1920 x 1080 pixels, Video Format: MP4 Video (.mp4), Level: BeginnerPrice: $19.00

Modo 701 Modeling Tools- Volume #1
In this first volume of 12 volumes 3D Instructor Adam Gibson demonstrates how to get started using Modo 701 modeling tools. This series is great for beginner 3D students or if you new to Modo and want to learn your way around Modo quickly. Table of Contents for Modeling Tools Volume #1: Chapter 1- Intro, Chapter 2- Interface Tour, Chapter 3- Grid Options, Chapter 4- Primitives Intro, Chapter 5- Transform Tools Intro, Chapter 6- Create Mesh and Mesh Layers, Chapter 7- Edit Objects at Point, Poly, and Edge Level, Chapter 8- Final. Running Time: 2 hrs. 10 mins., Resolution: 1920 x 1080 pixels, Video Format: MP4 Video (.mp4), Level: Beginner.Price: $19.00
![LightWave 11.5 Modeler Tools -Volume #4 [AG]](http://www.learn3dsoftware.com/LW_11_5_Modeler_Product_Box_Vol_4_400pix.jpg)
LightWave 11.5 Modeler Tools -Volume #4 [AG]
In this Fourth Volume of 12 Volumes Lightwave Instructor Adam Gibson introduces the 3D student to Lightwave's Powerful Modeler. A great series for beginner 3D students. Table of Contents for Modeler Volume #4: Chapter 1- Intro, Chapter 2- Add Center Point Tool, Chapter 3- Text Tool, Chapter 4- Rotate Tool, Chapter 5- Stretch Tool, Chapter 6- Size Tool, Chapter 7- Transform Tool (Part One), Chapter 8- Transform Tool (Part Two), Chapter 9- Points Tool, Chapter 10- Make Polygon Tool, Chapter 11- Pen Tool, Chapter 12- Sketch Tool, Chapter 13- Final. Running Time: 2 hrs. 2 mins., Resolution: 1920 x 1080 pixels, Video Format: MP4 Video (.mp4), Level: BeginnerPrice: $19.00
Lightwave 11.5 UV Mapping a Creature
In this video tutorial Lightwave Instructor Adam Gibson will show the 3D student how to UV Unwrap a Suchomimus dinosaur for the eventual purpose of texturing and detailing. Topics Covered: Retopology for Better UV Maps, Edge Selection for Creating UV Islands, ABF UV Unwrap Tool, Renaming UV's, UV Editing Tools, UV Interpolation Modes, Tweaking and UV Correction Techniques. A great video to quickly understand how to UV map your characters. Table of Contents for UV Mapping Essentials: Chapter 1- Intro, Chapter 2- Retopology for UV Mapping, Chapter 3- Creating UV Seams (Part One), Chapter 4- Creating UV Seams (Part Two), Chapter 5- Creating UV Seams (Part Three), Chapter 6- Creating UV Seams (Part Four), Chapter 7- ABF (Angle Based Flattening) UV Unwrap, Chapter 8- How to Rename a UV Map, Chapter 9- Organize UV Islands, Chapter 10- Final Edit of the UV Map. Running Time: 3 hrs. 7 mins., Resolution: 1920 x 1080 pixels, Video Format: MP4 Video (.mp4), Level: Beginner.Price: $19.00
![LightWave 11.5 Modeler Tools -Volume #3 [AG]](http://www.learn3dsoftware.com/LW_11_5_Modeler_Product_Box_Vol_3_400pix.jpg)
LightWave 11.5 Modeler Tools -Volume #3 [AG]
In this Third Volume of 12 Volumes Lightwave Instructor Adam Gibson introduces the 3D student to Lightwave's Powerful Modeler. A great series for beginner 3D students. Table of Contents for Modeler Volume #3: Chapter 1- Intro, Chapter 2- Slice Tool, Chapter 3- Place Mesh Tool, Chapter 4- Chamfer Tool (Part One), Chapter 5- Chamfer Tool (Part Two), Chapter 6- Thicken Tool (Part One), Chapter 7- Thicken Tool (Part Two), Chapter 8- Heat Shrink Tool, Chapter 9- Final, Running Time: 1 hrs. 48 mins., Resolution: 1920 x 1080 pixels, Video Format: MP4 Video (.mp4), Level: BeginnerPrice: $19.00

Lightwave 11.5 Genoma Rigging Bundle (Vol. #1,2,3,4)
If you are looking to get up to get started quickly using the new Lightwave 11.5 Genoma Rigging Tools this is the training series for you. This video bundle includes Genoma Volumes #1,2,3, and 4. Level: Beginner. Video Format: MP4 ).mp4 at 1920x1080 pixels. Running Time: 12 hrs 13 mins.Price: $65.00

Lightwave 11.5 Genoma Rigging- Volume #4
In this video tutorial Lightwave Instructor Adam Gibson demonstrates how to rig a quadruped dog character using Lightwave 11.5's new powerful Genoma Rigging tools. Topics Covered: Importing Genoma Presets in Modeler, How to Combine Genoma Presets, Rig Editing, Test Deformations, and Weight Mapping. A Great tutorial to get you up and started rigging Quadruped (4 legged) characters while also getting a first hand look at how to deal with some of the gotchas and pitfalls of rigging a character using Genoma. Table of Contents for Genoma Volume #4: Chapter 1- Intro, Chapter 2- Import Model and Insert Quadruped Rig Preset, Chapter 3- Adjust Leg and Spine Bones, Chapter 4- Add Head Preset, Chapter 5- Add Tail Preset, Chapter 6- Adjust Neck Bone, Chapter 7- Welding the Tail and Head to the Body, Chapter 8- Test Deformations in Layout, Chapter 9- Weight Maps (Part One), Chapter 10- Weight Maps (Part Two), Chapter 11- Assign Weight Maps to Genoma Skelegons, Chapter 12- More Deformation Tests, Chapter 13- Chest Deformation Issues, Chapter 14- Review and Final, Running Time: 3 hrs. 44 mins., Resolution: 1920 x 1080 pixels, Video Format: MP4 Video (.mp4), Level: BeginnerPrice: $19.00
Lightwave 11.5 Genoma Volume #2
In this second volume on Genoma Rigging, Lightwave Instructor Adam Gibson introduces Lightwave 11.5's newest set of rigging tools. Topics covered: Genoma Muscles, Genoma Tendons, How to Set-Up the Genoma Head Rig, Adding Weight-Maps, Correcting Deformation Problems. A must have video on how to get started using this powerful new rigging tool!! Table of Contents for Genoma Volume #2: Chapter 1- Intro, Chapter 2- Genoma Muscles (Introduction), Chapter 3- Genoma Tendons (Introduction), Chapter 4- Head Rig Set-Up (Part One)- Weight Maps, Chapter 5- Head Rig Set-Up (Part Two)- Genoma Skelegon Editing, Chapter 6- Head Rig Set-Up (Part Three), Chapter 7- Head Rig Set-Up (Part Four), Chapter 8- Final. Running Time: 2 hrs. 5 mins., Resolution: 1920 x 1080 pixels, Video Format: MP4 Video (.mp4), Level: BeginnerPrice: $19.00
Lightwave 11.5 Genoma Volume #1
In this first volume on Genoma Rigging, Lightwave Instructor Adam Gibson introduces Lightwave 11.5's newest set of rigging tools. Topics covered: Using the Genoma Presets Panel, Full-Rigs, Sub-Rigs, Genoma Skelegons, Bones, Types of Genoma Connectors, Bone Influence, Welding Rigs Parts together, Importing Genoma Rigs into Layout, Exporting Genoma Rigs out of Modeler, Genoma Tips, and dealing with Errors/Gotchas. A must have video on how to get started using this powerful new rigging tool!! Table of Contents for Genoma Volume #1: Chapter 1- Intro, Chapter 2- Genoma Menu Orientation, Chapter 3- Genoma Bi-Ped Rig Demo/Introduction, Chapter 4- Genoma Presets Panel, Chapter 5- How to Export a Genoma Rig into Layout, Chapter 6- Basics of Connectors, Chapter 7- Passive and Active Connectors, Chapter 8- Connectors and Points/Vertices, Chapter 9- How to Create a Genoma Preset, Chapter 10- Final. Running Time: 2 hrs. 33 mins., Resolution: 1920 x 1080 pixels, Video Format: MP4 Video (.mp4), Level: Beginner
Price: $19.00
![LightWave 11.5 Modeler Tools -Volume #2 [AG]](http://www.learn3dsoftware.com/LW_11_5_Modeler_Product_Box_Vol_2_400pix.jpg)
LightWave 11.5 Modeler Tools -Volume #2 [AG]
In this First Volume of 12 Volumes Lightwave Instructor Adam Gibson introduces the 3D student to Lightwave's Powerful Modeler. A great series for beginner 3D students. Table of Contents for Modeler Volume #2: Chapter 1- Intro, Chapter 2- Box Tool (Part One), Chapter 3- Box Tool (Part Two), Chapter 4- Ball Tool, Chapter 5- Cone Tool, Chapter 6- Disc Tool, Chapter 7- Drag Tool, Chapter 8- Snap Drag Tool, Chapter 9- Tweak Tool, Chapter 10- Axis Rotate Tool (Part One), Chapter 11- Axis Rotate Tool (Part Two), Chapter 12- Axis Scale Tool, Chapter 13- Final, Running Time: 2 hrs. 46 mins., Resolution: 1920 x 1080 pixels, Video Format: MP4 Video (.mp4), Level: Beginner
Price: $19.00
![LightWave 11.5 Modeler Tools- Volume #1 [AG]](http://www.learn3dsoftware.com/LW_11_5_Modeler_Vol_1_400pix.jpg)
LightWave 11.5 Modeler Tools- Volume #1 [AG]
In this First Volume of 12 Volumes Lightwave Instructor Adam Gibson introduces the 3D student to Lightwave's Powerful Modeler. A great series for beginner 3D students. Table of Contents for Modeler Volume #1: Chapter 1- Intro, Chapter 2- Modeler Overview, Chapter 3- Polygon Types and Theory, Chapter 4- Unit Primitives, Chapter 5- The Move Tool in Detail, Chapter 6- Axis Translate Tool (Part One), Chapter 7- Axis Translate Tool (Part Two), Chapter 8- Axis Translate Tool (Part Three), Chapter 9- Final, Running Time: 3 hrs. 19 mins., Resolution: 1920 x 1080 pixels, Video Format: MP4 Video (.mp4), Level: Beginner
Price: $19.00

Lightwave 11.5- UV Mapping a Human
In this video tutorial Lightwave Instructor Adam Gibson demonstrates how to UV Unwrap a Human using the new powerful ABF Unwrap tool in Lightwave 11.5. Problem Solving and Work Flow is shown in great detail in order to educate you on how to get the best possible UV Maps for your 3D models. Without clean UV Maps it is very difficult to have glitch-free textures. This tutorial will give you the knowledge on how to pre-plan your UV unwraps and how to fix UV unwrapping errors. *Bonus: Includes all Content Files and a free Female Human Model. Running Time: 4 hrs. 21 mins., Resolution: 1920 x 1080 pixels, Video Format: MP4 Video (.mp4), Level: BeginnerPrice: $19.00
GoZ for Lightwave 11 and ZBrush Users- Volume #3- Endomorphs
GoZ is a new and powerful addition to Lightwave 11. In this third volume on GoZ Instructor Adam Gibson demonstrates how to create Endomorphs in ZBrush for use in Lightwave 3D. Learn the theory, the possibilities, and the Gotchas that can arise combined with the understanding of how to overcome them.
Being able to take advantage of powerful Zbrush sculpting tools for animation purposes will open new doors for your creations. Learn to how to combine Endomorphs created in both ZBrush and Lightwave for maximum control over your objects. A Great Video for those who wish increase their knowledge on how to integrate Lightwave and Zbrush together for animation purposes!! Running Time: 2 hrs. 5 mins., High Quality (Screen-Res 1920 x 1080 pixels) MP4 Video (.mp4), Level: Beginner to IntermediatePrice: $19.00

Lightwave 11- Endomorph Essentials
In this training video Lightwave 3D Instructor Adam Gibson demonstrates how to quickly get started using Endomorphs for animation production. Tips and Tricks are shown on how to avoid mesh distortions when using Endomorphs on Sub-D models. Multiple examples using Endomorphs are shown in detail to provide the 3D student a strong foundation of how they could use and create their own imaginative uses for Endomorphs. A great training video for beginner Lightwave users!! Running Time: 3 hrs. 44 mins., High Quality (Screen-Res 1920 x 1080 pixels) MP4 Video, Level: Beginner & Up
Price: $19.00
![LightWave 11 -Rigging a Tiger [AG]](http://www.learn3dsoftware.com/Lightwave_3D_Rigging_Tiger_Product_Shot_400pix.jpg)
LightWave 11 -Rigging a Tiger [AG]
In this training video Lightwave 3D Instructor Adam Gibson demonstrates how to rig a tiger character for animation using Layout's powerful Bone Tools and IK (Inverse Kinematics) System. Tips and Tricks on how to clean up your rig to avoid typical problems like Gimble Lock and glitches during animating. Other topics covered include: Foot Control Goals for Position and Foot Pivoting, Knee/Elbow Control, the use of "Hold Bones" and "Weight Maps". A great video for beginner level Lightwave users to get started rigging Quadruped "Toe Walker" style animals like tigers, lions, cats, dogs and more!!
*Bonus: Includes Tiger model and all Scene Files so you can follow along with course!! Running Time: 8 hrs 52 mins., High Quality (Screen-Res 1920 x 1080 pixels) MP4 Video, Level: Beginner & Up
Price: $19.00
LWCAD 3.6 Modeling Tools BUNDLE (Volumes #1,2,3,4,5, and 6) [AG]
This Lightwave Modeling Bundle includes LWCAD 3.6 Volumes #1,2,3,4,5,and 6. Save $35!!Price: $79.00
GoZ for Lightwave 11 and ZBrush Users-Volume #2-UV Maps
GoZ is a new and powerful addition to Lightwave 11. In this second volume on GoZ an in depth study of the possibilities, strengths and limitations of UV Mapping in both software applications are shown. Tips and Tricks are shown how to deal with typical problems gotchas that can arise when integrating Lightwave with ZBrush. Learn how to create UV Maps for your 3D models using Zbrush's powerful "UV Master" Plugin.
Running Time: 3 hrs. 52 mins.
High Quality (Screen-Res 1680 x 1050 pixels) MP4 Video (.mp4)
Level: Beginner to Intermediate
Price: $19.00
![Lightwave 11-Animating a Human-Vol.#1-How to Make Your Character Walk [AG]](http://www.learn3dsoftware.com/LW_Animating_A_Human_Vol_1_Product_Shot_400pix.jpg)
Lightwave 11-Animating a Human-Vol.#1-How to Make Your Character Walk [AG]
In this training course for beginner Lightwave students 3D Instructor Adam Gibson shows the essential basics of how to animate a character walking. Keyframing concepts and problem solving are covered in an easy to understand video chapters.
*All Model and Scene Files are included with the course so that you can follow along.
High Quality (Screen-Res 1440 x 900 pixels) Quicktime Video
Level: Beginner
Running Time: 3 hrs. 56 mins.Price: $19.00

Lightwave Sci-Fi Modeling (Volume #2)-Exteriors: Futuristic City
In this training video watch Lightwave Instructor Adam Gibson build a Sci-Fi Style City similar to many that have been created for big screen sci-fi action films.
The premise of this video is to show Lightwave's quick and powerful modeling tools combined with some compositing tricks to create the illusion of a massive city using very little geometry. Less geometry means quicker render times. Techniques on how to set up a Sky-Dome and how to set-up optical illusions using Perspective are discussed in detail.
Level: Beginner
Running Time: 7 hrs. 44 mins.
Screen-Res: 1680 x 1050 pixels)
Video Format: MP4(.mp4)Price: $19.00

Mega-Uber Deal (Contains 55 Video Titles, 2 Texture Packs, 1 Model Pack)
The Mega-Uber Deal is a collection of 55 Video Tutorial Titles by Adam Gibson as well as 2 Texture Packs and 1 Model Collection. It contains 31-LightWave 3D titles, 12-3D Coat titles, 7-ZBrush titles, 4 Modo titles and 2-Photoshop titles. This offer will be available for a Limited Time only.Lightwave Titles
- Dinosaur Sub-D Modeling
- Dinosaur UV Mapping
- Spacecraft Modeling
- Surfacing for Beginners Volume #1
- Surfacing for Beginners Volume #2
- Surfacing for Beginners Volume #3
- Advanced UV Mapping Volume #1
- Advanced UV Mapping Volume #2
- Modeler Volume #1
- Modeler Volume #2
- Modeler Volume #3
- Modeler Volume #4
- Modeler Volume #5
- Modeler Volume #6
- Rigging a T-Rex with Skelegons
- Rigging a T-Rex with Bones
- Animating a Tyrannosaurus
- Sci-Fi Modeling-Interiors Hallways and Corridors
- LW CAD 3.6 Modeling Tools Volume #1
- LW CAD 3.6 Modeling Tools Volume #2
- LW CAD 3.6 Modeling Tools Volume #3
- LW CAD 3.6 Modeling Tools Volume #4
- LW CAD 3.6 Modeling Tools Volume #5
- LW CAD 3.6 Modeling Tools Volume #6
- Rigging a Human
- Animation Essentials-Vol. #1
- Animation Essentials-Vol. #2
- Camera Essentials
- ZBrush 3.1 for Lightwave Users-Volume #1-How to Paint Color
- ZBrush 3.1 for Lightwave Users-Volume #2-Normal Maps
- ZBrush 3.1 for Lightwave Users-Volume #3-Displacement Maps
- 3D Coat -StarFighter Detailing Volume #1 -Normal Maps
- 3D Coat -UV Mapping a StarFighter -Quick Method
- 3D Coat 3.5 for Lightwave Users-Photo Painting I
- 3D Coat 3.5 for Lightwave Users-Photo Painting II
- 3D Coat 3.5 for Lightwave Users-Painting Color
- 3D Coat 3.5 for Lightwave Users-Normal and Displacement Maps
- 3D Coat 3.5 for Lightwave Users-Voxel Sculpting:Project Dragon
- 3D Coat 3.5 for Lightwave Users-UV Mapping
- 3D Coat 3.5 for Lightwave Users-Retopology I
- 3D Coat 3.5 for Lightwave Users-Retopology II-Project Suchomimus
- 3D Coat 3.5 for Lightwave Users-Auto-Retopology
- ZBrush 4 for Lightwave Users-Painting Color
- ZBrush 4 for Lightwave Users-Normal Maps
- ZBrush 4 for Lightwave Users-Displacement Maps
- ZBrush 4- ZApp Link Plugin
- ZBrush 3.1 Creature Sculpting
- ZBrush 3.1 Creature Head Detailing
- ZBRUSH 3.5 -UV Unwrapping-"Mastering UV Master"
- Modo 501 Painting Color-The Essentials
- Modo 501 Modeling Tools(Volume #1)
- MODO 501-Retopology
- MODO 501-Dinosaur UV Mapping
- Photoshop CS4-Basic Training
- Photoshop CS4-Seamless Textures
- Creature Eye Packs- Volume #1
- 2D Sci-Fi Alpha Brush Collection Volume #1
- Dinosaur Mega-Pack (Over 40 Dinosaurs)
Price: $199.00

3D Coat-2D Sci-Fi Alpha Brush Collection Volume #1
This powerful Sci-Fi Alpha Brush Collection contains 100 individual alpha brushes. The brushes can be used in any painting or sculpting program.
Programs like 3D Coat, ZBrush, Modo, Mudbox, Photoshop and more. These Alpha Brushes will save you thousands of hours in production time when detailing Sci-Fi creations like spaceships, space stations, architecture, droids, robots, machines and more. When combining these brushes together you can make extremely high detailed and complex looking surfaces.
Speed up your workflow by using pre-made alpha brushes.
Contains: 100 Sci-Fi Alpha Brushes
All images are 500 x 500 pixels.
Format: JPEG (.jpg)

Price: $19.00

Lightwave 10- Camera Essentials
In this training video watch Lightwave 3D Instructor Adam Gibson show the beginner 3D student how to quickly get up and started using Cameras and Rendering images in Lightwave 10.
Topics covered: Viewport Modes, VPR (Viewport Preview Render), Camera Set-Up and Control, How to Render Images and Animations, How to Export/Save Images and Animations to your Hard-Drive, Image Formats, 24-bit Vs. 32-bit (Creating Alpha Channels Embedded in your rendered images), Safe Areas Mode, Field Chart, Pixel Aspect Ratio, Antialiasing, Camera Types, Output Resolutions, and a quick intro to Stereo-scopic 3D in Lightwave.
Running Time: 2 hrs. 32 mins.
Level: Beginner
Screen Resolution: 1440 x 900 pixels
Format: MP4 Video (.mp4)Price: $19.00

Lightwave 10-Rigging a Human-Project Biped
In this 14 hour video training course for beginner Lightwave students 3D Instructor Adam Gibson shows the essential basics to rig human style characters for posing and animation.
Detailed demonstration of how to build/edit a complete skeletal structure with skelegons/bones, weight-mapping, bone parenting, model modification/adjustments, test deformations, adding powerful hand and foot control nulls, IK (Inverse Kinematics) Set-up and problem solving are all included within this course. A great training guide for beginner 3D students to get started rigging their 3D models for animation purposes. Make your 3D models and characters come to life!!
*All Model and Scene Files are included with the course so that you can follow along.
High Quality (Screen-Res 1440 x 900 pixels) Quicktime Video
Level: Beginner
Running Time: 14 hrs. 39 minsPrice: $19.00

Lightwave 10-Animation Essentials-Vol. #1
In this first volume of Lightwave 10-Animation Essentials Lightwave Instructor Adam Gibson gives the beginner 3D student a tour of Lightwave's Layout interface, animation tools, and shows how to set up a scene and create a spaceship animation. A great video to get you up and started animating in Lightwave 3D.
Level: Beginner
Running Time: 2 hrs. 49 mins
Format: MP4 (1440 x 900 pixels) Price: $19.00
![LightWave 3D- Surfacing- Volume #3-Image Maps [AG]](http://www.learn3dsoftware.com/LW_Surfacing_Vol_3_Image_Maps_Product_Shot_400pix.jpg)
LightWave 3D- Surfacing- Volume #3-Image Maps [AG]
In this video tutorial Lightwave 3D Instructor Adam Gibson introduces the beginner 3D student to surfacing objects with image maps. Surfacing using image maps is one of the best ways to creating amazing looking objects in 3D. Image maps can be used for various other things like creating amazing background plates for you scenes and creating cool bump details to your objects. If you are new to surfacing objects in 3D this video is a highly recommended addition to your library of tutorials.
Running Time: 2 hrs. 50 mins
Level: Beginner
Screen Resolution: 1440 x 900 pixels
Format: MP4 Video (.mp4)Price: $19.00
![LWCAD 3.6 Modeling Tools (Volume #6) [AG]](http://www.learn3dsoftware.com/LWCAD_36_Modeling_Tools_Vol_6_Product_Shot_400pix_JPEG.jpg)
LWCAD 3.6 Modeling Tools (Volume #6) [AG]
In this sixth volume on LWCAD 3.6 Instructor Adam Gibson introduces the Lightwave 3D student to the essentials required to using this powerful modeling plug-in. LWCAD is known for it's architectural time-saving modeling tools. Introduction to LWCAD's advanced modeling tools is covered in great detail. This sixth volume is a must to able to get you up and started using LWCAD's core modeling tools.Price: $19.00
![LWCAD 3.6 Modeling Tools (Volume #5) [AG]](http://www.learn3dsoftware.com/LWCAD_36_Modeling_Tools_Vol_5_Product_Shot_400pix_JPEG.jpg)
LWCAD 3.6 Modeling Tools (Volume #5) [AG]
LWCAD 3.6 Modeling Tools (Volume #5)-by Adam Gibson
In this fifth volume on LWCAD 3.6 Instructor Adam Gibson introduces the Lightwave 3D student to the essentials required to using this powerful modeling plug-in. LWCAD is known for it's architectural time-saving modeling tools. Introduction to LWCAD's advanced modeling tools is covered in great detail. This fifth volume is a must to able to get you up and started using LWCAD's core modeling tools.
Running Time: 2 hrs. 5 mins.
Level: Beginner
Screen Resolution: 1440 x 900 pixels
Format: MP4 Video (.mp4)Price: $19.00
![LWCAD 3.6 Modeling Tools (Volume #4) [AG]](http://www.learn3dsoftware.com/LWCAD_36_Modeling_Tools_Vol_4_Product_Shot_400pix_JPEG.jpg)
LWCAD 3.6 Modeling Tools (Volume #4) [AG]
In this fourth volume on LWCAD 3.6 Instructor Adam Gibson introduces the Lightwave 3D student to the essentials required to using this powerful modeling plug-in. LWCAD is known for it's architectural time-saving modeling tools. Introduction to LWCAD's advanced modeling tools is covered in great detail. This fourth volume is a must to able to get you up and started using LWCAD's core modeling tools.
Running Time: 2 hrs. 12 mins.
Level: Beginner
Screen Resolution: 1440 x 900 pixels
Format: MP4 Video (.mp4)Price: $19.00
![LWCAD 3.6 Modeling Tools (Volume #3) [AG]](http://www.learn3dsoftware.com/LWCAD_36_Modeling_Tools_Vol_3_Product_Shot_400pix_JPEG.jpg)
LWCAD 3.6 Modeling Tools (Volume #3) [AG]
In this third volume on LWCAD 3.6 Instructor Adam Gibson introduces the Lightwave 3D student to the essentials required to using this powerful modeling plug-in. LWCAD is known for it's architectural time-saving modeling tools. Introduction to LWCAD's advanced modeling tools is covered in great detail. This third volume is a must to able to get you up and started using LWCAD's core modeling tools.
Table of Contents for LWCAD 3.6 Modeling Tools (Volume #3)
Chapter 1- Intro
Chapter 2- Circle Tool (Part One)
Chapter 3- Circle Tool (Part Two)
Chapter 4- Ellipse Tool
Chapter 5- Rectangle Tool
Chapter 6- Rec3p Tool
Chapter 7- NGon Tool
Chapter 8- Star Tool
Chapter 9- Box Tool
Chapter 10- Box3p Tool
Chapter 11- Arc Section Tool
Chapter 12- Cylinder Tool
Chapter 13- Pyramid Tool
Chapter 14- Tube Tool
Chapter 15- Final
Running Time: 2 hrs.
Level: Beginner
Screen Resolution: 1440 x 900 pixels
Format: MP4 Video (.mp4)Price: $19.00
![LWCAD 3.6 Modeling Tools (Volume #2) [AG]](http://www.learn3dsoftware.com/LWCAD_36_Modeling_Tools_Vol_2_Product_Shot_400pix.jpg)
LWCAD 3.6 Modeling Tools (Volume #2) [AG]
In this second volume on LWCAD 3.6 Instructor Adam Gibson introduces the Lightwave 3D student to the essentials required to using this powerful modeling plug-in. LWCAD is known for it's architectural time-saving modeling tools. Introduction to LWCAD's advanced modeling tools is covered in great detail. This second volume is a must to able to get you up and started using LWCAD's core modeling tools.
Running Time: 2 hrs. 6 mins.
Level: Beginner
Screen Resolution: 1440 x 900 pixels
Format: MP4 Video (.mp4)Price: $19.00
![LWCAD 3.6 Modeling Tools (Volume #1) [AG]](http://www.learn3dsoftware.com/LWCAD_36_Modeling_Tools_Vol_1_Product_Shot_400pix.jpg)
LWCAD 3.6 Modeling Tools (Volume #1) [AG]
In this first volume on LWCAD 3.6 Instructor Adam Gibson introduces the Lightwave 3D student to the essentials required to using this powerful modeling plug-in. LWCAD is known for it's architectural time-saving modeling tools. Introduction to LWCAD's advanced Universal Coordinate System (UCS) and powerful Snapping Tools is covered in great detail. This first volume is a must to able to learn how to use all of LWCAD's tools in the latter volumes in this video training series.
Running Time: 1 hrs. 54 mins.
Level: Beginner
Screen Resolution: 1440 x 900 pixels
Format: MP4 Video (.mp4)Price: $19.00
Lightwave Sci-Fi Modeling (Volume #1)-Interiors: Hallways & Corridors
In this training video watch Lightwave Instructor Adam Gibson build a Sci-Fi Style Corridor/Hallway similar to many that have been created for big screen sci-fi action films.
Learn how to take simple shapes and turn them into highly detailed geometry. Learn how to make your polygons glow to be used a light sources. A great video for the beginner 3D modeler and those who wish to learn a few more new modeling tricks.Price: $19.00

Lightwave 3D 9.6 Animating a Tyrannosaurus
Lightwave 3D 9.6 Animating a Tyrannosaurus-by Adam Gibson
In this video tutorial Lightwave Instructor Adam Gibson demonstrates how to animate a Tyrannosaurus dinosaur using Lightwave's powerful animation tools. Walking and adding secondary motions for the T-Rex are shown in great detail.
Table of Contents for Animating a Tyrannosaurus
Chapter 1- Intro
Chapter 2- Importing the Scene File and Rigged/IK Model
Chapter 3- Setting Up the Viewports in Layout
Chapter 4- Correcting Object Size to Real World Scale
Chapter 5- Reviewing the Object Size Correction and using the "Item Picker" Plugin
Chapter 6- Timing for Animation
Chapter 7- Creating the First Walk Cycle (Adding Key Frames and Tension)
Chapter 8- Creating the Second Walk Cycle (Adding Key Frames and Tension)
Chapter 9- Creating the Third Walk Cycle (Adding Key Frames and Tension)
Chapter 10- Key Framing the Feet Lifting off the Ground
Chapter 11- Key Framing Head and Body Bobbing
Chapter 12- Leg IK Error Fix
Chapter 13- Key Framing Body Side-to-Side Movement (Part One)
Chapter 14- Key Framing Body Side-to-Side Movement (Part Two)
Chapter 15- IK Thigh Fix
Chapter 16- Body Movement Edit
Chapter 17- Key Framing Tail Movement
Chapter 18- Key Framing Neck Movement
Chapter 19- Key Framing Foot Bend (Part One)
Chapter 20- Key Framing Foot Bend (Part Two)
Chapter 21- Forearm Animation Test
Chapter 22- Key Framing Neck Turn and T-Rex Roaring at Camera
Level: Beginner
High Quality (Screen-Res 1440 x 900 pixels) Quicktime VideoPrice: $19.00
![LightWave 3D 9.6 Modeler- Volume #6 [AG]](http://www.learn3dsoftware.com/LW_96_Modeler_Vol_6_Product_Shot_400pix.jpg)
LightWave 3D 9.6 Modeler- Volume #6 [AG]
Table of Contents for Volume #6
Chapter 1- Intro
Chapter 2- Connect Tool (Edge Mode)
Chapter 3- Connect Tool (Point Mode)
Chapter 4- Connect Tool (Polygonal Mode)
Chapter 5- Bridge Tool (Part One)
Chapter 6- Bridge Tool (Part Two)
Chapter 7- Remove Polygons Tool
Chapter 8- Collapse Polygons Tool
Chapter 9- Band Glue Tool
Chapter 10- Boolean Tool (Operations: Union, Intersect, Subtract, and Add)
Chapter 11- Drill Tool (2D Operations: Core, Tunnel, Stencil, and Slice)
Chapter 12- Solid Drill Tool (3D Operations: Core, Tunnel, Stencil, and Slice)
Chapter 13- Speed Booleans (Operations: Union, Intersect, Subtract, and Add)
Chapter 14- Final
Running Time: 1 hr. 10 mins.
High Quality (Screen-Res 1440 x 900 pixels) Quicktime Video
Level: Beginner
Price: $19.00
![PHOTOSHOP CS4-How to Create Seamless Textures [AG]](http://www.learn3dsoftware.com/PS_CS4_Seamless_Textures_400Pix.jpg)
PHOTOSHOP CS4-How to Create Seamless Textures [AG]
Photoshop CS4-Seamless Textures-by Adam Gibson
In this training video instructor Adam Gibson shows how to take simple photos taken with a basic digital camera and convert them into seamless textures that are commonly used in 3D software applications. Through techniques in this tutorial you will learn how to easily convert your images into textures that can be used to simulate brick walls, bark on trees, and rock/ground on your 3D objects. These concepts can also be used to generate seamless textures beyond the examples shown in this 4 hour course. Being able to create your own textures is an extremely important skill for all 2D and 3D artists.
Table of Contents for Seamless Textures
Chapter 1- Intro
Chapter 2- What a Seamless Texture Means (Part One)
Chapter 3- What a Seamless Texture Means (Part Two)
Chapter 4- What a Seamless Texture Means (Part Three)
Chapter 5- Brick Texture Set-Up
Chapter 6- Offset Filter
Chapter 7- Brick Seam Editing (Part One)
Chapter 8- Brick Seam Editing (Part Two)
Chapter 9- Brick Seam Editing (Part Three)
Chapter 10- Brick Seam Editing (Part Four)
Chapter 11- Brick Seam Editing (Part Five)
Chapter 12- Brick Seam Editing (Part Six)
Chapter 13- Brick Texture Testing and Correction
Chapter 14- Setting Up Bark Texture
Chapter 15- Bark Seam Editing (Part One)
Chapter 16- Bark Seam Editing (Part Two)
Chapter 17- Bark Seam Editing (Part Three)
Chapter 18- Bark Seam Editing (Part Four)
Chapter 19- Bark Seam Editing (Part Five)
Chapter 20- Bark Render Testing
Chapter 21- Setting Up Rock Texture
Chapter 22- Rock Seam Editing
Chapter 23- Rock Render Test
Running Time: 4 hrs. 10 mins
High Quality (Screen-Res 1440 x 900 pixels) Quicktime Video
Level: BeginnerPrice: $19.00

Lightwave 3D 9.6 Rigging a T-Rex with Bones
In this Rigging Video Course Lightwave Instructor Adam Gibson shows the beginner 3D student how to use the Bone Tools in Lightwave's Layout to rig a Tyrannosaurus dinosaur. Weight Mapping is also covered in addition to show how to keep your character's mesh stable during posing and animation. This video is an excellent way to learn how to quickly and easily get your characters set up so they can eventually be animated to walk, run, jump and much much more.
Chapter 1- Intro
Chapter 2- Creating Eye Weight Maps
Chapter 3- Teeth Weight Maps
Chapter 4- Merging Layers
Chapter 5- Setting Up Rig Scene File
Chapter 6- COG Bone
Chapter 7- How to Rest a Bone
Chapter 8- Leg Bones
Chapter 9- Fixing Leg Bones
Chapter 10- Bone Connector Tool
Chapter 11- Renaming Leg Bones
Chapter 12- Tail Bones
Chapter 13- Fixing Tail Pitch
Chapter 14- Fixing Hip Pitch
Chapter 15- Spine Head Bones
Chapter 16- Lower Jaw Bones
Chapter 17- Renaming Bones
Chapter 18- How to Split
Chapter 19- Renaming Head Bones
Chapter 20- Creating Arm, Hand and Finger Bones
Chapter 21- Checking Pitch Channels on Fingers
Chapter 22- Groin Belly Hold Bone
Chapter 23- Eye Bone
Chapter 24- Mirror Eye Bone
Chapter 25- Renaming Arm and Claw Bones
Chapter 26- Mirroring Arm Bones
Chapter 27- Mirroring Leg Bones
Chapter 28- Parenting Eye Bones to the Head Bone
Chapter 29- Checking Bone Chain Parents
Chapter 30- Resting Bones Problem
Chapter 31- Fixing Bone Sizing and Scaling Issues
Chapter 32- Resting the Bones
Chapter 33- Fall Off Type and Subdivision Order
Chapter 34- Testing Tail Bones
Chapter 35- Testing Spine Bones
Chapter 36- Testing Neck Bones
Chapter 37- Testing Eye Bones Part One
Chapter 38- Testing Eye Bones Part Two
Chapter 39- Upper and Lower Jam Weight Maps
Chapter 40- Testing Eye Bones Part Three
Chapter 41- Testing Eye Bones Part Four
Chapter 42- Lower Jaw Bone Test
Chapter 43- Arm Test
Chapter 44- Leg Testing
Chapter 45- Creating Object Nulls
Chapter 46- Parenting Object Nulls
Chapter 47- Positioning Goals
Chapter 48- Setting Up IK(Inverse Kinematics) in the Legs
High Quality (Screen-Res 1440 x 900 pixels) Quicktime Video
Level: BeginnerPrice: $19.00
Lightwave 3D 9.6 Rigging a T-Rex with Bones-Part 4
Price: $29.00
Lightwave 3D 9.6 Rigging a T-Rex with Bones-Part 3
Price: $29.00
Lightwave 3D 9.6 Rigging a T-Rex with Bones-Part 2
Price: $29.00
Lightwave 3D 9.6 Rigging a T-Rex with Bones-Part 1
Price: $29.00

Lightwave 3D 9.6 Rigging a T-Rex with Skelegons
Lightwave 3D 9.6 Rigging a T-Rex with Skelegons-by Adam Gibson
In this 6 hour rigging course Lightwave Instructor Adam Gibson shows the student how to easily set-up a Tyrannosaurus base skeleton using Lightwave's "Skelegons" Tool in modeler and then how to convert it to Bones in Layout. The video then continues to show the set-up process in Layout as well as how to apply Weight Maps for more control over your mesh. Problem solving, test deformations, and IK (Inverse Kinematics) are also shown in great detail. A perfect video for a beginner 3D student to get started rigging characters quickly.
Price: $19.00
Lightwave 3D 9.6 Rigging a T-Rex with Skelegons (Part 4)
Lightwave 3D 9.6 Rigging a T-Rex with Skelegons-by Adam Gibson
In this 6 hour rigging course Lightwave Instructor Adam Gibson shows the student how to easily set-up a Tyrannosaurus base skeleton using Lightwave's "Skelegons" Tool in modeler and then how to convert it to Bones in Layout. The video then continues to show the set-up process in Layout as well as how to apply Weight Maps for more control over your mesh. Problem solving, test deformations, and IK (Inverse Kinematics) are also shown in great detail. A perfect video for a beginner 3D student to get started rigging characters quickly.
Table of Contents for Rigging a T-Rex with Skelegons
Chapter 1- Intro
Chapter 2- Checking Your Mesh for Errors and Problems
Chapter 3- Setting Up Layers for Skelegons
Chapter 4- COG (Center of Gravity) Skelegon
Chapter 5- Tail Skelegons
Chapter 6- Head and Body Skelegons
Chapter 7- Leg Skelegons
Chapter 8- Hip Skelegon
Chapter 9- Arm and Claw Skelegons
Chapter 10- Adjusting Arm and Claw Skelegons
Chapter 11- Hold Bone and Chest Plate Skelegons
Chapter 12- Hold Bones
Chapter 13- Renaming Skelegons Part One
Chapter 14- Renaming Skelegons Part Two
Chapter 15- Renaming Skelegons Part Three
Chapter 16- Mirroring Arm Leg Chains
Chapter 17- Renaming Mirrored Skelegons
Chapter 18- Eye Ball Skelegons
Chapter 19- Eye Ball Weight Maps
Chapter 20- Leg Weight Maps
Chapter 21- Merge Items to One Layer
Chapter 22- Lower Jaw Weight Map
Chapter 23- Upper Jaw Weight Map
Chapter 24- Converting Skelegons to Bones
Chapter 25- How to Save Bones to a Scene File
Chapter 26- Parenting the Eyes to the Head Bone
Chapter 27- Eye Bones Test
Chapter 28- Tail Bones Test
Chapter 29- Leg Bones Tests
Chapter 30- Subdivision Order Setting
Chapter 31- Re-Checking Deformations
Chapter 32- Body and Leg Weight Maps
Chapter 33- Problem Solving and Locking Off Channels
Chapter 34- Locking Off Channels
Chapter 35- Parenting Bone Chains to COG (Center of Gravity) Bone
Chapter 36- Adding Foot Goals (Object Nulls)
Chapter 37- Positioning Foot Goals
Chapter 38- Setting Up the Leg IK (Inverse Kinematics)
Chapter 39- Enabling and Testing the IK Chains in the Legs
High Quality (Screen-Res 1440 x 900 pixels) Quicktime Video
Level: Beginner
Running Time: 6 Hour Rigging Course
Price: $29.00
Lightwave 3D 9.6 Rigging a T-Rex with Skelegons (Part 3)
Lightwave 3D 9.6 Rigging a T-Rex with Skelegons-by Adam Gibson
In this 6 hour rigging course Lightwave Instructor Adam Gibson shows the student how to easily set-up a Tyrannosaurus base skeleton using Lightwave's "Skelegons" Tool in modeler and then how to convert it to Bones in Layout. The video then continues to show the set-up process in Layout as well as how to apply Weight Maps for more control over your mesh. Problem solving, test deformations, and IK (Inverse Kinematics) are also shown in great detail. A perfect video for a beginner 3D student to get started rigging characters quickly.
Table of Contents for Rigging a T-Rex with Skelegons
Chapter 1- Intro
Chapter 2- Checking Your Mesh for Errors and Problems
Chapter 3- Setting Up Layers for Skelegons
Chapter 4- COG (Center of Gravity) Skelegon
Chapter 5- Tail Skelegons
Chapter 6- Head and Body Skelegons
Chapter 7- Leg Skelegons
Chapter 8- Hip Skelegon
Chapter 9- Arm and Claw Skelegons
Chapter 10- Adjusting Arm and Claw Skelegons
Chapter 11- Hold Bone and Chest Plate Skelegons
Chapter 12- Hold Bones
Chapter 13- Renaming Skelegons Part One
Chapter 14- Renaming Skelegons Part Two
Chapter 15- Renaming Skelegons Part Three
Chapter 16- Mirroring Arm Leg Chains
Chapter 17- Renaming Mirrored Skelegons
Chapter 18- Eye Ball Skelegons
Chapter 19- Eye Ball Weight Maps
Chapter 20- Leg Weight Maps
Chapter 21- Merge Items to One Layer
Chapter 22- Lower Jaw Weight Map
Chapter 23- Upper Jaw Weight Map
Chapter 24- Converting Skelegons to Bones
Chapter 25- How to Save Bones to a Scene File
Chapter 26- Parenting the Eyes to the Head Bone
Chapter 27- Eye Bones Test
Chapter 28- Tail Bones Test
Chapter 29- Leg Bones Tests
Chapter 30- Subdivision Order Setting
Chapter 31- Re-Checking Deformations
Chapter 32- Body and Leg Weight Maps
Chapter 33- Problem Solving and Locking Off Channels
Chapter 34- Locking Off Channels
Chapter 35- Parenting Bone Chains to COG (Center of Gravity) Bone
Chapter 36- Adding Foot Goals (Object Nulls)
Chapter 37- Positioning Foot Goals
Chapter 38- Setting Up the Leg IK (Inverse Kinematics)
Chapter 39- Enabling and Testing the IK Chains in the Legs
High Quality (Screen-Res 1440 x 900 pixels) Quicktime Video
Level: Beginner
Running Time: 6 Hour Rigging Course
Price: $29.00
Lightwave 3D 9.6 Rigging a T-Rex with Skelegons (Part 2)
Lightwave 3D 9.6 Rigging a T-Rex with Skelegons-by Adam Gibson
In this 6 hour rigging course Lightwave Instructor Adam Gibson shows the student how to easily set-up a Tyrannosaurus base skeleton using Lightwave's "Skelegons" Tool in modeler and then how to convert it to Bones in Layout. The video then continues to show the set-up process in Layout as well as how to apply Weight Maps for more control over your mesh. Problem solving, test deformations, and IK (Inverse Kinematics) are also shown in great detail. A perfect video for a beginner 3D student to get started rigging characters quickly.
Table of Contents for Rigging a T-Rex with Skelegons
Chapter 1- Intro
Chapter 2- Checking Your Mesh for Errors and Problems
Chapter 3- Setting Up Layers for Skelegons
Chapter 4- COG (Center of Gravity) Skelegon
Chapter 5- Tail Skelegons
Chapter 6- Head and Body Skelegons
Chapter 7- Leg Skelegons
Chapter 8- Hip Skelegon
Chapter 9- Arm and Claw Skelegons
Chapter 10- Adjusting Arm and Claw Skelegons
Chapter 11- Hold Bone and Chest Plate Skelegons
Chapter 12- Hold Bones
Chapter 13- Renaming Skelegons Part One
Chapter 14- Renaming Skelegons Part Two
Chapter 15- Renaming Skelegons Part Three
Chapter 16- Mirroring Arm Leg Chains
Chapter 17- Renaming Mirrored Skelegons
Chapter 18- Eye Ball Skelegons
Chapter 19- Eye Ball Weight Maps
Chapter 20- Leg Weight Maps
Chapter 21- Merge Items to One Layer
Chapter 22- Lower Jaw Weight Map
Chapter 23- Upper Jaw Weight Map
Chapter 24- Converting Skelegons to Bones
Chapter 25- How to Save Bones to a Scene File
Chapter 26- Parenting the Eyes to the Head Bone
Chapter 27- Eye Bones Test
Chapter 28- Tail Bones Test
Chapter 29- Leg Bones Tests
Chapter 30- Subdivision Order Setting
Chapter 31- Re-Checking Deformations
Chapter 32- Body and Leg Weight Maps
Chapter 33- Problem Solving and Locking Off Channels
Chapter 34- Locking Off Channels
Chapter 35- Parenting Bone Chains to COG (Center of Gravity) Bone
Chapter 36- Adding Foot Goals (Object Nulls)
Chapter 37- Positioning Foot Goals
Chapter 38- Setting Up the Leg IK (Inverse Kinematics)
Chapter 39- Enabling and Testing the IK Chains in the Legs
High Quality (Screen-Res 1440 x 900 pixels) Quicktime Video
Level: Beginner
Running Time: 6 Hour Rigging Course
Price: $29.00