zBrush Training
ZBrush Bootcamp Series- Volumes #1 to #10 [AG]
The Zbrush Bundle Contains:
ZBrush Bootcamp Series- Volumes #1 to #10ZBrush Bootcamp- Volume #10- UV Mapping Secrets II [AG]
In this tenth video volume of 12 volumes 3D Instructor Adam Gibson takes the beginner 3D student through more UV Mapping Tools/Techniques and a Project-Based Session unwrapping a Therizinosaurus Dinosaur. The workflow for this project utilizes ZBrush's Powerful UV Master Plugin. Table of Contents for Volume #10: Chapter 1- Intro, Chapter 2- Polygroups for UV Mapping Overview, Chapter 3- Mask to Polygroups Conversion, Chapter 4- Polypaint to Polygroups Conversion, Chapter 5- Hide/Select Tools for Polygroup Creation, Chapter 6- ZModeler Polygroup Tools, Chapter 7- ZSphere to Polygroups Conversion, Chapter 8- UV Shells/Islands to Polygroups Conversion, Chapter 9- Therizinosaurus Dinosaur UV Unwrap in ZBrush Using Polygroups, Chapter 10- Therizinosaurus Dinosaur UV Unwrap in Lightwave/ZBrush Using Polygroups, Chapter 11- Final. Running Time: 2 hrs. 41 mins. High Quality (Screen-Res 1920 x 1080 pixels), Video Format: MP4 (.mp4), Level: Beginner.ZBrush Bootcamp- Volume #9- UV Mapping Secrets I [AG]
In this ninth video volume of 12 volumes 3D Instructor Adam Gibson introduces the beginner 3D student how to get up and started quickly using ZBrush 4R7's UV Mapping Tools. Some of the Topics Covered: 1) UV User Interface, 2) UV Master Plugin, 3) Automated UV Solutions, 4) Polygroup UVs, 5) Exporting UVed Models, 6) Copy/Pasting UVs, 7) How to Check for Overlapping UVs/Errors. Table of Contents for Volume #9: Chapter 1- Intro, Chapter 2- UV Map User Interface, Chapter 3- UV Master Plugin User Interface, Chapter 4- Texture Map User Interface, Chapter 5- Morph UV Tool (How to Check for UV Maps), Chapter 6- Delete UV Tool, Chapter 7- UV Map Size Tool, Chapter 8- UV Planar Tool, Chapter 9- UV Spherical Tool, Chapter 10- AUV (Adaptive) Automated Tiles Button and AUV Ratio Slider, Chapter 11- GUV (Group) Automated Tiles Button, Chapter 12- PUV (Packed) Automated Tiles Button, Chapter 13- How to Check for Overlapping UVs in ZBrush (New From UV Check Button), Chapter 14- How to Edit UVs in ZBrush Using the Move Brush, Chapter 15- New From UV Map Button, Chapter 16- UV Master Plugin Unwrapping a Human Head (Part One), Chapter 17- UV Master Plugin Unwrapping a Human Head (Part Two), Chapter 18- Saving, Loading, and Clearing Control Maps, Chapter 19- Pixel Density Maps, Chapter 20- Attract From Ambient Occlusion Tool, Chapter 21- Use Existing UV Seams Tool, Chapter 22- Final. Running Time: 2 hrs. 45 mins., High Quality (Screen-Res 1920 x 1080 pixels) , Video Format: MP4 (.mp4), Level: Beginner.ZBrush Bootcamp- Volume #8- ZModeler Tools I [AG]
In this eighth video volume of 12 volumes 3D Instructor Adam Gibson introduces the beginner 3D student how to get up and started using the powerful new ZModeler Tools in ZBrush 4R7. Learn these amazing polygonal modeling tools that will have you creating Base Meshes quicker and faster than ever before all with ZBrush!!
Some of the Topics Covered: 1) Initializing the ZModeler Brush, 2) Creating Geometry/Models from Scratch within ZBrush, 3) How to Import 3D Models created in other Software Packages, 4) Optimization and Gotchas for Importing Polygonal and Sub-D Models, 5) Creating and Deleting Edge Loops, 6) QCube and QSphere, 7) Creating and Deleting Polygons, 8) Point/Vertice Editing, 9) Moving Polygons and Edges, 10) Creating Insets, 11) Masking, 12) Editing with the Transpose Tools (Move, Rotate, Scale), 13) Modifying Pre-Existing Meshes and Much More!!
Table of Contents for Volume #8: Chapter 1- Intro, Chapter 2- What is ZModeler?, Chapter 3- Initializing ZModeler using ZBrush's Built-in Primitives and Subtools, Chapter 4- Initializing ZModeler when Importing Optimized Polygonal Meshes into ZBrush, Chapter 5- Initializing ZModeler when Importing Sub-D Meshes into ZBrush, Chapter 6- Important ZModeler Tools - Box Modeling a Spaceship (Part One), Chapter 7- Important ZModeler Tools - Box Modeling a Spaceship (Part Two), Chapter 8- Final. Running Time: 2 hrs. 4 mins., High Quality (Screen-Res 1920 x 1080 pixels) , Video Format: MP4 (.mp4), Level: Beginner.ZBrush Bootcamp- Volume #7- Lightwave Integration III- GoZ Concepts [AG]
In this seventh video volume of 12 volumes 3D Instructor Adam Gibson introduces the beginner 3D student how to get up and started quickly with ZBrush 4R7's GoZ Plugin. Learn how to import/export Multi-Layered Meshes and Subtools between ZBrush and Lightwave. Table of Contents for Volume #7: Chapter 1- Intro, Chapter 2- How to Install the GoZ Plugin, Chapter 3- Lightwave Layers Vs ZBrush Subtools, Chapter 4- How to Convert Multiple Lightwave Layers to Multiple Subtools in ZBrush, Chapter 5- Splitting Subtools with Masking, Chapter 6- Exporting Individual Subtools to Lightwave Using GoZ, Chapter 7- Export All Subtools Button Using GoZ, Chapter 8- Export Visible Subtools Button Using GoZ, Chapter 9- GoZ Export to Layout, Chapter 10- Final. Running Time: 1 hrs. 39 mins., High Quality (Screen-Res 1920 x 1080 pixels) , Video Format: MP4 (.mp4), Level: Beginner.ZBrush Bootcamp 2014 Series -Volume #6-Lightwave Integration II [AG]
In this sixth video volume of 12 volumes 3D Instructor Adam Gibson introduces the beginner 3D student to a hands on project on how to detail a sci-fi prop that was modeled in Lightwave 3D. The main goal is to show how to take a basic model created in Lightwave, detail it in ZBrush, and then import it seamlessly back into Lightwave with all the ZBrush created maps (Color, Displacement, Normal) in tact. Table of Contents for Volume #6: Chapter 1- Intro, Chapter 2- Optimizing the Mesh in Lightwave for Export to ZBrush, Chapter 3- Importing Mesh into ZBrush and Initial Set-up (Morph Target, UV's), Chapter 4- How to Import Custom Alpha Brushes into ZBrush, Chapter 5- Adding Panels and Details in Projection Master, Chapter 6- Exiting Projection Master, Chapter 7- Creating the Maps (Color, Displacement, and Normal), Chapter 8- Exporting and Set-Up in Lightwave, Test Renders, and Final. Running Time: 1 hrs. 22 mins., High Quality (Screen-Res 1920 x 1080 pixels) , Video Format: MP4 (.mp4), Level: Beginner.ZBrush Bootcamp 2014- Volume #5- Lightwave Integration I [AG]
In this fifth video volume of 12 volumes 3D Instructor Adam Gibson introduces how to integrate Lightwave 3D with ZBrush and how to use the GoZ system. The main focus of this beginner integration tutorial is how to optimize hard surface meshes for sculpting and painting in ZBrush and how to export that data back into Lightwave as seamlessly as possible. Zbrush is a very powerful 3D package but there are also some gotchas and pitfalls along the way that require some extra knowledge to get the best results possible. This tutorial covers those hidden items in great detail. Table of Contents for Volume #5: Chapter 1- Intro, Chapter 2- GoZ Import to Zbrush from Lightwave, Chapter 3- NGon Import Issues to ZBrush, Chapter 4- Unified Skin Option, Chapter 5- Sci-Fi Prop Optimized, Chapter 6- Adding Details in ZBrush, Chapter 7- Creating Maps in ZBrush (Color, Normal, and Displacement Maps), Chapter 8- GoZ Export to Lightwave, Chapter 9- Delete Lower Subdivision Level Fix, Chapter 10- More Displacement Gotchas, Chapter 11- Morph Target Solution, Chapter 12- Final. Running Time: 2 hrs. 52 mins., High Quality (Screen-Res 1920 x 1080 pixels) , Video Format: MP4 (.mp4), Level: Beginner.ZBrush Bootcamp Series Volume #4-Getting Started IV
In this fourth video volume of 12 volumes 3D Instructor Adam Gibson introduces the beginner 3D student how to get up and started quickly with ZBrush 4R6. Table of Contents for Volume #4: Chapter 1- Intro, Chapter 2- Dynamesh Intro (Part One), Chapter 3- Dynamesh Intro (Part Two), Chapter 4- Making a Critter/Creature Using Dynamesh (Part One), Chapter 5- Making a Critter/Creature Using Dynamesh (Part Two), Chapter 6- Dynamesh Groups Button and Slice Curve Brush, Chapter 7- Groups Splits Tool and Close Holes Tool, Chapter 8- How to Convert a Mask to a Poly Group, Chapter 9- GroupsLoops Tool, Chapter 10- PolyGroup Selection and the Move Tool, Chapter 11- Group Panels Button and Split Parts Tool, Chapter 12- Merge Visible Subtools Button. Running Time: 1 hrs. 53 mins., High Quality (Screen-Res 1920 x 1080 pixels) , Video Format: MP4 (.mp4), Level: Beginner.ZBrush Bootcamp Series Volume #3-Getting Started III
In this third video volume of 12 volumes 3D Instructor Adam Gibson introduces the beginner 3D student how to get up and started quickly with ZBrush 4R6. Table of Contents for Volume #3: Chapter 1- Intro, Chapter 2- Backface Masking Button for Sculpting on Thin Meshes/Objects, Chapter 3- Topological Brush Settings, Chapter 4- How to Paint a Mask, Chapter 5- How to Inverse a Mask, Chapter 6- How to Clear a Mask, Chapter 7- How to Erase a Mask, Chapter 8- Mask All, Chapter 9- Blur Mask, Chapter 10- Sharpen Mask, Chapter 11- Grow Mask, Chapter 12- Shrink Mask, Chapter 13- Extract Polys to New Subtool, Chapter 14- Append and Insert Tool (Part One), Chapter 15- Append and Insert Tool (Part Two), Chapter 16- Final. Running Time: 1 hr. 53 mins., High Quality (Screen-Res 1920 x 1080 pixels), Video Format: MP4 (.mp4), Level: Beginner.ZBrush Bootcamp Series Volume #2-Getting Started II
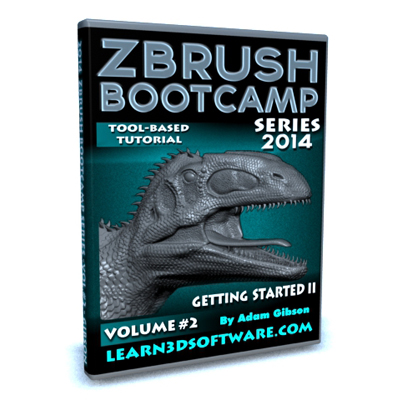
In this second video volume of 12 volumes 3D Instructor Adam Gibson introduces the beginner 3D student how to get up and started quickly with ZBrush 4R6. Table of Contents for Volume #2: Chapter 1- Intro, Chapter 2- How to Clear the Canvass, Chapter 3- Primitives Introduction and Make PolyMesh 3D, Chapter 4- Cube Primitive, Chapter 5- Cylinder Primitive, Chapter 6- Cone Primitive, Chapter 7- Ring3D Primitive, Chapter 8- Star3D Primitive, Chapter 9- Arrow3D Primitive, Chapter 10- Spiral3D Primitive, Chapter 11- Helix3D Primitive, Chapter 12- Gear3D Primitive, Chapter 13- Spherinder3D Primitive, Chapter 14- Terrain3D Primitive, Chapter 15- Plane3D Primitive, Chapter 16- Circle3D Primitive, Chapter 17- SweepProfile3D Primitive, Chapter 18- Initialize Primitives (Part One), Chapter 19- Initialize Primitives (Part Two), Chapter 20- Orthagonal Perspective Views, Chapter 21- How to Move Objects/Meshes, Chapter 22- Combine Masking and the Move Tool. Running Time: 2 hrs. 8 mins., High Quality (Screen-Res 1920 x 1080 pixels) , Video Format: MP4 (.mp4), Level: Beginner.ZBrush Bootcamp Series Volume #1-Getting Started I
In this first video volume of 12 volumes 3D Instructor Adam Gibson introduces the beginner 3D student how to get up and started quickly with ZBrush 4R6. Table of Contents for Volume #1: Chapter 1- Intro, Chapter 2- Purpose, Chapter 3- General Orientation to User Interface, Chapter 4- Poly Paint Introduction, Chapter 5- Switch Color, Chapter 6- Alternate Colors Button, Chapter 7- Color Picker, Chapter 8- Eraser Brush Alternative, Chapter 9- Draw Size, Chapter 10- Focal Shift, Chapter 11- Premade Models ZTools, Chapter 12- How to Import OBJ Models, Chapter 13- How to Add Scales to a Dinosaur , Chapter 14- How to Save Your Work and Final. Running Time: 2 hrs. 43 mins., High Quality (Screen-Res 1920 x 1080 pixels) , Video Format: MP4 (.mp4), Level: Beginner.GoZ for Lightwave 11 and ZBrush Users- Volume #3- Endomorphs
GoZ is a new and powerful addition to Lightwave 11. In this third volume on GoZ Instructor Adam Gibson demonstrates how to create Endomorphs in ZBrush for use in Lightwave 3D. Learn the theory, the possibilities, and the Gotchas that can arise combined with the understanding of how to overcome them.
Being able to take advantage of powerful Zbrush sculpting tools for animation purposes will open new doors for your creations. Learn to how to combine Endomorphs created in both ZBrush and Lightwave for maximum control over your objects. A Great Video for those who wish increase their knowledge on how to integrate Lightwave and Zbrush together for animation purposes!! Running Time: 2 hrs. 5 mins., High Quality (Screen-Res 1920 x 1080 pixels) MP4 Video (.mp4), Level: Beginner to IntermediateZBrush 4R4- Retoplogy Vol.#1- Topology Brush
In this video tutorial ZBrush Instructor Adam Gibson shows how to use the newly added Topology Brush in ZBrush 4R4. Retoplogy is often a necessary part of creating clean meshes to work with and creating clothing and accessories that fit perfectly to a characters body shape. Table of Contents for Retopology Volume #1: Chapter 1- Intro, Chapter 2- Preparing Mesh for Retopology, Chapter 3- Topology Brush Basics, Chapter 4- Symmetry Mode, Chapter 5- Create Geometry, Chapter 6- Exporting Retopology Mesh, Chapter 7- Multiple Sub-D Levels, Running Time: 1 hr. 9 mins., Resolution: 1920 x 1080 pixels, Video Format: MP4 Video (.mp4), Level: BeginnerZBrush 4R4- Retoplogy Vol.#2- QRemesher
In this video tutorial ZBrush Instructor Adam Gibson shows how to use the newly added auto-retopology tool called QRemesher in ZBrush 4R4. Retopology is often a necessary part of creating clean meshes to enable better sculpting and better topology flow is required to maintain error free deformations that can occur during animation. Table of Contents for Retopology Volume #2: Chapter 1- Intro, Chapter 2- QRemesher Basics, Chapter 3- QRemesher Guides, Chapter 4- Retopology Mesh Clean-Up. Running Time: 58 mins., Resolution: 1920 x 1080 pixels, Video Format: MP4 Video (.mp4), Level: BeginnerGoZ for Lightwave 11 and ZBrush Users-Volume #2-UV Maps
GoZ is a new and powerful addition to Lightwave 11. In this second volume on GoZ an in depth study of the possibilities, strengths and limitations of UV Mapping in both software applications are shown. Tips and Tricks are shown how to deal with typical problems gotchas that can arise when integrating Lightwave with ZBrush. Learn how to create UV Maps for your 3D models using Zbrush's powerful "UV Master" Plugin.
Running Time: 3 hrs. 52 mins.
High Quality (Screen-Res 1680 x 1050 pixels) MP4 Video (.mp4)
Level: Beginner to Intermediate
GoZ for Lightwave 11 and ZBrush Users-Volume #1- The Essentials
GoZ is a new and powerful addition to Lightwave 11. In this first volume on GoZ an in depth study of the possibilities, strengths and limitations are shown. Tips and Tricks are shown how to deal with typical problems gotchas that can arise when integrating Lightwave with ZBrush. Learn how to get the best possible Color, Normal and Displacement maps for your 3D models.
Running Time: 4 hrs. 49 mins.
High Quality (Screen-Res 1680 x 1050 pixels) MP4 Video (.mp4)
Level: Beginner to IntermediateMega-Uber Deal (Contains 55 Video Titles, 2 Texture Packs, 1 Model Pack)
The Mega-Uber Deal is a collection of 55 Video Tutorial Titles by Adam Gibson as well as 2 Texture Packs and 1 Model Collection. It contains 31-LightWave 3D titles, 12-3D Coat titles, 7-ZBrush titles, 4 Modo titles and 2-Photoshop titles. This offer will be available for a Limited Time only.Lightwave Titles
- Dinosaur Sub-D Modeling
- Dinosaur UV Mapping
- Spacecraft Modeling
- Surfacing for Beginners Volume #1
- Surfacing for Beginners Volume #2
- Surfacing for Beginners Volume #3
- Advanced UV Mapping Volume #1
- Advanced UV Mapping Volume #2
- Modeler Volume #1
- Modeler Volume #2
- Modeler Volume #3
- Modeler Volume #4
- Modeler Volume #5
- Modeler Volume #6
- Rigging a T-Rex with Skelegons
- Rigging a T-Rex with Bones
- Animating a Tyrannosaurus
- Sci-Fi Modeling-Interiors Hallways and Corridors
- LW CAD 3.6 Modeling Tools Volume #1
- LW CAD 3.6 Modeling Tools Volume #2
- LW CAD 3.6 Modeling Tools Volume #3
- LW CAD 3.6 Modeling Tools Volume #4
- LW CAD 3.6 Modeling Tools Volume #5
- LW CAD 3.6 Modeling Tools Volume #6
- Rigging a Human
- Animation Essentials-Vol. #1
- Animation Essentials-Vol. #2
- Camera Essentials
- ZBrush 3.1 for Lightwave Users-Volume #1-How to Paint Color
- ZBrush 3.1 for Lightwave Users-Volume #2-Normal Maps
- ZBrush 3.1 for Lightwave Users-Volume #3-Displacement Maps
- 3D Coat -StarFighter Detailing Volume #1 -Normal Maps
- 3D Coat -UV Mapping a StarFighter -Quick Method
- 3D Coat 3.5 for Lightwave Users-Photo Painting I
- 3D Coat 3.5 for Lightwave Users-Photo Painting II
- 3D Coat 3.5 for Lightwave Users-Painting Color
- 3D Coat 3.5 for Lightwave Users-Normal and Displacement Maps
- 3D Coat 3.5 for Lightwave Users-Voxel Sculpting:Project Dragon
- 3D Coat 3.5 for Lightwave Users-UV Mapping
- 3D Coat 3.5 for Lightwave Users-Retopology I
- 3D Coat 3.5 for Lightwave Users-Retopology II-Project Suchomimus
- 3D Coat 3.5 for Lightwave Users-Auto-Retopology
- ZBrush 4 for Lightwave Users-Painting Color
- ZBrush 4 for Lightwave Users-Normal Maps
- ZBrush 4 for Lightwave Users-Displacement Maps
- ZBrush 4- ZApp Link Plugin
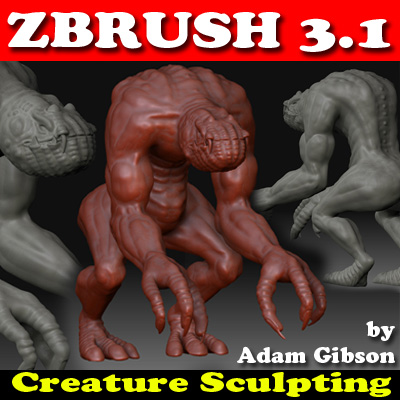
- ZBrush 3.1 Creature Sculpting
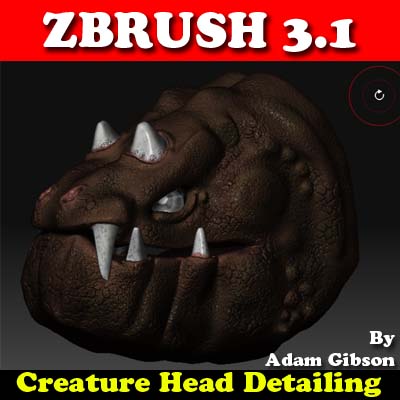
- ZBrush 3.1 Creature Head Detailing
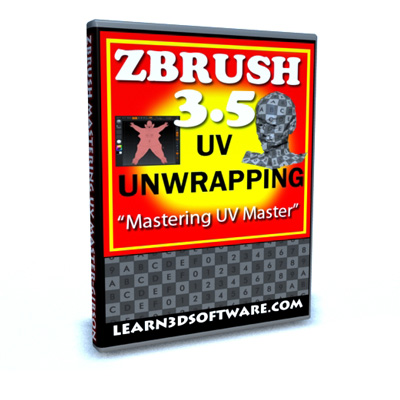
- ZBRUSH 3.5 -UV Unwrapping-"Mastering UV Master"
- Modo 501 Painting Color-The Essentials
- Modo 501 Modeling Tools(Volume #1)
- MODO 501-Retopology
- MODO 501-Dinosaur UV Mapping
- Photoshop CS4-Basic Training
- Photoshop CS4-Seamless Textures
- Creature Eye Packs- Volume #1
- 2D Sci-Fi Alpha Brush Collection Volume #1
- Dinosaur Mega-Pack (Over 40 Dinosaurs)
3D Coat-2D Sci-Fi Alpha Brush Collection Volume #1
This powerful Sci-Fi Alpha Brush Collection contains 100 individual alpha brushes. The brushes can be used in any painting or sculpting program.
Programs like 3D Coat, ZBrush, Modo, Mudbox, Photoshop and more. These Alpha Brushes will save you thousands of hours in production time when detailing Sci-Fi creations like spaceships, space stations, architecture, droids, robots, machines and more. When combining these brushes together you can make extremely high detailed and complex looking surfaces.
Speed up your workflow by using pre-made alpha brushes.
Contains: 100 Sci-Fi Alpha Brushes
All images are 500 x 500 pixels.
Format: JPEG (.jpg)

ZBrush 4 for Lightwave Users-Painting Color
In this videos series we show 3D students how to use ZBrush 4 and Lightwave 3D together as an easy and functional workflow and pipeline in your 3D projects. Although this video series uses Lightwave 3D as the final output for your ZBrush work, most of the concepts, principles and techniques used here will work with all the most popular 3D programs like 3D Max, Maya, Softimage, Modo, Cinema 4D and many others.
In this video tutorial ZBrush/Lightwave Instructor Adam Gibson shows how to use ZBrush to create high detail color map on a Velociraptor dinosaur that is exported as an image map for use inside of Lightwave 3D.
ZBrush 4- ZApp Link Plugin
In this video tutorial ZBrush Instructor Adam Gibson demonstrates how to integrate 2D Image Editing Software with ZBrush 4 using the powerful free ZApp Link Plugin. The ability to use painting and photo editing tools outside of ZBrush's current tool set opens up worlds of new possibilities for texturing your 3D objects. ZApp works with Adobe Photoshop and many other 2D Applications. If you are seriously looking to texture your ZBrush models/meshes using a traditional 2D Image Editor then this video tutorial is a must for you. This video also shows how to make a UV Map for your models with only 2 mouse-clicks using the "PUV Tiles" feature.
Level: Beginner
Running Time: 1 hr. 23 mins.
High Quality (Screen-Res 1440 x 900 pixels) Quicktime VideoDinosaur Mega-Pack (3D Model Collection)
This model pack contains over 40 Untextured 3D Dinosaur models in 6 different model formats.
Formats: LWO, OBJ, 3DS, XSI, MAYA, and MAX.
The purpose of this Model pack is so that you may practice your rigging, UV Mapping, Retopology, and Texturing Skills on Pre-made 3D Models.
Have fun with our Dinosaurs and make your own adventures with them and also give them your own style and look.
-You may use our royalty free 3d dinosaurs for your animations in film/video or still images.
Below is a list of the dinosaurs included in this model pack:
Achelousaurus,
Anhanguera,
Apatosuarus,
Brachiosaurus,
Camptosaurus,
Centrosaurus,
Chasmosaurus,
Corythosaurus,
Deinonychus,
Dilophosaurus,
Dsungaripterus,
Einiosaurus,
Germanodactylus,
Gnathosaurus,
Ichthyosaurus,
Iguanodon,
Kentrosaurus,
Kritosaurus,
Lambeosaurus,
Maiasaura,
Monoclonius,
Ouranosaurus,
Pachyrhinosaurus,
Parasaurolophus,
Pteranodon,
Pteranodon Sternbergi,
Saurolophus,
Shonisaurus,
Spinosaurus,
Spinosaurus (Textured),
Stegosaurus,
Styracosaurus,
Suchomimus,
Tenontosaurus,
Therizinosaurus,
Triceratops,
Troodon,
Tropeognathus,
Tuojiangosaurus,
Tyrannasaurus,
Velociraptor,
WuerhosaurusZBrush 4 for Lightwave Users-Normal Maps
ZBrush 4 for Lightwave Users-Normal Maps-by Adam Gibson
In this videos series we show 3D students how to use ZBrush 4 and Lightwave 3D together as an easy and functional workflow and pipeline in your 3D projects. Although this video series uses Lightwave 3D as the final output for your ZBrush work, most of the concepts, principles and techniques used here will work with all the most popular 3D programs like 3D Max, Maya, Softimage, Modo, Cinema 4D and many others.
Table of Contents for Normal Maps
Chapter 1- Intro
Chapter 2- Sculpting the Gums Part One
Chapter 3- Sculpting the Gums Part Two
Chapter 4- Sculpting the Gums Part Three
Chapter 5- Defining Lip Area
Chapter 6- Creating Scales in Hi Def Mode Part One
Chapter 7- Creating Scales in Hi Def Mode Part Two
Chapter 8- Creating Scales Using the Global Inflate Tool
Chapter 9- Creating Lip Scales
Chapter 10- Creating Scales Using the Drag Rectangle Tool
Chapter 11- Correcting and Blending Scales
Chapter 12- Creating Bumpy Skin Areas on the Head
Chapter 13- Creating Scales on the Feet
Chapter 14- Creating Scales on the Hands
Chapter 15- Creating and Exporting a Normal Map in ZBrush
Chapter 16- Exporting an OBJ in ZBrush
Chapter 17- Importing and OBJ into Lightwave
Chapter 18- Setting Up Normal Map Node In Layout
Chapter 19- Problem Solving and Test Renders
Running Time: 2 hrs. 49 mins.
High Quality (Screen-Res 1440 x 900 pixels) Quicktime Video
Level: Beginner to IntermediateZBrush 4 for Lightwave Users-Displacement Maps-by Adam Gibson
In this videos series we show 3D students how to use ZBrush 4 and Lightwave 3D together as an easy and functional workflow and pipeline in your 3D projects. Although this video series uses Lightwave 3D as the final output for your ZBrush work, most of the concepts, principles and techniques used here will work with all the most popular 3D programs like 3D Max, Maya, Softimage, Modo, Cinema 4D and many others.
In this tutorial Lightwave and ZBrush Instructor Adam Gibson shows you how to create Displacements Maps for a Velociraptor dinosaur model originally created in Lightwave 3D. By using the sculpting tools inside of Zbrush you can add detail to your models like muscle, bone, tendons, and ligaments and export that detail out as a Displacement Map for use in other 3D programs.
Adam shows how the Displacement Node in Lightwave 3D is utilized to reproduce the detail created in ZBrush from the sculpting process. The Displacement Node set-up is shown in full detail so that the student can easily recreate it on their own and even save it for use on other projects.
Table of Contents for Displacement Maps
Chapter 1- Intro
Chapter 2- Optimizing your Mesh for ZBrush (Part-1)
Chapter 3- Optimizing your Mesh for ZBrush (Part-2)
Chapter 4- Optimizing your Mesh for ZBrush (Part-3)
Chapter 5- Checking the UV Map for Problem Areas
Chapter 6- Exporting Body Parts as Individual OBJs
Chapter 7- Importing Body OBJ into ZBrush
Chapter 8- Checking UVs in ZBrush for Problems
Chapter 9- Adjusting UV's with ZBrush's UV Master Plug-in
Chapter 10- Creating a Morph Target
Chapter 11- Increasing Subdivision Levels
Chapter 12- How to Use the OBJ ZBrush Mode
Chapter 13- Importing the Teeth OBJ into ZBrush
Chapter 14- How to Append the Teeth as a Sub-Tool Layer
Chapter 15- Sculpting the Thigh Muscles and Knee Detail
Chapter 16- Sculpting the Calf Muscles and Shin Detail
Chapter 17- Foot and Ankle Detailing
Chapter 18- Creating Rib-Cage Bones
Chapter 19- Adding Spinal Bones on the Back
Chapter 20- Neck Detailing
Chapter 21- Belly and Groin Detailing
Chapter 22- Arm and Bicep Detailing
Chapter 23- Shoulder Detailing
Chapter 24- Forearm Detailing
Chapter 25- Claw/Hand Detailing
Chapter 26- Head Detailing
Chapter 27- Preparing Mesh for Displacement Map Export
Chapter 28- Generating a Displacement Map in ZBrush
Chapter 29- Exporting a Displacement Map from the Alpha Menu
Chapter 30- Flip Vertical Button
Chapter 31- Creating and Exporting a Bump Map
Chapter 32- Exporting a new OBJ File
Chapter 33- Import OBJ into Lightwave 3D
Chapter 34- Scene Set-Up in Layout
Chapter 35- Bump Map Set-Up
Chapter 36- Displacement Node Set-Up Part One
Chapter 37- Displacement Node Set-Up Part Two
Chapter 38- Saving a Displacement Node for Other Models
Running Time: 8 hrs. 7 mins
High Quality (Screen-Res 1440 x 900 pixels) Quicktime Video
Level: Beginner to Intermediate
In this video tutorial series the power of combining Lightwave 3D and ZBrush is shown. There has been a lot of confusion over how to properly use these 2 amazing pieces of software in synergy with each other. Learning how to Integrate software packages is mandatory now a days when trying to work between various work pipelines whether it's within your own studio or between multiple other studios. The ability to get your models in and out and back and forth between different softwares packages for modeling and texturing is crucial.
In this video tutorial series the power of combining Lightwave 3D and ZBrush is shown. There has been a lot of confusion over how to properly use these 2 amazing pieces of software in synergy with each other. Learning how to Integrate software packages is mandatory now a days when trying to work between various work pipelines whether it's within your own studio or between multiple other studios. The ability to get your models in and out and back and forth between different softwares packages for modeling and texturing is crucial.
In this video tutorial series the power of combining Lightwave 3D and ZBrush is shown. There has been a lot of confusion over how to properly use these 2 amazing pieces of software in synergy with each other. Learning how to Integrate software packages is mandatory now a days when trying to work between various work pipelines whether it's within your own studio or between multiple other studios. The ability to get your models in and out and back and forth between different softwares packages for modeling and texturing is crucial.
Experience and learn ZBrush's powerful color painting and sculpting for detailing Creatures, Dinosaurs, Monsters, and all types of crazy and wild looking Characters.
Topics Include:
* How to Set-Up and use a Back-Drop Reference Image for Sculpting Details
* Poly Painting-Sculpting
* Masking-Cavity Masking-Mat
* Cap Materials
* How to import objects from 3D Software Packages via OBJ Format
Running Time: 3 hrs.(Approx.)
$29.00 USD - Instant Download
Learn the power of Sculpting in ZBrush. Create Amazing Characters, Creatures, and Monsters. Learn how to create realistic Muscle, Bone and Tendons.
Topics Include:
* How to Set-Up and use a Back-Drop Reference Image for Sculpting Details
* Inflate Brush
* Z-Add, Z-Sub, and Smoothing Techniques
* Advanced Sculpting Techniques
* Z-Sphere Modeling
* Posing Character using Transpose Tool
* Masking
Running Time: 6 hrs.(Approx.)
$29.00 USD Instant Download
Learn to Master the "UV Master" Plug-in
This video covers in detail the new FREE UV Unwrapping Plug-in available for Free Download at the Pixologic website.
Topics Covered:
* 1 Click UV Unwrapping
* Symmetrical UV Editing
* Control Painting
* Ambient Occlusion UV Unwrapping
* Density UV Editing Preset Editor
* Work on Clone Feature
* Copy and Paste UV Buttons
*
* Check UV Seams and Clear Maps Feature
* How to Combine UV Masters different types of UV Unwrapping Features together for more control over your UV's
* Polygroup UV Unwrapping
* Polypaint UV Unwrapping
* Masking UV Unwrapping
* ZSphere UV Unwrapping
* Examples of how to unwrap different types of characters from basic low poly meshes to more high poly more complicated characters.
* How to use an external 3D Application in combination with UV Master Plug-in to create much cleaner UV Unwrapping in ZBrush.
* How to Delete a UV Map off your mesh.
* How to Edit a UV Map in Flatten Mode using ZBrush's Move Brush
* How to Export a UV Map to another 3D program for UV Editing and how to re-import back again with the new changes to the UV.
* Create UV Maps in ZBrush easily to use in your traditional 3D Animation Package. In most other 3D Packages UV Mapping is a very time consuming process. Speed up your production pipeline with the techniques in this powerful training video.
Basically an A to Z course on all the new UV Unwrapping possibilities/techniques in ZBrush 3.5 using the new UV Master Plug-in.
*Running Time: 3 hrs 45 mins-Approx.
$39.00 USD Instant Download



![ZBrush Bootcamp Series- Volumes #1 to #10 [AG]](https://www.liberty3d.com/wp-content/uploads/2016/04/ZBrush_Bundle_1-_to_10.jpg)
![ZBrush Bootcamp- Volume #10- UV Mapping Secrets II [AG]](https://www.liberty3d.com/wp-content/uploads/2018/10/ZB_BC_Product_Box_Vol_10_400pix.jpg)
![ZBrush Bootcamp- Volume #9- UV Mapping Secrets I [AG]](https://www.liberty3d.com/wp-content/uploads/2018/10/ZB_BC_Product_Box_Vol_9_400pix.jpg)
![ZBrush Bootcamp- Volume #8- ZModeler Tools I [AG]](https://www.liberty3d.com/wp-content/uploads/2018/10/ZB_2014_Bootcamp_Series_Vol_8_Product_Box_400pix.jpg)
![ZBrush Bootcamp- Volume #7- Lightwave Integration III- GoZ Concepts [AG]](https://www.liberty3d.com/wp-content/uploads/2018/10/ZB_2014_Bootcamp_Series_Product_Box_Vol_7_400pix.jpg)
![ZBrush Bootcamp 2014 Series -Volume #6-Lightwave Integration II [AG]](https://www.liberty3d.com/wp-content/uploads/2018/10/ZB_2014_Bootcamp_Series_Product_Box_Vol_6_400pix.jpg)
![ZBrush Bootcamp 2014- Volume #5- Lightwave Integration I [AG]](https://www.liberty3d.com/wp-content/uploads/2018/10/ZB_2014_Bootcamp_Series_Product_Box_Vol_5_400pix.jpg)


