


Digital Bullet Hits: Bullet Holes in a Metal Door Part Two
 Part Two picks up where part one left off by adding sparks, smoke, the hangar interior and finishes with a couple variations on the project.
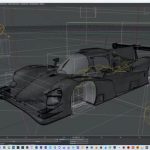
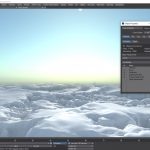
First Dana demonstrates setting up Lightwave’s two different types of particles. From there we add spark particles then smoke particles to the door animation. Once the particles are in place we model some simple geometry and project a photograph on it forming the interior of the hangar. From there we move the camera inside and set up a volumetric light so we can see light rays beaming through the holes as the bullets punch through the door. Finally, we finish by moving back outside and setting up the door to look like bullets have dented the door but did not break through.
This part of the tutorial is more about the process than specific tool settings. While we do touch on particles, workflow, modeling, and volumetric lights, we don’t go deep into any one subject.
Part Two picks up where part one left off by adding sparks, smoke, the hangar interior and finishes with a couple variations on the project.
First Dana demonstrates setting up Lightwave’s two different types of particles. From there we add spark particles then smoke particles to the door animation. Once the particles are in place we model some simple geometry and project a photograph on it forming the interior of the hangar. From there we move the camera inside and set up a volumetric light so we can see light rays beaming through the holes as the bullets punch through the door. Finally, we finish by moving back outside and setting up the door to look like bullets have dented the door but did not break through.
This part of the tutorial is more about the process than specific tool settings. While we do touch on particles, workflow, modeling, and volumetric lights, we don’t go deep into any one subject.

Topics Covered:
- Differences Between Partigons and HV Particles
- Using a DP_Kit node and a Gradient to Color Partigon Particles by Age
- Setting up a Particle Emitter
- Surfacing Partigon Particles
- Cloning and Placing Emitters
- Setting the Start Time for Particles
- HyperVoxel Sprite Smoke
- Making Changes Using the Scene Editor
- Mapping a Photograph Onto Simple Geometry to Add Depth
- Adding a Volumetric Light
« Time-Lapse Modeling: Samsung Cell Phone (Previous News)
(Next News) So you think Stereo3D is a fad? Guess again. »
Related News

Independence Day 2026! 50% off until July 9th!
To help celebrate the 250th Anniversary Declaration of Independence of the United States of America,Read More
SCI-FI Environment Series- Space Station Interior Collection
Space Station Interiors- Collection I The “Space Station-Interiors Collection I ” from our “SCI-FI EnvironmentRead More
SCI-FI Environment Series- Desert Planet Collection
The Desert Planet Collection from our “SCI-FI Environment Series” is a large collection of highlyRead More
SCI-FI Environment Series- Ice Planet Collection
The Ice Planet Collection from our “SCI-FI Environment Series” is a large collection of highlyRead More