


Mouth Selector Node Setup for LightWave3D (free files from Dana Burman)
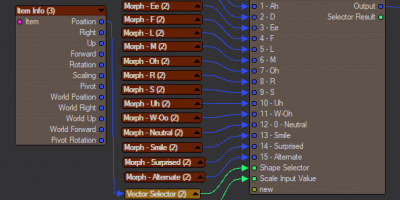
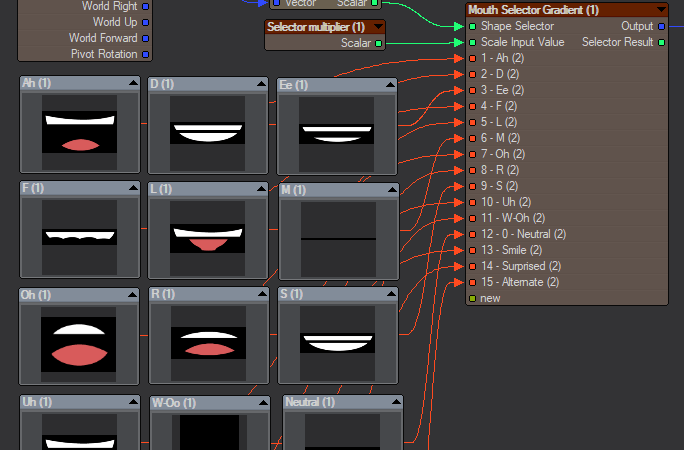 This is a set of nodes that can be loaded into your project for the mouth-swapping type of animation seen in Nightmare Before Christmas and Robot Chicken). Borne out of experiments using Adobe Character Animator, the mouth shapes and order are set up to match the “visemes” in Character Animator. I did add an “Alternate” slot as well for something like frowns or other shapes. You do not need Character Animator to use this. You just need to provide a value between 0 and 14 to select the corresponding mouth shape. This is done by either animating an object in the scene and linking to it (by default, you’d animate between 0.0 and 1.4 on the Y axis), or by plugging something else into the Shape Selector input on the nodes.
This zip file contains 3 node setups which can be opened in LightWave3D’s node editor by using the Import Nodes menu option.
Mouth_Selector_Images_TypeG.nodes – Uses a gradient to select which image to use.
Mouth_Selector_MorphMaps_TypeG.nodes – Uses a gradient to select which morph map to use.
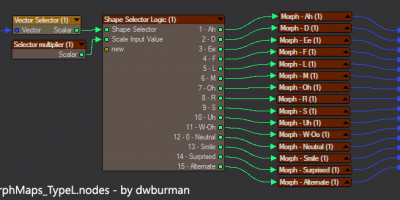
Mouth_Selector_MorphMaps_TypeL.nodes – Uses a set of logic nodes to select which morph map to use.
Download (9KB .zip file)
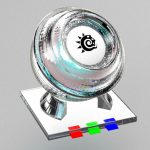
The mouth shape images you see in the pictures and videos are from the “Mouth Template” at: http://okaysamurai.com/puppets/
You will need to separate the layered PSD or AI file into separate images.
This is a set of nodes that can be loaded into your project for the mouth-swapping type of animation seen in Nightmare Before Christmas and Robot Chicken). Borne out of experiments using Adobe Character Animator, the mouth shapes and order are set up to match the “visemes” in Character Animator. I did add an “Alternate” slot as well for something like frowns or other shapes. You do not need Character Animator to use this. You just need to provide a value between 0 and 14 to select the corresponding mouth shape. This is done by either animating an object in the scene and linking to it (by default, you’d animate between 0.0 and 1.4 on the Y axis), or by plugging something else into the Shape Selector input on the nodes.
This zip file contains 3 node setups which can be opened in LightWave3D’s node editor by using the Import Nodes menu option.
Mouth_Selector_Images_TypeG.nodes – Uses a gradient to select which image to use.
Mouth_Selector_MorphMaps_TypeG.nodes – Uses a gradient to select which morph map to use.
Mouth_Selector_MorphMaps_TypeL.nodes – Uses a set of logic nodes to select which morph map to use.
Download (9KB .zip file)
The mouth shape images you see in the pictures and videos are from the “Mouth Template” at: http://okaysamurai.com/puppets/
You will need to separate the layered PSD or AI file into separate images.
-
- Mouth_Selector_Images_TypeG
-
- Mouth_Selector_MorphMaps_TypeG
-
- Mouth_Selector_MorphMaps_TypeL
- Right-Click opens a menu. Select “Import Nodes” – This opens a file requestor.
- Select the .nodes file you wish to use
- Double click the Item Info node and select the scene item you wish to drive the animation
- Double click the Vector Selector node and choose the position channel you are animating. Y is the default.
- Double click Adjust the Selection multiplier node and enter a number to adjust the input value to be whole numbers. (i.e. If you are animating the position from 0.0 to 1.4 m, you’ll put in a multiplier of 10. If you are animating position from 0.0 to 14 m, you’ll put in a multiplier of 1.)
- Double click the Morph or Image nodes to select the morph maps or images that you wish to use. (You may need to reposition/scale the images.)
- Plug the ouput of the last node wherever it needs to go.
« 3D Scanning with Reality Capture (Free Tutorial from Phil Nolan) (Previous News)
(Next News) Fusion for LightWave (2018) Artists – Vol. 6 »
Related News
LightWave 2023- Volume #1- Getting Started I
In this first volume of the LightWave 2023 Series 3D Instructor Adam Gibson introduces LightWaveRead More
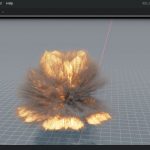
Advanced TubulenceFD for LightWave3D – Rising From the Fog
Now that TurbulenceFD is a part of LightWave3D 2023 (and up), Kat has produced aRead More
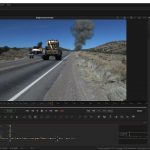
Practical Production Techniques Vol. 23 – Top Gunner 3 Fighter Combat
Practical Production Techniques Vol. 23 from Kelly “Kat” Myers is a shot study and recreationRead More

It’s time for our annual Independence Day Sale!
Ah yes! Summertime is here and it’s time for our annual Independence Day Sale asRead More

2 Comments to Mouth Selector Node Setup for LightWave3D (free files from Dana Burman)
Leave a Reply
For Posting a Comment You must be Logged In.
Do these nodes work in LW2015 or only in LW2018?
Yes, I tested it and found they work in LW2015 just fine.