
LightWave 11.x
Tutorials made on LightWave version 11.x.
![Adam's Everything LightWave Monster Bundle [AG]](https://www.liberty3d.com/wp-content/plugins/wp-cart-for-digital-products/lib/timthumb.php?src=https://www.liberty3d.com/wp-content/uploads/2023/05/Everything_LightWave_Monster_Bundle_JPEG.jpg&h=125&w=125&zc=1&q=100)
![LightWave 2020- Volume #20- Retro Spaceship Modeling I [AG]](https://www.liberty3d.com/wp-content/plugins/wp-cart-for-digital-products/lib/timthumb.php?src=https://www.liberty3d.com/wp-content/uploads/2023/01/LW_2020_Vol_20_Product_Box_400pix.jpg&h=125&w=125&zc=1&q=100)
![LightWave 2020/2019/2018- Monster Bundle Pack- Volumes #1 to #17 [AG]](https://www.liberty3d.com/wp-content/plugins/wp-cart-for-digital-products/lib/timthumb.php?src=https://www.liberty3d.com/wp-content/uploads/2022/04/LightWave-2020-2019-2018-Bundle-01-JPEG.jpg&h=125&w=125&zc=1&q=100)
![LightWave 2020- Cartoon Character Modeling I & II [AG]](https://www.liberty3d.com/wp-content/plugins/wp-cart-for-digital-products/lib/timthumb.php?src=https://www.liberty3d.com/wp-content/uploads/2022/04/LightWave-2020-Character-Modeling-Bundle-01-JPEG.jpg&h=125&w=125&zc=1&q=100)
![LightWave 2020- Vol. #17- Cartoon Character Modeling II- Body Modeling [AG]](https://www.liberty3d.com/wp-content/plugins/wp-cart-for-digital-products/lib/timthumb.php?src=https://www.liberty3d.com/wp-content/uploads/2022/04/LW_2020_Vol_17_Product_Box_400pix.jpg&h=125&w=125&zc=1&q=100)


![Practical Production Techniques Vol 1 - 20 Ultra Bundle [KAT]](https://www.liberty3d.com/wp-content/plugins/wp-cart-for-digital-products/lib/timthumb.php?src=https://www.liberty3d.com/wp-content/uploads/2010/09/STORE_Generic.jpg&h=125&w=125&zc=1&q=100)
![Practical Production Techniques Vol. 18 [KAT]](https://www.liberty3d.com/wp-content/plugins/wp-cart-for-digital-products/lib/timthumb.php?src=https://www.liberty3d.com/wp-content/uploads/2021/01/PPTVol18PromoImages_05-1.jpg&h=125&w=125&zc=1&q=100)

![Boeing 737-700 in LightWave 3D [Cat]](https://www.liberty3d.com/wp-content/plugins/wp-cart-for-digital-products/lib/timthumb.php?src=https://www.liberty3d.com/wp-content/uploads/2020/07/Cat-737-Wireframe-side.jpg&h=125&w=125&zc=1&q=100)
![C-130 Hercules in LightWave3D [CAT]](https://www.liberty3d.com/wp-content/plugins/wp-cart-for-digital-products/lib/timthumb.php?src=https://www.liberty3d.com/wp-content/uploads/2020/07/C-130-front-bluesky.jpg&h=125&w=125&zc=1&q=100)
![Buy 1 get 2 Free [RR]](https://www.liberty3d.com/wp-content/plugins/wp-cart-for-digital-products/lib/timthumb.php?src=https://www.liberty3d.com/wp-content/uploads/2020/02/3for1.png&h=125&w=125&zc=1&q=100)
![The LFS Project [LFSP]](https://www.liberty3d.com/wp-content/plugins/wp-cart-for-digital-products/lib/timthumb.php?src=https://www.liberty3d.com/wp-content/uploads/2018/08/rising-pracima.jpg&h=125&w=125&zc=1&q=100)
![Practical Production Techniques Vol. 12 [KAT]](https://www.liberty3d.com/wp-content/plugins/wp-cart-for-digital-products/lib/timthumb.php?src=https://www.liberty3d.com/wp-content/uploads/2019/11/PPTV12_Promo2.jpg&h=125&w=125&zc=1&q=100)
![LightWave 2019/2018 Bundle Pack-Volumes #1 to #12 (Free Bonus Content & Tutorials) [AG]](https://www.liberty3d.com/wp-content/plugins/wp-cart-for-digital-products/lib/timthumb.php?src=https://www.liberty3d.com/wp-content/uploads/2019/10/Lightwave_2019_Bundle_Pack_I_400pix_JPEG.jpg&h=125&w=125&zc=1&q=100)
![LightWave 2019- Volume #12- Modeler Tools IV [AG]](https://www.liberty3d.com/wp-content/plugins/wp-cart-for-digital-products/lib/timthumb.php?src=https://www.liberty3d.com/wp-content/uploads/2019/10/LW_2019_Vol_12_Product_Box_400pix.jpg&h=125&w=125&zc=1&q=100)
![LightWave 2019- Volume #11- Modeler Tools III [AG]](https://www.liberty3d.com/wp-content/plugins/wp-cart-for-digital-products/lib/timthumb.php?src=https://www.liberty3d.com/wp-content/uploads/2019/10/LW_2019_Vol_11_Product_Box_400pix.jpg&h=125&w=125&zc=1&q=100)
![Lightwave 3D- UV Mapping Bundle Pack I (Contains 5 Courses)[AG]](https://www.liberty3d.com/wp-content/plugins/wp-cart-for-digital-products/lib/timthumb.php?src=https://www.liberty3d.com/wp-content/uploads/2019/08/Lightwave_UV_Mapping_Bundle_Pack_01_400pix.jpg&h=125&w=125&zc=1&q=100)
![Iron Sky Model and Scene Pack Vol. Three [KAT]](https://www.liberty3d.com/wp-content/plugins/wp-cart-for-digital-products/lib/timthumb.php?src=https://www.liberty3d.com/wp-content/uploads/2018/12/JapanPromo_3-1.jpg&h=125&w=125&zc=1&q=100)
![Iron Sky Model and Scene Pack Vol. Two [KAT]](https://www.liberty3d.com/wp-content/plugins/wp-cart-for-digital-products/lib/timthumb.php?src=https://www.liberty3d.com/wp-content/uploads/2018/11/AustraliaPromo_4.jpg&h=125&w=125&zc=1&q=100)
![Iron Sky Model and Scene Pack Vol. One [KAT]](https://www.liberty3d.com/wp-content/plugins/wp-cart-for-digital-products/lib/timthumb.php?src=https://www.liberty3d.com/wp-content/uploads/2018/11/Zepp_20.jpg&h=125&w=125&zc=1&q=100)
![TFD Advanced Concepts and Projects: Engine Fire [KAT]](https://www.liberty3d.com/wp-content/plugins/wp-cart-for-digital-products/lib/timthumb.php?src=https://www.liberty3d.com/wp-content/uploads/2018/05/TFDEngineFire_PromoImage1-150x150.jpg&h=125&w=125&zc=1&q=100)
![RR Cam [RR]](https://www.liberty3d.com/wp-content/plugins/wp-cart-for-digital-products/lib/timthumb.php?src=https://www.liberty3d.com/wp-content/uploads/2017/02/RR_Cam_TN.png&h=125&w=125&zc=1&q=100)
![Practical Production Techniques Vol. 10 - Project Smoke Monster [kat]](https://www.liberty3d.com/wp-content/plugins/wp-cart-for-digital-products/lib/timthumb.php?src=https://www.liberty3d.com/wp-content/uploads/2017/01/PPTV10_FusionCompExample-150x150.png&h=125&w=125&zc=1&q=100)
![LightWave 2015- Volume #11- Character Rigging for Beginners [AG]](https://www.liberty3d.com/wp-content/plugins/wp-cart-for-digital-products/lib/timthumb.php?src=https://www.liberty3d.com/wp-content/uploads/2019/08/Lightwave_2015_Vol_11_Product_Box_400pix.jpg&h=125&w=125&zc=1&q=100)
![Daz3d to Lightwave Mocap Utility [RR]](https://www.liberty3d.com/wp-content/plugins/wp-cart-for-digital-products/lib/timthumb.php?src=https://www.liberty3d.com/wp-content/uploads/2016/07/Daz3d_to_LW_Plugin_ProductImage.jpg&h=125&w=125&zc=1&q=100)
![The Quick Start Guide to Octane (Lightwave) [RR]](https://www.liberty3d.com/wp-content/plugins/wp-cart-for-digital-products/lib/timthumb.php?src=https://www.liberty3d.com/wp-content/uploads/2016/06/Octane_Thumbnail.png&h=125&w=125&zc=1&q=100)
![Advanced LightWave Modeling Projects - Chevy Impala [ELV]](https://www.liberty3d.com/wp-content/plugins/wp-cart-for-digital-products/lib/timthumb.php?src=https://www.liberty3d.com/wp-content/uploads/2016/05/impalapromoone-300x254.jpg&h=125&w=125&zc=1&q=100)
![Fusion for LightWave Artists Part III [KAT]](https://www.liberty3d.com/wp-content/plugins/wp-cart-for-digital-products/lib/timthumb.php?src=https://www.liberty3d.com/wp-content/uploads/2016/05/FusionCompOne.jpg&h=125&w=125&zc=1&q=100)
![TFD Advanced Concepts and Projects - Clouds [KAT]](https://www.liberty3d.com/wp-content/plugins/wp-cart-for-digital-products/lib/timthumb.php?src=https://www.liberty3d.com/wp-content/uploads/2016/05/CloudOne_SoftPuffyLookR07_0065-300x169.png&h=125&w=125&zc=1&q=100)
![Fusion for LightWave Artists Part II [KAT]](https://www.liberty3d.com/wp-content/plugins/wp-cart-for-digital-products/lib/timthumb.php?src=https://www.liberty3d.com/wp-content/uploads/2016/03/FFLWAPromo2.jpg&h=125&w=125&zc=1&q=100)
![LightWave 2015 Bundle Pack- (Volumes #1 to #10)- [AG]](https://www.liberty3d.com/wp-content/plugins/wp-cart-for-digital-products/lib/timthumb.php?src=https://www.liberty3d.com/wp-content/uploads/2016/02/LW_2015_Bundle_Vol_1_to_10.jpg&h=125&w=125&zc=1&q=100)
![LightWave 2015- Volume #10- Surfacing [AG]](https://www.liberty3d.com/wp-content/plugins/wp-cart-for-digital-products/lib/timthumb.php?src=https://www.liberty3d.com/wp-content/uploads/2019/08/Lightwave_2015_Vol_10_Product_Box_400pix.jpg&h=125&w=125&zc=1&q=100)
![LightWave 2015- Volume #9- UV Mapping [AG]](https://www.liberty3d.com/wp-content/plugins/wp-cart-for-digital-products/lib/timthumb.php?src=https://www.liberty3d.com/wp-content/uploads/2019/08/Lightwave_2015_Vol_9_Product_Box_400pix.jpg&h=125&w=125&zc=1&q=100)
![DDO for Lightwave Users- Volume #7- DDO Painter I [AG]](https://www.liberty3d.com/wp-content/plugins/wp-cart-for-digital-products/lib/timthumb.php?src=https://www.liberty3d.com/wp-content/uploads/2018/10/dDo_for_Lightwave_Users_Vol_7_400pix.jpg&h=125&w=125&zc=1&q=100)
![DDO for Lightwave Users- Volume #6- NDO Painter I [AG]](https://www.liberty3d.com/wp-content/plugins/wp-cart-for-digital-products/lib/timthumb.php?src=https://www.liberty3d.com/wp-content/uploads/2018/10/dDo_for_Lightwave_Users_Vol_6_400pix.jpg&h=125&w=125&zc=1&q=100)
![Instant 3D Turntable for LightWave Users [cw]](https://www.liberty3d.com/wp-content/plugins/wp-cart-for-digital-products/lib/timthumb.php?src=https://www.liberty3d.com/wp-content/uploads/2015/12/Screen-Shot-2015-12-15-at-5.38.22-PM.png&h=125&w=125&zc=1&q=100)
![UV Layout for Lightwave Users- Volume #1 & #2 [AG]](https://www.liberty3d.com/wp-content/plugins/wp-cart-for-digital-products/lib/timthumb.php?src=https://www.liberty3d.com/wp-content/uploads/2019/08/UV_Layout_for_LW_Users_Product_Box_400pix.jpg&h=125&w=125&zc=1&q=100)
![LightWave 2015- Volume #8- Particles & HyperVoxels II [AG]](https://www.liberty3d.com/wp-content/plugins/wp-cart-for-digital-products/lib/timthumb.php?src=https://www.liberty3d.com/wp-content/uploads/2019/08/Lightwave_2015_Vol_8_Product_Box_400pix.jpg&h=125&w=125&zc=1&q=100)
![LightWave 2015- Volume #7- Particles & HyperVoxels I [AG]](https://www.liberty3d.com/wp-content/plugins/wp-cart-for-digital-products/lib/timthumb.php?src=https://www.liberty3d.com/wp-content/uploads/2019/08/Lightwave_2015_Vol_7_Product_Box_400pix.jpg&h=125&w=125&zc=1&q=100)
![Adam's Everything LightWave Monster Bundle [AG]](https://www.liberty3d.com/wp-content/uploads/2023/05/Everything_LightWave_Monster_Bundle_JPEG.jpg)
Adam's Everything LightWave Monster Bundle [AG]
This Monster LightWave Bundle contains every LightWave 3D Tutorial and Course that Adam Gibson has created since the year 2009. LightWave Versions: 9, 10, 11, 11.5, 2015, 2018, 2019 and 2020. Hundreds of hours of detailed training covering everything from 3D Modeling, Texturing, UV Mapping, Rigging, Animating and more!!Price: $140.00

This LightWave 2020/2019/2018 Bundle contains:
Volumes #1 to #23 (plus Huge-Bonus Content)
Price: $125.00
![LightWave 2020- Volume #20- Retro Spaceship Modeling I [AG]](https://www.liberty3d.com/wp-content/uploads/2023/01/LW_2020_Vol_20_Product_Box_400pix.jpg)
In this twentieth volume of the Lightwave 2020/2019/2018 Series 3D Instructor Adam Gibson introduces LightWave 2020's powerful modeling toolset. A great place to start for beginner LightWave Users.
Topics and Tools Covered: 1) Sub-D Modeling, 2) Basic Polygon Theory, 3) Move Tool, 4) Rotate Tool, 5) Stretch Tool, 6) Size Tool, 7) Extender Plus Tool, 8) Bandsaw Pro Tool, 9) Mouse Action-Center Tools, 10) Point/Polygon/Edge Selection Tools, 11) Basic Surfing Introduction, 12) Copy/Cut/Paste Tools, 13)Model Layer Navigation, 14) Statistics Panel, 15) Mirror Tool, 16) Saving/Opening 3D Model Files, 17) Shadow Catcher, 18) Basic Compositing and more!!
Running Time: 3 hrs. 22 mins., High Quality (Screen-Res 1920 x 1080 pixels), Video Format: MP4 (.mp4), Level: Beginner
Price: $19.00
![LightWave 2020/2019/2018- Monster Bundle Pack- Volumes #1 to #17 [AG]](https://www.liberty3d.com/wp-content/uploads/2022/04/LightWave-2020-2019-2018-Bundle-01-JPEG.jpg)
LightWave 2020/2019/2018- Monster Bundle Pack- Volumes #1 to #17 [AG]
This LightWave 2020/2019/2018 Monster Bundle Includes: Volumes #1 to #17 (+MASSIVE BONUS Content) by Adam Gibson. All 17 Volumes are included in this bundle!!Price: $119.00
![LightWave 2020- Cartoon Character Modeling I & II [AG]](https://www.liberty3d.com/wp-content/uploads/2022/04/LightWave-2020-Character-Modeling-Bundle-01-JPEG.jpg)
LightWave 2020- Cartoon Character Modeling I & II [AG]
This Bundle Contains: 1) Lightwave 2020- Vol. #16- Cartoon Character Modeling I- Head Modeling 2) LightWave 2020- Vol. #17- Cartoon Character Modeling II- Body ModelingPrice: $29.00
![LightWave 2020- Vol. #17- Cartoon Character Modeling II- Body Modeling [AG]](https://www.liberty3d.com/wp-content/uploads/2022/04/LW_2020_Vol_17_Product_Box_400pix.jpg)
In this seventeenth volume of the LightWave 2020/2019/2018 Series 3D Instructor Adam Gibson teaches the LightWave student how to get started modeling Cartoon Style Characters that are designed for the rigging process and animation purposes.
Adam Gibson shows the important modeling techniques & basics for functional polygon flow so your characters can deform/bend for easier posing and animation. In this volume "Cartoon Character Modeling II" we show how to seamlessly create the Alien character's body building off the head structure from the previous volume. Learn how to control Points, Edges and Polygons to sculpt the shapes and structures needed for creating beautiful organic style Sub-D characters. The modeling techniques in this training series is the foundation for building characters, animals, monsters or any organic type 3D model. A great place to start for beginner LightWave Users or those new 3D Modeling.
*Bonus Content Folder Includes: 1) Model Files 2) Background Reference Image Templates
Price: $19.00
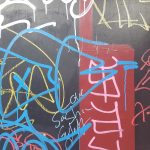
Kat has released volume 2 of his DT Las Vegas Texture Pack. Taking through out the late summer months of 2021 in the downtown Las Vegas area these lovely photographs for you that are perfect for textures in use with just about any 3D program on the planet, especially LightWave3D. This is a complimenting package to the first volume so make sure to check that one out as well so you have the complete set.
You get:
Graffiti = 53
GroundNStuff = 83
StuccoStoneWalls =56
Misc = 11
That's just over 200 images ready for you to drop into a program such as Materializer (Materializer example project included!) to create your texture sets from for PBR use in just about any modern rendering engine such as LightWave3D 2018+, game engine such as Unreal or Unity or other PBR system. They can also easily be used LightWave3D Legacy editions as well. They are untouched, pristine images taken at magic hour during the months of August, September and October of 2021. Crop and adjust as needed!
Get 894MB of awesome texture images for your next project in this collection today!
All photos taken at 1960x4032 or 4032x1960 pixels.
Price: $9.95
Kat spent a good while walking around the Downtown Las Vegas area taking these lovely photographs for you that are perfect for textures in use with just about any 3D program on the planet, especially LightWave3D.
You get:
Brick = 16
CamoGrass = 16
Cement = 34
DirtSan =56
Metalics = 115
Misc = 9
PlasterStucco = 46
StoneRocks = 16
Woods = 114
That's 422 images ready for you to drop into a program such as Materializer (Materializer example project included!) to create your texture sets from for PBR use in just about any modern rendering engine such as LightWave3D 2018+, game engine such as Unreal or Unity or other PBR system. They can also easily be used LightWave3D Legacy editions as well. They are untouched, pristine images taken at magic hour during the month of August 2021.
Get over 1.65GB of awesome textures for your next project in this collection today!
All photos taken at 1960x4032 or 4032x1960 pixels.
Price: $19.95
![Practical Production Techniques Vol 1 - 20 Ultra Bundle [KAT]](https://www.liberty3d.com/wp-content/uploads/2010/09/STORE_Generic.jpg)
Practical Production Techniques Vol 1 - 20 Ultra Bundle [KAT]
It's the most awesome bundle of all! 20 Practical Production Techniques videos in one ultra bundle from Kelly "Kat" Myers!
This is hundreds of hours of amazing learning material for LightWave3D, Fusion, Syntheyes and much more - spread across 20 titles for an amazingly low price!
With titles dating back to 2010 when we first started, this series covers practically (pun intended) every major type of visual effects scenario a VFX artist may face in the course of their career or pursuits as a hobbyist. From flying space ships to fixing impossibly bad footage in comp, every artist can benefit from the titles in this ultra bundle!
This is a massive product so be ready for some serious downloads!Price: $249.00
![Practical Production Techniques Vol. 18 [KAT]](https://www.liberty3d.com/wp-content/uploads/2021/01/PPTVol18PromoImages_05-1.jpg)
As we all know, Bullet Dynamics in LightWave3D as with any program that supports Bullet, has a lot of uses beyond smashing and crashing stuff. Or a stupid box and ball demo. While either use can be fun, there is much more to it than that and this title demonstrates a great way to make use of Bullet in a real-world scenario.
In Kelly "Kat" Myers' 18th installment in the Practical Production Techniques series of video training for LightWave3D, the subject is how to take a turbosquid sourced model, quickly texture and light it with volumetric lights and then animate each of the Ferris Wheel "carts" or cabins via Bullet Dynamics. It's a lot easier than you might think, but does take a bit of patience to get things "right" and then replicate for each element to be animated.
In just under 3 hours, this video will take you from start to finish and show you everything you need to know about how to produce a similar animation while also teaching some fundamentals about Bullet Dynamics with respect to "Hinges" and bone relationships to constraints.
Content is included with this for scenes, surface libraries, but unfortunately the model itself and texture images are not part of the package as its a commercial product from outside Liberty3d.com. However, you can easily build out your own similar model or pick up the one featured in the video. Either way this is great for testing and evaluation purposes once you understand how the physics side of things work and apply it to just about anything that calls for "swinging", animated elements that behave naturally under normal gravity, motivated by a parent object's motion.
This is a great tutorial for anyone who needs to dive into a practical application for bullet while not getting to deep into the far end of the pool. It's split up into eight easily digestible parts. For details on the model please view the TXT file included in the tutorial after purchase should you choose to want to grab it yourself. Support artists!
Est. Runtime 174 minutes
HD 1920x1080 Resolution
Price: $21.49
In an attempt to preserve some of the legacy of LightWave3D's history in the 3D and VFX world and its contributions to some of the most icon sci-fi television shows of the last 30 years; Liberty3d.com is making an effort archive and make available to the LightWave3D community many fan built assets from the series Babylon 5 (B5).
In this free to download collection, there are dozens of objects and scene set ups that will allow you to reproduce many wonderful visuals from the mid-1990s series. This is a great collection for anyone with a copy of LightWave3D going back to version 5.6 (if not earlier but we haven't tested this) to LightWave3D 2015.3. Later versions of LightWave3D may cause some pretty serious breakage of certain textures, and - volumetric engine or weapons fire effects rigs, so be warned! This doesn't mean that they cannot be reproduced using later versions of LightWave3D. They can, it just takes a bit of work.
While we can't list everything here, these are some highlights.
Included in this collection:
Whitestar LWO
Vorlon Dreadnought
Velarian_Class_Battleship
v9etu69q4r28-Babylon5
Shadow_Ship_(non_cannon)
Shadow_Alien
Psy_Corp_Mothership
narncruiser
minbari_warcruiser
Minbari_Sharlin_War_Cruiser
minbari_fighter
minbari
Jump_Gate
Hyperion
G-'Quan_v1
Earth_Force_One
EA_Shadow_New_Babylon_Station
EA_Omega_Destroyer_by_M.Tarling
EA Badger StarFury F3D Release
Centauri_Liner
big flying saucer
Babylon6
Babylon5
Babylon_5_Starfury_Version_3
B5Dockv2
Ashinta_Class_Escort_Frigate
ACTA_Jumpoint
A_Call_to_Arms_Babylon_5_Jump_Point
These and many more are included in this collection. They are provided "As Is" and where possible as they seem to be preserved from their original states produced by fans, credit for the authors is included in readme.txt files for most.
Price: $0.00
Boeing 737-700 in LightWave 3D [Cat]
Catherine Smallwood's Boeing 737-700 aircraft.
Check out Catherine Smallwood’s awesome Boeing 737-700 in LightWave 3D format (LWO3 2018+ LWS).
Modeled to be technically accurate and look good on camera, this model has all the main fixings of an awesome LightWave3D asset. It is essentially “ready-to-render” in LightWave3D 2018+.
Use your own paint scheme or use Catherine’s maps as a guide easily giving your shot or demo or whatever you might need a 737-700 for (AR/VR, games, you name it) a sense of reality without compromise. Price: $49.95
C-130H Hercules for using LightWave3D. Made of 175,737 polygons, this detailed replica of the Lockheed C-130H Hercules has the major control surfaces separated but not animated, propellers are in their own layers with pivot points set for rotation in your animations or still images. The model comes painted in the Tennessee Air National Guard color scheme. For repainting the model easily, a Photoshop PSD file is included with the basic layers and the UV Mapping images. The rear door edges are modeled into the aircraft, but not separated and a simple interior is placed inside if you wanted to finish the cargo doors.
Price: $49.95
![Buy 1 get 2 Free [RR]](https://www.liberty3d.com/wp-content/uploads/2020/02/3for1.png)
Buy 1 get 2 Free [RR]
After purchasing this product, e-mail Ryan Roye at ryanroye@gmail.com to receive your download links. You may pick any 3 of Ryan's non-bundled products (including plugins). Available Qty: 18
Price: $64.95
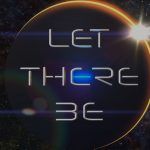
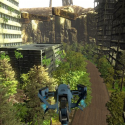
![The LFS Project [LFSP]](https://www.liberty3d.com/wp-content/uploads/2018/08/rising-pracima.jpg)
Price: $189.00
In this title, VFX artist and CG supervisor of Declaration Pictures Inc., and founder of Liberty3d.com - Kelly Lee Myers (aka Kat), shows you how to take a VFX shot from end-to-end using SynthEyes, LightWave3D and Fusion.
Starting with tracking the shot in Syntheyes, Kat walks you through the basics of getting a 3D track done fast using a manual method that produces extremely solid tracks every time. From there he will show you how to set up a LightWave3D based particle snow storm, snowflakes and more before proceeding to the final stages in Fusion where he discussed the ins and outs of Rotoscoping, the caveats involved when dealing with bugs in Fusions Rototools (which are being fixed right now if not already by the time you read this), and how Keyers can work to your advantage if all else fails.
This 31 part video includes assets used in the original VFX shot that was part of a real-world VFX job for the feature film "The Christmas Cabin" which Kat and Wes Sargent completed in a very short time in November/December of 2018 on order to make a tight deadline for the producers to successfully sell the film at a film market conference.
More in the practical production techniques series feature this film as subject matter are in the works and will be available here on Liberty3d.com exclusively.
Price: $69.95
Price: $49.95
![LightWave 2019/2018 Bundle Pack-Volumes #1 to #12 (Free Bonus Content & Tutorials) [AG]](https://www.liberty3d.com/wp-content/uploads/2019/10/Lightwave_2019_Bundle_Pack_I_400pix_JPEG.jpg)
Lightwave 2019/2018 Bundle Pack-Volumes #1 to #12 (Free Bonus Content & Tutorials)
Price: $99.00
![LightWave 2019- Volume #12- Modeler Tools IV [AG]](https://www.liberty3d.com/wp-content/uploads/2019/10/LW_2019_Vol_12_Product_Box_400pix.jpg)
In this twelfth volume of the Lightwave 2019/2018 (12 Volume Series) 3D Instructor Adam Gibson continues to introduce Modeler's powerful toolset. A great place to start for beginner Lightwave Users.
Price: $19.00
![LightWave 2019- Volume #11- Modeler Tools III [AG]](https://www.liberty3d.com/wp-content/uploads/2019/10/LW_2019_Vol_11_Product_Box_400pix.jpg)
In this eleventh volume of the Lightwave 2019/2018 (12 Volume Series) 3D Instructor Adam Gibson continues to introduce Lightwave’s powerful modeling tools. A great place to start for beginner Lightwave Users.
Price: $19.00
![Lightwave 3D- UV Mapping Bundle Pack I (Contains 5 Courses)[AG]](https://www.liberty3d.com/wp-content/uploads/2019/08/Lightwave_UV_Mapping_Bundle_Pack_01_400pix.jpg)
The "Lightwave UV Mapping Bundle Pack I" contains: 1) Lightwave 2019- Volume #8- UV Mapping I,
2) Lightwave 2015- Volume #9- UV Mapping- Dinosaur UV Project,
3) Lightwave 11.5- UV Mapping a Human,
4) Lightwave 11.5 UV Mapping a Creature,
5) Lightwave 11.5 UV Mapping Essentials
Price: $39.00
Iron Sky Model and Scene Pack Vol. Three, features two very special ships from the feature film "Iron Sky".
First up, the Russian "Mir" which is a proverbial kit bash if there ever was one in science fiction, the "Mir" from Iron Sky is it. A reflection of the horrific (if not always fully of surprises) state of Soviet and later Russian Federation space programs this ship combines what was supposed to the "burn up and splashdown" re-entry disposed of space station of Taco Bell publicity stunt fame fa few years back. That and spare parts of just about anything the Soviets and later the Russian Federation space programs shot into orbit. Meticulously detailed in many places, while head scratching in a few others where details could have been really been driven towards, the "Mir" in Iron Sky is a border line capital ship and the direct opposite of the USS George W. Bush scene in the film. It's primary weapon is in effect, a Particle Projection Cannon with its power source said to be re-purposed nuclear material from failed Mars missions, or orbital nuclear weapons platforms. Take your pick. With the "Mir" you probably would be right with both. "It came in pieces" so to speak, and the primary weapon system is a frontal assault type, more than likely intended to strike at ground based targets such as ICBM silos, power plants, critical infrastructure or ocean faring weapons platforms such as American Aircraft Carriers and their support ships.
Fully rigged, this model and scene set up for LightWave 2015.3 (and previous versions going back to 10.1) has been checked and ready for you to play around with and study. It includes the original engine system and PPC weapon rig used in the feature film. Please note, the final effect was treated heavily in post and color corrected to the final result one sees in the picture.
Next up is the controversial, almost lost to several hard drive crashes and idiots with lawyers and market courts with no concept of reality... the Japanese "Banzai" Ship. This ship has seen work in 4 different 3D packages. Originally built in 3DSMax, then modified and cleaned up in Modo, before being completely overhauled again in LightWave3D in order to get it it to hero level as picture ready requirements needed to be upped to the best level possible after several shots were added to the feature film shot list with close ups of this ship being called for (because its that's cool). This meant final work completed including the volumetric engine system and laser bank weapons rigging by Kat himself who also prepared it for destruction/ramming duties in shots found at the end of the picture. A combination of LightWave3D Modeler (mostly Modeler working on the fly during shot set ups) and 3D-Coat was used to produce the damage morphs needed to finish the job. 3 highly skilled VFX artists contributed to the design, construction, and "flight" of this model and it was produced completely independent of the "Production Designer" on the show who interfered constantly, with the VFX process. Maybe that's why it's so cool? Yes, because it's an absolutely original design.
Seb, Tuomas and Kat say "banzai!" mofos!
Price: $44.49

Instant motion capture system using your existing VR headset and hand controllers. Free updates for the life of the product.
Price: $999.00
Price: $399.00
Instant motion capture system using your existing VR headset and hand controllers. This license is for the current version and one free update.
Price: $399.00
Price: $49.00
"The Commonwealth Ships"
Three "Earth Fleet" ships, specifically those from the British Common Wealth as we referred to them on the show are included in Iron Sky Model and Scene Pack Volume 2. You get some really awesome craft in this one!
The British "SpitFire", the Australia "Rooketer" (roo as in kangaroo) and the Canadian "CanadArm3". Each of which includes their appropriate volumetric engine set-ups and feature animated moving parts with the exception of the CanadArm3 ship which didn't have any moving parts. These are all "Hero" models, meaning they were the ones used for close up shots and later the base for downres or proxy objects used for shots where they appear in the distance or for previs. These models are an essential starting point to the series of packs being released later where entire shots will be made available to LightWave3D users with the goal of pretty much the entire work done in LightWave3D for the original film, being released. 4K, 6K and even 10K resolution texture maps are included where applicable, matching exactly the way they were used on the show.
Price: $49.98
After 7 long years, Liberty3D.com is proud to announce the availability of the Iron Sky LightWave3D assets library. Kat has opened up the “vault” and begun to prep each of the main Earth and Moon NAZI ships featured in the first film. These are not baked down, neutered versions of the originals. They ARE the originals! Used in the show!
Initially produced using LightWave 10.1 and early beta versions of LighWave 11, all of the scenes have been pulled forward to LightWave 2015.3 for maximum compatibility. LightWave users from LightWave3D 9.6 to LightWave3D 2015.3 can load these scene files up along with the objects almost by default. Only two 3rd party plug-ins are required; DP Kit and DP Light which are both free to download and use. DB&W’s Material Booster Node may be required for some scenes to load correctly but is not required should you not have it. It is optional but we encourage you to support DB&W by picking up their tools.
LightWave3D 2018 Compatibility is not entirely possible (at least out of the box) due to the massive changes in the rendering, shading and lighting systems in the new versions of LightWave3D. However, Kat is working on that. Most of the basic surfacing will come in with some adjustments using the emulated “layer” system but really it should be rebuit for the new PBR technology in LightWave3D 2018 and beyond. The lighting on the ships, specifically the volumetric lighting systems such as those for the engines of most craft will also have to be adapted to the new render and volumetric technology in Lightwave3D 2018.
These incredibly rare and detailed assets represent thousands of hours of effort to produce and we are offering them exclusively to the LightWave3D community in their original form as an educational initiative. LightWave3D users new and old can study them and learn while also adapting them to their own scenes or making use of them as they see fit for their own reasons. Kat is granting a limited license for use by individual users of LightWave3D and options for commercial use as well.
Several packs are planned and in the works. First up is Iron Sky Model and Scene Pack Volume 1.
Iron Sky Model and Scene Pack Volume 1.
Three iconic ships are included in Iron Sky Model and Scene Pack Volume 1. The USA’s George W. Bush, the Moon NAZI “Tanhauser” Zeppelin and the Moon NAZI Valkyrie. Each of which includes their appropriate volumetric engine set-ups an in the case of the Valkyrie the volumetric gun system which are able to be animated and aimed for firing. These are all “Hero” models, meaning they were the ones used for close up shots and later the base for downres or proxy objects used for shots where they appear in the distance or for previs. These models are an essential starting point to the series of packs being released later where entire shots will be made available to LighWave3D users with the goal of pretty much the entire work done in LightWave3D for the original film, being released. 4K, 6K and even 10K resolution texture maps are included where applicable, matching exactly the way they were used on the show.
Price: $99.98
Instant motion capture system using your existing VR headset and hand controllers.
Price: $399.00
Price: $99.00
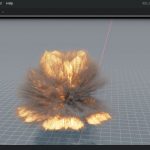
Kat is back with a new installment in the TurbulenceFD Advanced Concepts and Projects Series. This time in “Project Engine Fire”, Kat shows you what goes into setting up a WWII era USAF B-25 with an engine fire effect.
This is a real-world shot from the upcoming feature-film (direct-to-video) “Behind the Lines” which is currently in post-production. With a run time of approximately 105 minutes, you get all the info you need to recreate such an effect using LightWave3D (works in 2015.x and 2018.x) and TurbulenceFD from Jawset.com
You also get the renders and the Fusion composite flows from Kat for this project so you can play with the render results instead of having to render out things on your own (which can take a wee bit of time). Don’t worry though, if you want to play around with things in LightWave3D and tweak settings and sim things for yourself, we have you covered there, too. The basic geometry and the scene files are included so you have everything you need to follow along and get the exact results you want using the provided materials as a guide!
You get almost 4GB of content and learning material, ready to go for just $24.95USD
Price: $24.95

Ultra-Camera Bundle
What is an Ultra-Camera bundle?
Simple! It is the ultimate triple threat of tools for LightWave3D artists who take their pictures seriously, especially those venturing into the realm of VR!
Get everything you need to do the job and do it right!
You get UberCam 2.6, RRCam and VR Scientist 1.0 for 80 dollars off what it would cost if you bought them separately.Price: $198.90
Price: $118.90
Kat has put together 10 of his Practical Production Techniques videos into a super bundle!
Get up to speed fast on everything from surface baking to polygon reduction for games and VR/AR production as well as how to construct your shots for big space battles or mysterious nebula scenes and much much more in this bundle for a great low price!
Here is a list of the videos you get!
Practical Production Techniques Vol. One
Practical Production Techniques Vol. Two
Practical Production Techniques Vol. Three
Practical Production Techniques Vol. Four
Practical Production Techniques Vol. Five
Practical Production Techniques - Vol. 6 Advanced Surface Baking
Practical Production Techniques - Vol. 7 Advanced Surface Baking Part II
Practical Production Techniques - Vol. 8 Capital Ship Combat Techniques
Practical Production Techniques - Vol. 9 Polygon Reduction
Practical Production Techniques Vol. 10 - Project Smoke Monster
Price: $236.70
Price: $149.49
Fusion for LightWave Artists: Volume 4 - Curse of the Phantom Shadow
Award winning VFX artist and CG Supervisor, Kelly "Kat" Myers is back in his latest installment in the Fusion for LightWave Artists series.
This time Kat walks you through a real-world production shot from the low-budget 30+ minute short film written and directed by Mark Ross; "Curse of the Phantom Shadow"
With over 396 VFX shots in the current edit of the film, the daunting challenge of completing the task at hand is met through the use of LightWave3D and Fusion!
In this tutorial, Kat demonstrates how one can employ creative uses of volumetrics supplied by LightWave3D natively as well as via TurbulenceFD From Jawset.com and mix them together in Fusion 8 in a way that "sells the shot".
It doesn't stop there, however! Kat also demonstrates where the use of LightWave's PRMB is essential vs. the use of Vector-Based motion blur in post, and what to do if you ever have to "mix and match" in a compositing program like Fusion.
If you have enjoyed the previous installments of Fusion for LightWave artists, then you are for sure going to want to grab this title as you can follow along with Kat as he breaks down the composite that made up the final shot and continues on improving it!
Kat also discusses how you can ensure that 'WYSIWYG' for input and output when working with LightWave's Linear Color Space workflow and how Fusion's LUTs should be used with sRGB rendered material.
Exclusively available from Liberty3d.com, Fusion for LightWave Artists: Volume 4 - Curse of the Phantom Shadow, includes the entire render results used in the tutorial. You can practice the techniques demonstrated by Kat without having to render a single frame out of LightWave! He's done that for you and the renders are included as a secondary download aside from the tutorial video so you can watch right away as the downloads for the renders come across to you in the background if you choose!
Price: $39.95
RR_Tools pro is simple, but powerful plugin set designed to enhance the rigging and animation workflows of Lightwave. See video demonstration for examples of how these tools are used in production.
Price: $29.95
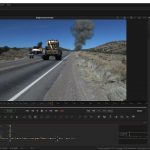
Practical Production Techniques Vol. 10 - Project Smoke Monster!
Kat is back with another installment in the highly popular Practical Production Techniques series. In Volume 10, Kat walks you through an entire shot featuring a Daz3D character model, taking the asset from Daz3D into LightWave, surfacing it using the maps from the asset, setting it up with animation applied via MDD, transferring in TurbulenceFD settings from another scene, lighting the character using some nifty tricks for realism in a photographic plate and then compositing the rendered results in Fusion.
With a runtime of almost 4.5 hours, this tutorial is jam-packed with lots of great tips and techniques pulled from Kat's experiences in production. The tutorial includes the rendered image files so you can follow along in the compositing process in Fusion or even AE and Nuke. You also get the scene files saved at every step along the way. Not included is the model which is a commercial asset but retails for 25 dollars on Daz3d.com and can be easily substituted for a character of your own design or any other Daz Character you may have laying about.
Price: $29.95
Price: $24.95
![LightWave 2015- Volume #11- Character Rigging for Beginners [AG]](https://www.liberty3d.com/wp-content/uploads/2019/08/Lightwave_2015_Vol_11_Product_Box_400pix.jpg)
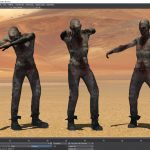
This massive Character Rigging Course is designed specifically for beginner 3D students who have never rigged a character in Lightwave or any other 3D package. Basic rigging concepts and principles are shown to get you up and started fast allowing you to be able to easily pose and control your characters movements with Lightwave's powerful rigging toolset. In this highly detailed course a Human Biped Character will be rigged using Lightwave's traditional rigging toolset first and then using the Genoma 2 Bi-Ped Rig (Lightwave's Auto-Rigging System). Learn how to Use and Download 2 pieces of "Free Character Creation Software" so that you can build thousands of you own detailed characters of all shapes and sizes that you can export and use in your Lightwave projects. Topics: Preparing your Models, Traditional Rigging Tools, Genoma Rigging, Bone Tools, Skelegons, Weight Maps, Facial Morphs (Endomorphs), Export/Import of DAZ Studio Characters, Export/Import of Make Human Characters, Surface Editing, Character Creation in DAZ Studio/Make Human Software, Saving Rig Presets, Inverse Kinematics (IK), Arm/Foot/Head/Eye Controls, Muscle Flexing/Joint Compensation. Also learn how you can import and use beautiful DAZ 3D Characters in Lightwave 3D. *Note: This course is not recommended for advanced-level or experienced rigging artists. *Bonus: Content Folder Included containing Scene, Model files, and Printable Pin-Up Notes/Diagrams from the tutorials.
Price: $29.00
This plugin/video content bundle provides users a way transport high quality daz3d models into Lightwave, and utilize the entire CMU motion capture database (free) in a single click.
Price: $39.95
Ryan covers all the bases to get you up and running quickly using the Octane renderer in Lightwave. (Available now. Sales page and promo video are in progress).
Price: $59.95
Advanced LightWave3D Modeling Projects - Chevy Impala Car Model
Lewis3D (Elvis)
Get this complete project and model a 1958 Chevy Impala using spline patch modeling techniques. Lewis takes you through the entire process from start to finish including the set up of modeler to make the most efficient use of your time by placing the most often used tools in front of you for easy access.
With 68 Chapters in total running just over 37 hours this tutorial will turn you into an expert Lightwave modeler!
No details are left untouched, everything from modeling the base body right down to the headlights and Chevy logo are covered in full. If you have always wanted to take your modeling to the next level but were unsure where to start then this is the tutorial for you. While not entirely intended for beginners, this tutorial will take someone from a basic knowledge of LightWave Modeler or any other modeling package and through the process of each step, teach you the tools needed to create awesome cars, trucks, planes, you name it.
A full collection of reference images necessary to build with are included.
Price: $39.95
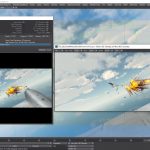
In part III of Fusion for LightWave Artists, Kelly "Kat" Myers breaks new ground in the series as he walks you through a complete shot to recreate a news broadcast style "playback" element using the assets from Iron Sky. SyntheyesTrackingMany years ago, Kat worked for a company that specialized in this area of film and television effects production working with Fusion and LightWave to produce video playback that would be used on set. This tutorial goes from start to finish including the tracking in Syntheyes of a plate shot using an everyday smart phone (in this case a Samsung Galaxy Note4), prepping the resulting footage for efficient use in Layout while getting the Iron Sky Valkyrie UFOs into the shot. From there this project takes a bit of a different turn as Kat demonstrates how to track elements in 2D using Fusions precise tracking tools and how to attach masks to these tracks providing for additional control of your composite. LightWave3DISValksThe tutorial finishes off with the introduction of several effects tools that you can use to "fake" broadcast TV interference or replicate the appearance of conventional television footage.
Learn how to deal with noisy "tracks" from a 3D tracking program by working with the data in Layout's graph editor while at the same time knowing what you can get away with due to the nature of the final target element. There are several tricks and tips in this tutorial that you simply will not find anywhere else covering an area of VFX creation that is rarely discussed if at all by visual effects artists.
With an approximate run time of 3.7 hours, Fusion for LightWave Artists Part III is a great companion title to the previous two parts in the series. With 20 video segments and all of the content included for you to follow along, this title is a must have for LightWave artists working with Fusion in their production work flows no FusionTrackingTwomatter what the tasks you may face. Visual Effects artists are sometimes asked to do some pretty odd things and creating "playback" for on-set shooting use is one of these odd ball jobs you are going to come across.
Price: $39.95
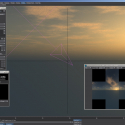
Do you need clouds in your shot? Hypervoxels got you down? Skytracer not cutting it?
No problem!
With "TFD Advanced Concepts and Projects - Clouds", learn how you can get awesome looking cloud formations that you can produce quickly with maximum control over their shape and appearance while rendering extremely fast compared to any other solutions available for LightWave3D.
Jawset's Turbulence FD for LightWave is the key! Award winning CG supervisor and VFX artist, Kelly "Kat" Myers walks you through the process of creating photorealistic cloud formations in this 3.6 hour 13 part tutorial specifically aimed at VFX artists who need to produce clouds for their shots.
Price: $23.95
Kat does it again!
Fusion for LightWave Artists Part II a 390 minute project based tutorial using the same techniques from Battle Star Galactica and Iron Sky for LightWave3D shot construction, Lighting, Rendering, Render Management, and Fusion Compositing that demonstrates how you can leverage the power of BlackMagic Design’s Fusion 7 (or 8) which is now free; into your LightWave production workflows.
Whether you use Mac or PC, Fusion is your best and most affordable compositing option available that provides absolutely uncompromising results and speed. Now, experience how you can take your LightWave work to the next level. Fusion and LightWave have a long history of being used together in top studios over the last two decades producing some of the most iconic television shows and films of our time.
In this video Kat takes you through an entire production level shot from "Battlestar Galactica" using freely downloadable assets (download links provided). Not only that, you get the complete renders from each lighting and buffer pass. That's 6500 frames from 16 different scene files to make up one awesome shot! No need to render at home! This package provides you with the content. That means you get all the the scenes, Fusion comp files and the renders in full!
This video is the second part in a series of videos designed specifically for LightWave artists in mind and is balanced between Layout and Fusion’s interface building up each element so the artist gets a firm grasp as to how to break out shots for compositing and how to manage renders in a network environment leveraging the power of Lightwave and Fusion network rendering technology.
This video gives you deep insight into how an entire shot would be produce on BSG or Iron Sky and can be applied to just about any product or project.
Get it now for only $39.49USD
Price: $39.49
Liberty3D UberCam 2.6 for LightWave3D 9.3.1 - LightWave 2015 (and beyond!) with Oculus Rift Virtual Reality support!
Studio Pack (5 Seats)
More Awesome Cameras and tools for LightWave3D that you can use in production right away.
We have updated our VR Cameras in this release to provide for "back seam" free rendering as well as a completely re-written algorithm for our VR Stereo Camera giving you the best stereoscopic rendering for VR video out there.
You get the following Cameras:
Liberty3D VR Stereoscopic Camera (New in 2.1) Make Stereoscopic Spherical 360 Degree VR Video!
Liberty3D VR Camera (New in 2.0!) Make Spherical 360 degree videos on youtube!
Liberty3D Surface Baking Camera (New in 2.0! - Experimental)
Liberty3D Spherical Camera (Updated for 2.0!)
Liberty3D Radial Shift Camera (Updated for 2.0!)
Liberty3D OverScan Camera (Updated for 2.0!)
Liberty3D SuperPano Camera (Updated for 2.0!)
Liberty3D Stereoscopic Camera (Updated for use and compatibility with LW 2015 and Oculus Rift VR Headsets)
Liberty3D Dual-Cam Camera (Updated for 2.0!)
Liberty3d 4-Up Camera (Updated for 2.0!)
Liberty3D 12-Up Camera (Updated for 2.0!)
Liberty3D Perspective Camera (DOF) (Motion Blur) (Updated for 2.0!)
Liberty3D Perspective Camera (No DoF) (Motion Blur) (Updated for 2.0!)
Liberty3D Perspective Camera (No DoF) (No Motion Blur) (Updated for 2.0!)
Liberty3D Panoramic Camera (Updated for 2.0!)
Liberty3D Cylinder Camera (Updated for 2.0!)
Liberty3D Skybox Camera (Updated for 2.0!)
Liberty3D FishEye Camera (Updated for 2.0!)
You get the following Tools:
VRHeadset Manager (For use with both Oculus Rift DK1.1 and DK2 Virtual Reality Headsets)
Virtual Studio Tools VR Headset Device Node (For connecting your camera in lightWave to the Oculus Rift via virtual Studio Tools)
UberRift Viewer (A brand new floating viewer window that works with the Oculus Rift in stereoscopic, properly applying the barrel lens distortion effect to your layout camera viewport)
L3D Oculus Rift Barrel Distortion Image Filter (For use with our Stereoscopic camera so you can render out images using LightWave's renderer for viewing on the Oculus Rift)
This release of UberCam 2.6 is jammed packed with features and comes with an awesome 60+ page manual covering everything you need to know about how to set up your Oculus Rift and use it with LightWave3D.
MacOS 32bit/64bit (Universal Binary), Win64bit and Win32bit versions are shipped in this plug-in along with our new manual.
Please note that at this time the UberRift viewer works on Windows PC platforms (32bit and 64bit) only and requires at least LightWave3D 11.6.3.
Most camera plug-ins are backward compatible to LightWave 9.3.1.
LightWave 2017 is supported.
Price: $349.75
Price: $299.00
![LightWave 2015 Bundle Pack- (Volumes #1 to #10)- [AG]](https://www.liberty3d.com/wp-content/uploads/2016/02/LW_2015_Bundle_Vol_1_to_10.jpg)
LightWave 2015 Bundle Pack- (Volumes #1 to #10)- [AG]
This Lightwave 2015 Bundle Contains: Volumes #1,2,3,4,5,6,7,8,9, and 10.
Bonus: Free 3D Dinosaur Model PackPrice: $75.00
![LightWave 2015- Volume #10- Surfacing [AG]](https://www.liberty3d.com/wp-content/uploads/2019/08/Lightwave_2015_Vol_10_Product_Box_400pix.jpg)
LightWave 2015- Volume #10- Surfacing [AG]
In this 10th Volume of our 2015 training series 3D Instructor Adam Gibson introduces the beginner 3D student how to get started using Lightwave's powerful surfacing tools.
Table of Contents for Volume #10: Chapter 1- Intro, Chapter 2- What is Surfacing?, Chapter 3- Polygons and Surface Normals, Chapter 4- Color Channel Basics, Chapter 5- Creating Surface Names and Renaming Surfaces, Chapter 6- Working with Multiple Surfaces, Chapter 7- Smoothing Angle, Chapter 8- Luminosity Channel, Chapter 9- Enable Glow, Chapter 10- Diffuse Channel, Chapter 11- Specular and Gloss Channels, Chapter 12- Reflection Channel, Chapter 13- Transparency and Refraction Index, Chapter 14- Object Dissolve, Chapter 15- Translucency Channel, Chapter 16- Bump Channel, Chapter 17- Double Sided Polygons, Chapter 18- Surface Presets (Colors, Metals, Rock, Fabric, Glass and More), Chapter 19- Gradients Introduction, Chapter 20- Nodes Introduction (Part One), Chapter 21- Nodes Introduction (Part Two), Chapter 22- Final. Running Time: 4 hrs. 0 mins., High Quality (Screen-Res 1920 x 1080 pixels), Video Format: MP4 (.mp4), Level: Beginner.Price: $19.00
![LightWave 2015- Volume #9- UV Mapping [AG]](https://www.liberty3d.com/wp-content/uploads/2019/08/Lightwave_2015_Vol_9_Product_Box_400pix.jpg)
LightWave 2015- Volume #9- UV Mapping [AG]
In this latest Lightwave 2015 Series tutorial 3D Instructor Adam Gibson will demonstrate how to quickly UV Map a Parasaurolophus Dinosaur model using the "ABF UV Unwrap" tool and the "PLG UV Tools" Plugin (Free Plugin). Learn how to systematically break up your model for easy flattening of UV Islands. Tips and Tricks are also shown on how to avoid typical problems and also how to deal with issues along the way. Table of Contents for Volume #9: Chapter 1- Intro, Chapter 2- UV Workflow for Project, Chapter 3- Dividing Up Body Parts (Part One), Chapter 4- Dividing Up Body Parts (Part Two), Chapter 5- Body UV Map, Chapter 6- Front Feet UV Map, Chapter 7- Claws of Front Feet UV Map, Chapter 8- Inner Mouth UV Maps, Chapter 9- Inner Nostrils, Eye Sockets, Ear Sockets UV Map, Chapter 10- Claws UV Map, Chapter 11- Neck UV Map, Chapter 12- Tail UV Map, Chapter 13- Eyes UV Map, Chapter 14- Arms UV Map, Chapter 15- Rear Feet UV Map, Chapter 16- Legs UV Map, Chapter 17- Head UV Map, Chapter 18- Merging Body Parts into One Layer and Merging Points, Chapter 19- Using the PLG Pack UV Chart Plugin, Chapter 20- Final. Running Time: 2 hrs. 44 mins., High Quality (Screen-Res 1920 x 1080 pixels) , Video Format: MP4 (.mp4), Level: Beginner.Price: $19.00
![DDO for Lightwave Users- Volume #7- DDO Painter I [AG]](https://www.liberty3d.com/wp-content/uploads/2018/10/dDo_for_Lightwave_Users_Vol_7_400pix.jpg)
DDO for Lightwave Users- Volume #7- DDO Painter I [AG]
In this training tutorial 3D Instructor Adam Gibson introduces the new and powerful DDO Painter to the currently released Quixel Suite 2.0. Learn how to get started quickly texturing your 3d models using the new painting tools and how to create automated input maps without having to leave the Quixel Suite. Table of Contents for Volume #7: Chapter 1- Intro, Chapter 2- Input Map Baking Glitch in 3DO (Work-Around Explained), Chapter 3- Baking Input Maps Via NDO (AO, Curvature, Object Space Normal, XYZ Gradient), Chapter 4- Baking Input Maps Via DDO (AO, Curvature, Object Space Normal, XYZ Gradient), Chapter 5- DDO Paint Brush Basics (Brush Size, Changing Colors, Albedo Viewing Mode), Chapter 6- DDO Paint Brush Basics (Channel Selection, Transferring Paint Data to Image Maps), Chapter 7- How to Add a Bump Channel in DDO and Paint Bump Displacement, Chapter 8- Keyboard Shortcuts (Othographic/Perspective Toggle, 90-Degree Ortho-Views), Chapter 9- Gloss Channel Painting, Chapter 10- How to Paint on Meshes with Multiple Groups, Chapter 11- Dynamask Painting, Layer Blending, Adding Dirt, Bump Map Detail, Chapter 12- Exporting Final Maps from DDO to Lightwave and Initial Texture Set-Up, Chapter 13- Test Renders in Lightwave, Chapter 14- Post Process Render Presets in 3DO and Final. Running Time: 2 hrs. 28 mins., High Quality (Screen-Res 1920 x 1080 pixels), Video Format: MP4 (.mp4), Level: Beginner.Price: $19.00

Everything Chilton has created for game development, including modeling, animation, videos, Unity3D and LightWave3D assets.
Price: $144.80
Price: $79.95
![DDO for Lightwave Users- Volume #6- NDO Painter I [AG]](https://www.liberty3d.com/wp-content/uploads/2018/10/dDo_for_Lightwave_Users_Vol_6_400pix.jpg)
DDO for Lightwave Users- Volume #6- NDO Painter I [AG]
In this training tutorial 3D Instructor Adam Gibson introduces the new and powerful NDO Painter from the newly released Quixel Suite 2.0. Learn how to get started quickly painting Normal Maps directly on your 3d models in 3DO using the new painting tools. Table of Contents for Volume #6: Chapter 1- Intro, Chapter 2- NDO Paint Basics (Part One), Chapter 3- NDO Paint Basics (Part Two), Chapter 4- NDO Paint Basics (Part Three), Chapter 5- Brush Tool, Chapter 6- Eraser Tool (Transparency and Alpha), Chapter 7- Object Navigation Review (Rotate, Move, Zoom), Chapter 8- Camera Animator (Make Animations of your 3D Model), Chapter 9- Creating Multiple Camera Views (Create, Save, Delete), Chapter 10- How to Create Groups/Parts and Hide Groups/Parts, Chapter 11- Alpha Brushes, Chapter 12- How to Change Alpha Brush Angle, Chapter 13- Importing and Creating Alpha Brush Collections, Chapter 14- Final. Running Time: 2 hrs. 13 mins., High Quality (Screen-Res 1920 x 1080 pixels), Video Format: MP4 (.mp4), Level: Beginner.
*Bonus: 150 FREE Sci-Fi Alpha Brushes!!! (Reg. Price $19.00 US)Price: $19.00
![Instant 3D Turntable for LightWave Users [cw]](https://www.liberty3d.com/wp-content/uploads/2015/12/Screen-Shot-2015-12-15-at-5.38.22-PM.png)
Build Instant 3D turntables and navigable rooms and buildings using the free version of Unity 5 and LightWave3D.
Price: $34.95
![UV Layout for Lightwave Users- Volume #1 & #2 [AG]](https://www.liberty3d.com/wp-content/uploads/2019/08/UV_Layout_for_LW_Users_Product_Box_400pix.jpg)
UV Mapping has always been one of the most challenging and dreaded aspects for creating amazing textures for 3D models.
3D artists around the world know this pain as it can be a very lengthy process trying to get your UV Maps with as little "Texture Distortion" as possible with manual tweaking methods which is necessary in most typical 3D packages.
In this video course 3D Instructor Adam Gibson will be showing how to get started fast using the amazing "UV Layout" Software Package with Lightwave 3D!!
Although Lightwave 3D will be used in this course with UV Layout, the concepts and techniques can easily be used with any other 3D Software package like: Modo, Maya, 3D Max, 3D Coat, ZBrush, etc.
When it comes to UV Mapping, UV Optimization is the Key to getting near perfect UV Maps. Manual Optimization Methods (in other words tweaking your maps by hand) with the typical checkboard pattern can be extremely long and tedious, frustrating, and not to mention cutting into your production time where you could be working on other more important things. Spending more time on modeling and the actual textures for you model can be immensely stolen by having to spend hours, days, weeks tweaking your UV Maps.
With that being said "UV Layout" not only contains all the traditional UV Map editing tools, but has one of the industries top "Automated UV Map Optimizers" at a very low price. With a few mouse clicks and few seconds of your time, your UV Maps can be flattened and optimized with amazing accuracy which would in most cases be impossible with manual methods.
In this course we demonstrate how to 1) Create all your UV Maps within UV Layout and 2) How to Import and Optimize UV Maps that have been Created in Other 3D Software Packages. Running Time: Volume #1- 2 hrs. 30 mins. and Volume #2- 3 hrs. 39 mins., High Quality (Screen-Res 1920 x 1080 pixels), Video Format: MP4 (.mp4), Level: Beginner.
Price: $29.00
![LightWave 2015- Volume #8- Particles & HyperVoxels II [AG]](https://www.liberty3d.com/wp-content/uploads/2019/08/Lightwave_2015_Vol_8_Product_Box_400pix.jpg)
LightWave 2015- Volume #8- Particles & HyperVoxels II [AG]
In Particles and HyperVoxels II 3D Instuctor Adam Gibson demonstrates how to make your particles and hypervoxels interact with other objects and 3D Models in your scene. This can be useful for limitless amount of situations whether it be making dust, debris or liquids fall and bounce off the ground, a character, or any other 3d models in the scene or for making a 3d object realistically pass through smoke, steam, or fire. The possibilities are limitless. In the second part of the tutorial how to convert your 3D models/meshes into Particle Emitters is shown. This is a very powerful feature as you can create effects like making your 3D models look like they are on fire or emitting smoke or steam or even sweating. If you are new to Lightwave 3D this a great tutorial to get started fast with Particles and HyperVoxels. Table of Contents for Volume #8: Chapter 1- Intro, Chapter 2- Collision Object (Plane-Type), Chapter 3- Collision Object (Roughness Setting), Chapter 4- Using 2 Collision Planes at the Same Time, Chapter 5- Collision Mode Types, Chapter 6- Polygonal Collision Mode (for Polygonal Models), Chapter 7- HyperVoxel Surface Permeation Problem (Radius/Level Fix), Chapter 8- SubDiv Collision Mode (for Sub-D Models), Chapter 9- Particle Collision Using Textured Deformed Terrains, Chapter 10- Using an Object/Mesh as a Particle Emitter, Chapter 11- Final. Running Time: 1 hrs. 51 mins., High Quality (Screen-Res 1920 x 1080 pixels), Video Format: MP4 (.mp4), Level: Beginner.Price: $19.00
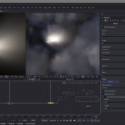
![LightWave 2015- Volume #7- Particles & HyperVoxels I [AG]](https://www.liberty3d.com/wp-content/uploads/2019/08/Lightwave_2015_Vol_7_Product_Box_400pix.jpg)
LightWave 2015- Volume #7- Particles & HyperVoxels I [AG]
Learn How to Create Clouds and Outer Space Nebulas in Lightwave 2015. Spice up your sky environments and outer space scenes. In this Beginner Level Lightwave 2015 tutorial Adam Gibson demonstrates easy to follow steps for Cloud and Nebula creation in Layout. So if you are new to Particles and HyperVoxels this tutorial is a great place to start. Table of Contents for Volume #7: Chapter 1- Intro, Chapter 2- HyperVoxel Cloud Concepts, Chapter 3- HyperVoxel Cloud Initial Set-Up, Chapter 4- HyperVoxel Cloud (Stretch Direction Input Parameter), Chapter 5- HyperVoxel Cloud (Shading Using Procedural Textures), Chapter 6- Nebula Creation (Using a Multi-Colored Gradient), Chapter 7- Nebula Render and Tweaking, Chapter 8- Final. Running Time: 1 hrs. 34 mins., High Quality (Screen-Res 1920 x 1080 pixels) , Video Format: MP4 (.mp4), Level: Beginner.Price: $19.00