Main Menu

LightWave3D Training

More videos are coming soon all the time! Check back often for new releases from Liberty3D.com
Fusion for LightWave Artists Part III [KAT]
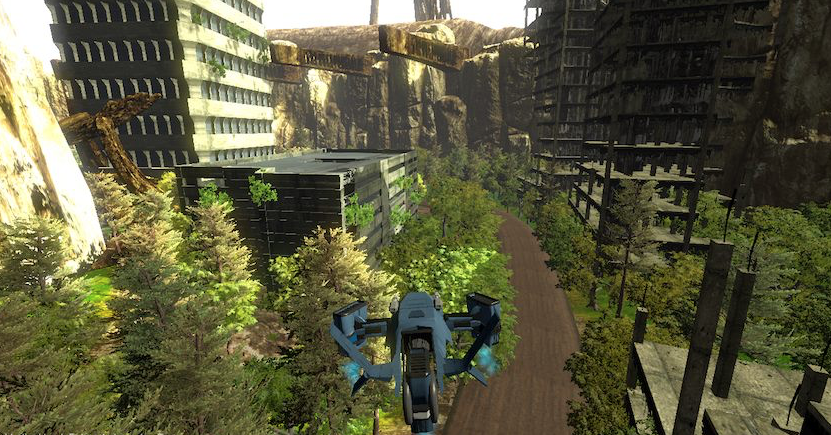
In part III of Fusion for LightWave Artists, Kelly "Kat" Myers breaks new ground in the series as he walks you through a complete shot to recreate a news broadcast style "playback" element using the assets from Iron Sky. SyntheyesTrackingMany years ago, Kat worked for a company that specialized in this area of film and television effects production working with Fusion and LightWave to produce video playback that would be used on set. This tutorial goes from start to finish including the tracking in Syntheyes of a plate shot using an everyday smart phone (in this case a Samsung Galaxy Note4), prepping the resulting footage for efficient use in Layout while getting the Iron Sky Valkyrie UFOs into the shot. From there this project takes a bit of a different turn as Kat demonstrates how to track elements in 2D using Fusions precise tracking tools and how to attach masks to these tracks providing for additional control of your composite. LightWave3DISValksThe tutorial finishes off with the introduction of several effects tools that you can use to "fake" broadcast TV interference or replicate the appearance of conventional television footage. Learn how to deal with noisy "tracks" from a 3D tracking program by working with the data in Layout's graph editor while at the same time knowing what you can get away with due to the nature of the final target element. There are several tricks and tips in this tutorial that you simply will not find anywhere else covering an area of VFX creation that is rarely discussed if at all by visual effects artists. With an approximate run time of 3.7 hours, Fusion for LightWave Artists Part III is a great companion title to the previous two parts in the series. With 20 video segments and all of the content included for you to follow along, this title is a must have for LightWave artists working with Fusion in their production work flows no FusionTrackingTwomatter what the tasks you may face. Visual Effects artists are sometimes asked to do some pretty odd things and creating "playback" for on-set shooting use is one of these odd ball jobs you are going to come across.
TFD Advanced Concepts and Projects - Clouds [KAT]
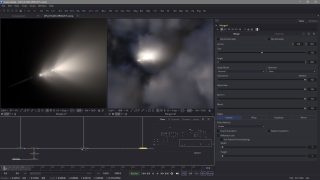
Do you need clouds in your shot? Hypervoxels got you down? Skytracer not cutting it? No problem! With "TFD Advanced Concepts and Projects - Clouds", learn how you can get awesome looking cloud formations that you can produce quickly with maximum control over their shape and appearance while rendering extremely fast compared to any other solutions available for LightWave3D. Jawset's Turbulence FD for LightWave is the key! Award winning CG supervisor and VFX artist, Kelly "Kat" Myers walks you through the process of creating photorealistic cloud formations in this 3.6 hour 13 part tutorial specifically aimed at VFX artists who need to produce clouds for their shots.
Substance Painter for Lightwave Users Bundle- Volumes #1 to #6 [AG]
Substance Painter for Lightwave Users- Volume #6- Normal Map Secrets [AG]
In this sixth volume 3D Instructor Adam Gibson introduces the 3D student to how Normal Maps work within Substance Painter 2. Some of the topics covered: Height Map to Normal Map Conversion, Normal Map Alpha Brushes, PB Texture Baker Plugin for Lightwave, Creating Input Normal Maps, Height Map Strength (Positive/Negative), Normal Sculpting Tips, Combining Height and Normal Channels. Table of Contents for Volume #6: Chapter 1- Intro, Chapter 2- Normal Map Concepts, Chapter 3- High-Poly to Low-Poly Normal Map Baking Concepts (Part One), Chapter 4- High-Poly to Low-Poly Normal Map Baking Concepts (Part Two), Chapter 5- Baking Input Normal Using High-Poly to Low-Poly in Substance Painter, Chapter 6- Baking Input Normal Using High-Poly to Low-Poly Using PB Texture Baker, Chapter 7- How to Use the New Orthagonal Views in Substance Painter 2, Chapter 8- Converting Height Channels to Normal Map Inputs, Chapter 9- Converting Normal Channels to Normal Map Inputs, Chapter 10- Tips and Tricks (More Normal Map Creation Secrets), Chapter 11- Final. Running Time: 3 hrs. 21 mins., High Quality (Screen-Res 1920 x 1080 pixels), Video Format: MP4 (.mp4), Level: Beginner.
LightWave 2015 Bundle Pack- (Volumes #1 to #10)- [AG]
This Lightwave 2015 Bundle Contains: Volumes #1,2,3,4,5,6,7,8,9, and 10. Bonus: Free 3D Dinosaur Model Pack
LightWave 2015- Volume #10- Surfacing [AG]
In this 10th Volume of our 2015 training series 3D Instructor Adam Gibson introduces the beginner 3D student how to get started using Lightwave's powerful surfacing tools. Table of Contents for Volume #10: Chapter 1- Intro, Chapter 2- What is Surfacing?, Chapter 3- Polygons and Surface Normals, Chapter 4- Color Channel Basics, Chapter 5- Creating Surface Names and Renaming Surfaces, Chapter 6- Working with Multiple Surfaces, Chapter 7- Smoothing Angle, Chapter 8- Luminosity Channel, Chapter 9- Enable Glow, Chapter 10- Diffuse Channel, Chapter 11- Specular and Gloss Channels, Chapter 12- Reflection Channel, Chapter 13- Transparency and Refraction Index, Chapter 14- Object Dissolve, Chapter 15- Translucency Channel, Chapter 16- Bump Channel, Chapter 17- Double Sided Polygons, Chapter 18- Surface Presets (Colors, Metals, Rock, Fabric, Glass and More), Chapter 19- Gradients Introduction, Chapter 20- Nodes Introduction (Part One), Chapter 21- Nodes Introduction (Part Two), Chapter 22- Final. Running Time: 4 hrs. 0 mins., High Quality (Screen-Res 1920 x 1080 pixels), Video Format: MP4 (.mp4), Level: Beginner.
LightWave 2015- Volume #9- UV Mapping [AG]
In this latest Lightwave 2015 Series tutorial 3D Instructor Adam Gibson will demonstrate how to quickly UV Map a Parasaurolophus Dinosaur model using the "ABF UV Unwrap" tool and the "PLG UV Tools" Plugin (Free Plugin). Learn how to systematically break up your model for easy flattening of UV Islands. Tips and Tricks are also shown on how to avoid typical problems and also how to deal with issues along the way. Table of Contents for Volume #9: Chapter 1- Intro, Chapter 2- UV Workflow for Project, Chapter 3- Dividing Up Body Parts (Part One), Chapter 4- Dividing Up Body Parts (Part Two), Chapter 5- Body UV Map, Chapter 6- Front Feet UV Map, Chapter 7- Claws of Front Feet UV Map, Chapter 8- Inner Mouth UV Maps, Chapter 9- Inner Nostrils, Eye Sockets, Ear Sockets UV Map, Chapter 10- Claws UV Map, Chapter 11- Neck UV Map, Chapter 12- Tail UV Map, Chapter 13- Eyes UV Map, Chapter 14- Arms UV Map, Chapter 15- Rear Feet UV Map, Chapter 16- Legs UV Map, Chapter 17- Head UV Map, Chapter 18- Merging Body Parts into One Layer and Merging Points, Chapter 19- Using the PLG Pack UV Chart Plugin, Chapter 20- Final. Running Time: 2 hrs. 44 mins., High Quality (Screen-Res 1920 x 1080 pixels) , Video Format: MP4 (.mp4), Level: Beginner.
DDO for Lightwave Users- Volume #7- DDO Painter I [AG]
In this training tutorial 3D Instructor Adam Gibson introduces the new and powerful DDO Painter to the currently released Quixel Suite 2.0. Learn how to get started quickly texturing your 3d models using the new painting tools and how to create automated input maps without having to leave the Quixel Suite. Table of Contents for Volume #7: Chapter 1- Intro, Chapter 2- Input Map Baking Glitch in 3DO (Work-Around Explained), Chapter 3- Baking Input Maps Via NDO (AO, Curvature, Object Space Normal, XYZ Gradient), Chapter 4- Baking Input Maps Via DDO (AO, Curvature, Object Space Normal, XYZ Gradient), Chapter 5- DDO Paint Brush Basics (Brush Size, Changing Colors, Albedo Viewing Mode), Chapter 6- DDO Paint Brush Basics (Channel Selection, Transferring Paint Data to Image Maps), Chapter 7- How to Add a Bump Channel in DDO and Paint Bump Displacement, Chapter 8- Keyboard Shortcuts (Othographic/Perspective Toggle, 90-Degree Ortho-Views), Chapter 9- Gloss Channel Painting, Chapter 10- How to Paint on Meshes with Multiple Groups, Chapter 11- Dynamask Painting, Layer Blending, Adding Dirt, Bump Map Detail, Chapter 12- Exporting Final Maps from DDO to Lightwave and Initial Texture Set-Up, Chapter 13- Test Renders in Lightwave, Chapter 14- Post Process Render Presets in 3DO and Final. Running Time: 2 hrs. 28 mins., High Quality (Screen-Res 1920 x 1080 pixels), Video Format: MP4 (.mp4), Level: Beginner.
Chilton's Christmas Game Builder Bundle
Everything Chilton has created for game development, including modeling, animation, videos, Unity3D and LightWave3D assets.
DDO for Lightwave Users- Volume #6- NDO Painter I  [AG]
DDO for Lightwave Users- Volume #6- NDO Painter I [AG]
In this training tutorial 3D Instructor Adam Gibson introduces the new and powerful NDO Painter from the newly released Quixel Suite 2.0. Learn how to get started quickly painting Normal Maps directly on your 3d models in 3DO using the new painting tools. Table of Contents for Volume #6: Chapter 1- Intro, Chapter 2- NDO Paint Basics (Part One), Chapter 3- NDO Paint Basics (Part Two), Chapter 4- NDO Paint Basics (Part Three), Chapter 5- Brush Tool, Chapter 6- Eraser Tool (Transparency and Alpha), Chapter 7- Object Navigation Review (Rotate, Move, Zoom), Chapter 8- Camera Animator (Make Animations of your 3D Model), Chapter 9- Creating Multiple Camera Views (Create, Save, Delete), Chapter 10- How to Create Groups/Parts and Hide Groups/Parts, Chapter 11- Alpha Brushes, Chapter 12- How to Change Alpha Brush Angle, Chapter 13- Importing and Creating Alpha Brush Collections, Chapter 14- Final. Running Time: 2 hrs. 13 mins., High Quality (Screen-Res 1920 x 1080 pixels), Video Format: MP4 (.mp4), Level: Beginner. *Bonus: 150 FREE Sci-Fi Alpha Brushes!!! (Reg. Price $19.00 US)
Instant 3D Turntable for LightWave Users [cw]
Build Instant 3D turntables and navigable rooms and buildings using the free version of Unity 5 and LightWave3D.
UV Layout for Lightwave Users- Volume #1 & #2 [AG]
UV Mapping has always been one of the most challenging and dreaded aspects for creating amazing textures for 3D models. 3D artists around the world know this pain as it can be a very lengthy process trying to get your UV Maps with as little "Texture Distortion" as possible with manual tweaking methods which is necessary in most typical 3D packages. In this video course 3D Instructor Adam Gibson will be showing how to get started fast using the amazing "UV Layout" Software Package with Lightwave 3D!! Although Lightwave 3D will be used in this course with UV Layout, the concepts and techniques can easily be used with any other 3D Software package like: Modo, Maya, 3D Max, 3D Coat, ZBrush, etc. When it comes to UV Mapping, UV Optimization is the Key to getting near perfect UV Maps. Manual Optimization Methods (in other words tweaking your maps by hand) with the typical checkboard pattern can be extremely long and tedious, frustrating, and not to mention cutting into your production time where you could be working on other more important things. Spending more time on modeling and the actual textures for you model can be immensely stolen by having to spend hours, days, weeks tweaking your UV Maps. With that being said "UV Layout" not only contains all the traditional UV Map editing tools, but has one of the industries top "Automated UV Map Optimizers" at a very low price. With a few mouse clicks and few seconds of your time, your UV Maps can be flattened and optimized with amazing accuracy which would in most cases be impossible with manual methods. In this course we demonstrate how to 1) Create all your UV Maps within UV Layout and 2) How to Import and Optimize UV Maps that have been Created in Other 3D Software Packages. Running Time: Volume #1- 2 hrs. 30 mins. and Volume #2- 3 hrs. 39 mins., High Quality (Screen-Res 1920 x 1080 pixels), Video Format: MP4 (.mp4), Level: Beginner.
LightWave 2015- Volume #8- Particles & HyperVoxels II [AG]
In Particles and HyperVoxels II 3D Instuctor Adam Gibson demonstrates how to make your particles and hypervoxels interact with other objects and 3D Models in your scene. This can be useful for limitless amount of situations whether it be making dust, debris or liquids fall and bounce off the ground, a character, or any other 3d models in the scene or for making a 3d object realistically pass through smoke, steam, or fire. The possibilities are limitless. In the second part of the tutorial how to convert your 3D models/meshes into Particle Emitters is shown. This is a very powerful feature as you can create effects like making your 3D models look like they are on fire or emitting smoke or steam or even sweating. If you are new to Lightwave 3D this a great tutorial to get started fast with Particles and HyperVoxels. Table of Contents for Volume #8: Chapter 1- Intro, Chapter 2- Collision Object (Plane-Type), Chapter 3- Collision Object (Roughness Setting), Chapter 4- Using 2 Collision Planes at the Same Time, Chapter 5- Collision Mode Types, Chapter 6- Polygonal Collision Mode (for Polygonal Models), Chapter 7- HyperVoxel Surface Permeation Problem (Radius/Level Fix), Chapter 8- SubDiv Collision Mode (for Sub-D Models), Chapter 9- Particle Collision Using Textured Deformed Terrains, Chapter 10- Using an Object/Mesh as a Particle Emitter, Chapter 11- Final. Running Time: 1 hrs. 51 mins., High Quality (Screen-Res 1920 x 1080 pixels), Video Format: MP4 (.mp4), Level: Beginner.
LightWave 2015- Volume #7- Particles & HyperVoxels I [AG]
Learn How to Create Clouds and Outer Space Nebulas in Lightwave 2015. Spice up your sky environments and outer space scenes. In this Beginner Level Lightwave 2015 tutorial Adam Gibson demonstrates easy to follow steps for Cloud and Nebula creation in Layout. So if you are new to Particles and HyperVoxels this tutorial is a great place to start. Table of Contents for Volume #7: Chapter 1- Intro, Chapter 2- HyperVoxel Cloud Concepts, Chapter 3- HyperVoxel Cloud Initial Set-Up, Chapter 4- HyperVoxel Cloud (Stretch Direction Input Parameter), Chapter 5- HyperVoxel Cloud (Shading Using Procedural Textures), Chapter 6- Nebula Creation (Using a Multi-Colored Gradient), Chapter 7- Nebula Render and Tweaking, Chapter 8- Final. Running Time: 1 hrs. 34 mins., High Quality (Screen-Res 1920 x 1080 pixels) , Video Format: MP4 (.mp4), Level: Beginner.
Fusion for LightWave Artists [KAT]
This title is massive! Fusion for LightWave Artists is a 420 minute exploration and project based tutorial that demonstrates how you can leverage the power of BlackMagic Design’s Fusion 7 (or 8) which is now free; into your LightWave production workflows. Whether you use Mac or PC, Fusion is your best and most affordable compositing option available that provides absolutely uncompromising results and speed. Now, experience how you can take your LightWave work to the next level. Fusion and LightWave have a long history of being used together in top studios over the last two decades producing some of the most iconic television shows and films of our time. In this video learn how to make use of Fusion’s powerful workflow and LightWave render buffer system to integrate photographic (stills or video can be used) material producing photorealistic composites. Kat masterfully walks you through the process over the course of 27 video clips and 4 project based examples demonstrating the use of Object ID, Surface ID, Depth (linear fog and z-Buffer techniques are covered) to gain maximum control over your shots. Learn how to produce color correction effects over distances using depth as well as DoF application and how to avoid “gotchas” when working with deep pixel data. Take advantage of LightWave’s Shadow Catcher node and learn how you can precisely control the results in comp helping you to save time in render as well as remain flexible when it comes to your final look. Learn how you can take advantage of LightWave’s native Composite Buffer tool or DB-W’s exrTrader buffer saver export plug-in to reduce the amount of image files you have to manage while getting the most out of each render pass to create your final composites. Learn how to use the power of motion vectors and work with them in comp without the need for any RSMB plug-ins or fancy tricks to make them work. Over 1.64GB in size this video is a huge value and comes with rendered image content and scenes (The A-10 model/scenes are not included due to copyright reasons, but the renders are). This video is the first part in a series of videos designed specifically for LightWave artists in mind and is balanced between Layout and Fusion’s interface building up each element so the artist gets a firm grasp as to how to break out shots for compositing later. Get it now for only $39.49USD
LightWave 2015- Getting Started Bundle (Volumes #1 to #6)  [AG]
LightWave 2015- Getting Started Bundle (Volumes #1 to #6) [AG]
This Lightwave Bundle Contains: Lightwave 2015 Getting Started Volumes #1,2,3,4,5, and #6. It is intended for Beginner Level 3D Students as an introduction to the Layout portion of Lightwave. *Bonus: Dinosaur Mega-Pack and Creature Eye Pack. Over 40 Base Dinosaur Mesh Objects and Creature Eye Image Maps.
LightWave 2015- Volume #6- Getting Started VI [AG]
What is Lightwave 3D? Lightwave is powerful 3D Modeling/Animation and VFX software used in the Film and Television Industry by 3D artists/studios in Hollywood and all over the world. This 12 volume series is designed for beginners who are new to 3D or students who are new to Lightwave. The series will be covering everything you need to get started fast. Some of the Topics Covered throughout the 12 Volume Series will be: User Interface, Polygonal Modeling, Sub-D Modeling, UV Mapping, Surfacing Techniques, Animation Basics, Compositing Tools, Particle FX, Genoma II Character Rigging and more!! Table of Contents for Volume #6: Chapter 1- Intro, Chapter 2- Volumetric Light Introduction, Chapter 3- Volumetric Light Types, Chapter 4- How to Create a Vortex Effect with Volumetrics, Chapter 5- Particles Introduction, Chapter 6- Particle Attributes (Part One)- Emitter Size, Birth Rate, Lifetime, Particle Limit, Gravity, Chapter 7- Particle Attributes (Part Two)- Explosion, Vibration, Particle Resistance, Variance, Chapter 8- Snow Particle Scene Set-Up (Part One), Chapter 9- Snow Particle Scene Set-Up (Part Two) and Final. Running Time: 2 hrs. 24 mins., High Quality (Screen-Res 1920 x 1080 pixels) , Video Format: MP4 (.mp4), Level: Beginner.
LightWave 2015- Volume #5- Getting Started V [AG]
What is Lightwave 3D? Lightwave is powerful 3D Modeling/Animation and VFX software used in the Film and Television Industry by 3D artists/studios in Hollywood and all over the world. This 12 volume series is designed for beginners who are new to 3D or students who are new to Lightwave. The series will be covering everything you need to get started fast. Some of the Topics Covered throughout the 12 Volume Series will be: User Interface, Polygonal Modeling, Sub-D Modeling, UV Mapping, Surfacing Techniques, Animation Basics, Compositing Tools, Particle FX, Genoma II Character Rigging and more!! Table of Contents for Volume #5: Chapter 1- Intro, Chapter 2- Fog FX Scene Set-Up (Fog Color, Thickness, Backdrop, Gradient Backdrop), Chapter 3- Fog Min Distance and Max Distance Circles (Radius), Chapter 4- Setting Up Textured Fog, Chapter 5- How to Animate Fog and Multiple Fog Layers, Chapter 6- Water Plane Set-Up (Basics of Making a Lake or Ocean), Chapter 7- Animating Water (Part One), Chapter 8- Animating Water (Part Two), Chapter 9- Final. Running Time: 1 hrs. 43 mins., High Quality (Screen-Res 1920 x 1080 pixels), Video Format: MP4 (.mp4), Level: Beginner.
LightWave 2015- Volume #4- Getting Started IV [AG]
What is Lightwave 3D? Lightwave is powerful 3D Modeling/Animation and VFX software used in the Film and Television Industry by 3D artists/studios in Hollywood and all over the world. This 12 volume series is designed for beginners who are new to 3D or students who are new to Lightwave. The series will be covering everything you need to get started fast. Some of the Topics Covered throughout the 12 Volume Series will be: User Interface, Polygonal Modeling, Sub-D Modeling, UV Mapping, Surfacing Techniques, Animation Basics, Compositing Tools, Particle FX, Genoma II Character Rigging and more!! Table of Contents for Volume #4: Chapter 1- Intro, Chapter 2- Importing Explosion Clip into Lightwave, Chapter 3- Explosion Surface Settings (Transparency Channel), Chapter 4- OpenGL Setting for Explosion Clip, Chapter 5- Clip Map Set-Up Concepts, Chapter 6- Frame Rate Fix for Explosion Clip, Chapter 7- Spaceship Animation Keyframe Set-Up, Chapter 8- Laser Explosion Set-Up, Chapter 9- Lens Flare Options and Time Envelope, Chapter 10- Motion Blur Basics and More Camera Animation, Chapter 11- Final Animation Rendered. Running Time: 2 hrs. 25 mins. High Quality (Screen-Res 1920 x 1080 pixels) , Video Format: MP4 (.mp4), Level: Beginner.
LightWave 2015- Volume #3- Getting Started III [AG]
What is Lightwave 3D? Lightwave is powerful 3D Modeling/Animation and VFX software used in the Film and Television Industry by 3D artists/studios in Hollywood and all over the world. This 12 volume series is designed for beginners who are new to 3D or students who are new to Lightwave. The series will be covering everything you need to get started fast. Some of the Topics Covered throughout the 12 Volume Series will be: User Interface, Polygonal Modeling, Sub-D Modeling, UV Mapping, Surfacing Techniques, Animation Basics, Compositing Tools, Particle FX, Genoma II Character Rigging and more!! Table of Contents for Volume #3: Chapter 1- Intro, Chapter 2- Textured Environment- Part One- Images, Chapter 3- Textured Environment- Part Two- Procedural Textures, Chapter 4- Sky Tracer (Part One) -Sun, Chapter 5- Sky Tracer (Part Two)-Clouds, Chapter 6- Sky Tracer (Part Two)-Atmosphere, Chapter 7- Sky Baker Plugin, Chapter 8- Lighting Your Scene with a Baked Environment Map, Chapter 9- Final. Running Time: 1 hrs. 34 mins., High Quality (Screen-Res 1920 x 1080 pixels), Video Format: MP4 (.mp4), Level: Beginner.
LightWave 2015- Volume #2- Getting Started II [AG]
What is Lightwave 3D? Lightwave is powerful 3D Modeling/Animation and VFX software used in the Film and Television Industry by 3D artists/studios in Hollywood and all over the world. This 12 volume series is designed for beginners who are new to 3D or students who are new to Lightwave. The series will be covering everything you need to get started fast. Some of the Topics Covered throughout the 12 Volume Series will be: User Interface, Polygonal Modeling, Sub-D Modeling, UV Mapping, Surfacing Techniques, Animation Basics, Compositing Tools, Particle FX, Genoma II Character Rigging and more!! Table of Contents for Volume #2: Chapter 1- Intro, Chapter 2- Backdrop Color, Chapter 3- Gradient Backdrop Colors, Chapter 4- How to Animate the Backdrop Color (Part One), Chapter 5- How to Animate the Backdrop Color (Part Two), Chapter 6- Backdrop Image Concepts, Chapter 7- How to Resize Backdrop Images, Chapter 8- Camera View Background Modes, Chapter 9- OpenGL Image Resolution Settings, Chapter 10- How to Use an Image Sequence as a Background, Chapter 11- Foreground Image Concepts and Tools, Chapter 12- Foreground Image Set-Up in Adobe Photoshop, Chapter 13- How to Create 3D Images with an Alpha Channel to Export to Photoshop, Chapter 14- Final. Running Time: 2 hrs. 16 mins., High Quality (Screen-Res 1920 x 1080 pixels), Video Format: MP4 (.mp4), Level: Beginner.
LightWave 2015- Volume #1- Getting Started I [AG]
What is Lightwave 3D? Lightwave is powerful 3D Modeling/Animation and VFX software used in the Film and Television Industry by 3D artists/studios in Hollywood and all over the world. This 12 volume series is designed for beginners who are new to 3D or students who are new to Lightwave. The series will be covering everything you need to get started fast. Some of the Topics Covered throughout the 12 Volume Series will be: User Interface, Polygonal Modeling, Sub-D Modeling, UV Mapping, Surfacing Techniques, Animation Basics, Compositing Tools, Particle FX, Genoma II Character Rigging and more!! Table of Contents for Volume #1: Chapter 1- Intro, Chapter 2- What is Lightwave?, Chapter 3- Layout Vs. Modeler, Chapter 4- Lightwave's Hub, Chapter 5- Selecting Items in Layout (Loading, Positioning, Rotating), Chapter 6- Creating Your First Animation, Chapter 7- How to Render Your First Animation, Chapter 8- Space Scene Project and Final. Running Time: 2 hrs. 28 mins., High Quality (Screen-Res 1920 x 1080 pixels), Video Format: MP4 (.mp4), Level: Beginner.
The Realflow Quick Start Guide [RR]
This very concise, carefully designed course will get you up to speed using Realflow by identifying all of the critical elements necessary to produce fluid simulations. Lightwave connectivity plugin usage is also covered. See product page for more information.
Substance Painter for Lightwave Users-Vol.#5-Smart Materials II [AG]
What is Substance Painter? Substance Painter is an extremely powerful 3D Painting Software package that is becoming very popular in the 3D Industry. It comes fully loaded with eye-popping materials to paint on your 3D models. Metals, Stone, Rock, Fabric, Wood and more. It also has a huge collection of tools and brushes to create weathering, dirt, scratches, corrosion, rust, skin, lizard scale detail (and more) with great speed and quality. A must have piece of software for those who want to add huge amounts of detail to their 3d Models. Table of Contents for Volume #5: Chapter 1- Intro, Chapter 2- Image Viewer Settings Vs. Final Map Output, Chapter 3- Height Force Setting Vs. Normal Map Amplitude Setting in Lightwave, Chapter 4- How Environment Map Lighting Affects Texture's Appearence, Chapter 5- Image World in Lightwave, Chapter 6- Textured Evironment in Lightwave and Light Tweaking, Chapter 7- How To Import Environment Maps into the Substance Painter Shelf, Chapter 8- Tips onHow to Figure Our Smart Material Controls, Chapter 9- Weapon Metal (Smart Material Preset), Chapter 10- Glossy Plastic (Smart Material Preset), Chapter 11- Monster Skin (Smart Material Preset), Chapter 12- Sand (Smart Material Preset), Chapter 13- Where Substance Painter Stores Newly Created Smart Materials, Chapter 14- Final. Running Time: 2 hrs. 9 mins., High Quality (Screen-Res 1920 x 1080 pixels), Video Format: MP4 (.mp4), Level: Beginner.
Intro to Python for Lightwave [RR]
Knowledge of Python scripting will augment what you already know about Lightwave by introducing automation to your workflow. Forget wading through overly complicated examples or fighting with undocumented functions, this content is results-focused and will immediately benefit your production process. This material will easily pay for itself in the time you will save having programming capabilites in your tool-set.
Substance Painter for Lightwave Users-Vol.#4-Smart Materials [AG]
What is Substance Painter? Substance Painter is an extremely powerful 3D Painting Software package that is becoming very popular in the 3D Industry. It comes fully loaded with eye-popping materials to paint on your 3D models. Metals, Stone, Rock, Fabric, Wood and more. It also has a huge collection of tools and brushes to create weathering, dirt, scratches, corrosion, rust, skin, lizard scale detail (and more) with great speed and quality. A must have piece of software for those who want to add huge amounts of detail to their 3d Models. Table of Contents for Volume #4: Chapter 1- Intro, Chapter 2- What are Smart Materials and Input Maps?, Chapter 3- How to Bake Input Maps (Ambient Occlusion, World Space Normal, and more), Chapter 4- How to Add a Smart Material and Adjusting the Smart Material Settings, Chapter 5- Result of Not Having Input Maps Explained, Chapter 6- How to Import a Premade Normal Map from Other Software Packages, Chapter 7- Modifying a Preset to Create a New Preset, Chapter 8- How to Create a Preset Preview Image in Photoshop, Chapter 9- How to Build a Smart Material from Scratch, Chapter 10- Final. Running Time: 2 hrs. 14 mins., High Quality (Screen-Res 1920 x 1080 pixels) , Video Format: MP4 (.mp4). Level: Beginner.
Substance Painter for Lightwave Users-Vol.#3- Lightwave Import & Emissive Maps [AG]
What is Substance Painter? Substance Painter is an extremely powerful 3D Painting Software package that is becoming very popular in the 3D Industry. It comes fully loaded with eye-popping materials to paint on your 3D models. Metals, Stone, Rock, Fabric, Wood and more. It also has a huge collection of tools and brushes to create weathering, dirt, scratches, corrosion, rust, skin, emissive-glow, lizard scale detail (and more) with great speed and quality. A must have piece of software for those who want to add huge amounts of detail to their 3d Models. Table of Contents for Volume #3: Chapter 1- Intro, Chapter 2- Texture Set-Up in Lightwave (Color, Specular, Gloss, Normal, Luminosity/Emissive), Chapter 3- Emissive Map Glow Options (Radiosity and Corona Image Filter Set-Up), Chapter 4- How to Create Emissive Channels in Substance Painter (Layer Settings), Chapter 5- Emissive Alpha Brushes, Chapter 6- Emissive Color Image Stamp Brush, Chapter 7- Final. Running Time: 2 hrs. 24 mins., High Quality (Screen-Res 1920 x 1080 pixels), Video Format: MP4 (.mp4), Level: Beginner.
DAZ 3D Model Creation- The Dark Art [AG]
Would you like to Earn Money from Selling 3D Models on the Internet? If so, this video course is designed to teach you how to do just that. One of the largest 3D content market places on the internet is www.daz3d.com. DAZ Studio is a "FREE" piece of 3D Software that you can download from DAZ3D.com that is used by thousands and thousands of people all over the world. Sounds complicated? Well don't worry in this course we will take you step-by-step on: Getting started with DAZ Studio UI (User Interface), Optimizing/Exporting Your Models for Import into DAZ, Converting/Adjusting your Models in DAZ Studio, Submission Guidelines, Dealing with the tricky DAZ File/Runtime(Texture) Folder Structure, Marketing and more!! Although this course is designed for anyone who wishes to create models for DAZ3D.com we will be using Lightwave 3D as our starting point demonstrate model/optimization and object file export. But once again the principles shown can be used in all other software packages to get your 3D models into DAZ Studio. *Please Note: Although this video tutorial is meant as a "Stand-Alone" Product it is also considered as Volume #5 of the "DDO for Lightwave Users" Series. Converting models and textures over to DAZ Studio for the purpose of Selling them on DAZ3D.com is part of the DDO series. Table of Contents for DAZ 3D Model Creation Chapter 1- Intro, Chapter 2- Basic DAZ Publishing Info Orientation, Chapter 3- DAZ UI (User Interface) Layouts and Menu Tabs, Chapter 4- IPR (Interactive Progressive Rendering) Image Preview, View Modes, Add Camera, Chapter 5- Draw Style Options Menu and Deleting Cameras, Chapter 6- Navigating View Modes (Pan, Orbit, Dolly Zoom, Frame Selection), Chapter 7- Item Selection and Transforms (Translation, Rotation, Scale), Chapter 8- Multiple Item Selection, Item Groups, Parenting Items, Chapter 9- Surface Selection Tool, Chapter 10- Item Duplication and Node Instances, Chapter 11- Create Primitives, Surfacing Primitives, Grouping Primitives, Chapter 12- Lights and Glowing Surfaces (Ambient Color and Strength), Chapter 13- Diffuse Color Vs Ambient Color (Glow Issue), Chapter 14- Rendering Product Images, Chapter 15- DAZ Content Library and Submission File Folder Structure, Chapter 16- Mesh Optimization (Tips on Triangles, Quads, Non-Planer Polys, UVs, and More), Chapter 17- FBX Export from Lightwave 3D and Proper UV Islands, Chapter 18- Import FBX into DAZ and Tweaking Surfaces, Chapter 19- Creating a Product Base Directory for your Files, Chapter 20- Runtime Texture Folder Structure Set-Up, Chapter 21- Setting Your Author/Artist Name in the Preferences Menu, Chapter 22- Props/Environments and Materials Folder Structure Creation, Chapter 23- Saving Prop Assets with Correct File Path and Settings, Chapter 24- Reassigning Texture File Paths to the Runtime Texture Folder, Chapter 25- Creating a Material Preset in the Materials Folder, Chapter 26- Zipping Up Your Product Folder and DAZ PASS Website, Chapter 27- Saving Multiple Item Products, Chapter 28- Helpful Websites for Selling Products on the Internet. Chapter 29- Final. Running Time: 7 hrs. 0 mins., High Quality (Screen-Res 1920 x 1080 pixels) . Video Format: MP4 (.mp4), Level: Beginner.
ZBrush Bootcamp- Volume #7- Lightwave Integration III- GoZ Concepts [AG]
In this seventh video volume of 12 volumes 3D Instructor Adam Gibson introduces the beginner 3D student how to get up and started quickly with ZBrush 4R7's GoZ Plugin. Learn how to import/export Multi-Layered Meshes and Subtools between ZBrush and Lightwave. Table of Contents for Volume #7: Chapter 1- Intro, Chapter 2- How to Install the GoZ Plugin, Chapter 3- Lightwave Layers Vs ZBrush Subtools, Chapter 4- How to Convert Multiple Lightwave Layers to Multiple Subtools in ZBrush, Chapter 5- Splitting Subtools with Masking, Chapter 6- Exporting Individual Subtools to Lightwave Using GoZ, Chapter 7- Export All Subtools Button Using GoZ, Chapter 8- Export Visible Subtools Button Using GoZ, Chapter 9- GoZ Export to Layout, Chapter 10- Final. Running Time: 1 hrs. 39 mins., High Quality (Screen-Res 1920 x 1080 pixels) , Video Format: MP4 (.mp4), Level: Beginner.
The Syflex Workflow Guide [RR]
Syflex is a very powerful 3rd party soft body simulation engine for Lightwave... but it's poorly understood despite the fact it's up to 50 times faster than native tools. Simulate character clothing, hair, water, mud, leaves, and anything you can think of in *real time*. Ryan demystifies this underrated plugin and introduces trade secret workflows that will let your dynamics work with your scene rather than against it!
Practical Production Techniques - Vol. 9 Polygon Reduction [KAT]
Kelly "Kat" Myers is back with another installment in the Practical Production Techniques series. In this video, Kat gets you into QemmLoss3 and Motool's Polygon Cruncher for LightWave Modeler. For anyone who is doing work with LightWave and wants to create game ready assets, effective polygon reduction is the other half of the process apart from Texture Baking. This title is the third and final volume in the sub-series on Advanced Texture Baking. The skills you will learn in this video carry over the concepts of those learned in Practical Production Techniques Vol. 6 - Advanced Surface Baking and Practical Production Techniques Vol. 7 - Advanced Surface Baking Part II. With a run time of 180 minutes this video details the process of working with QemmLoss3, MooTools Polygon Cruncher as well as PB Texture Baker. Learn when and where to rebuild geometry rather than poly reduce objects using reductions plus tricks on how to handle tricky geometry that doesn't want to seem to cooperate. Only $24.95USD
Substance Painter for Lightwave Users- Volume #2- Getting Started II [AG]
What is Substance Painter? Substance Painter is an extremely powerful 3D Painting Software package that is becoming very popular in the 3D Industry. It comes fully loaded with eye-popping materials to paint on your 3D models. Metals, Stone, Rock, Fabric, Wood and more. It also has a huge collection of tools and brushes to create weathering, dirt, scratches, corrosion, rust, skin, lizard scale detail (and more) with great speed and quality. A must have piece of software for those who want to add huge amounts of detail to their 3d Models. Table of Contents for Volume #2: Chapter 1- Intro, Chapter 2- Lazy Mouse, Chapter 3- Bump Material Mode and Brush Settings, Chapter 4- Particle Brush Introduction, Chapter 5- Tool Presets, Chapter 6- Creating your own Brush and Material Presets, Chapter 7- Exporting Textures from Substance Painter to Use in Lightwave and Final. Running Time: 1 hrs. 39 mins., High Quality (Screen-Res 1920 x 1080 pixels) , Video Format: MP4 (.mp4), Level: Beginner.
Substance Painter for Lightwave Users- Volume #1- Getting Started I [AG]
What is Substance Painter? Substance Painter is an extremely powerful 3D Painting Software package that is becoming very popular in the 3D Industry. It comes fully loaded with eye-popping materials to paint on your 3D models. Metals, Stone, Rock, Fabric, Wood and more. It also has a huge collection of tools and brushes to create weathering, dirt, scratches, corrosion, rust, skin, lizard scale detail (and more) with great speed and quality. A must have piece of software for those who want to add huge amounts of detail to their 3d Models. Table of Contents for Volume #1, Chapter 1- Intro, Chapter 2- What is Substance Painter?, Chapter 3- User Interface (UI) Orientation, Chapter 4- 3D Viewer Navigation (Rotate, Move, and Zoom-In/Out), Chapter 5- 2D Viewer Navigation (Rotate, Move, Zoom-In/Out, Show Entire Mesh), Chapter 6- How to Rotate the Environment Map, Chapter 7- Viewer Setting Modes, Chapter 8- Mesh Normal View, Chapter 9- Environment Map Settings, Chapter 10- How to Open and Close a Project, Chapter 11- Preparing Models in Lightwave, Chapter 12- Importing Box Primitive into Substance Painter, Chapter 13- Correcting the Smoothing Issue for the Ball Primitive, Chapter 14- Correcting NGons in your Models, Chapter 15- Correcting Non-Planar Polygons in your Models, Chapter 16- Painting Introduction (Layers and Fill Layers), Chapter 17- Final. Running Time: 2 hrs. 7 mins., High Quality (Screen-Res 1920 x 1080 pixels), Video Format: MP4 (.mp4), Level: Beginner.
DDO for Lightwave Users- Volume #4- Getting Started IV  [AG]
DDO for Lightwave Users- Volume #4- Getting Started IV [AG]
What is dDo? dDo is an extremely powerful 3D texturing plugin for Adobe Photoshop used by top Video Game Companies and Movie Studios around the world. Imagine being able to detail your Sci-Fi and Industrial style models with adjustable rust, scratches, corrosion, water damage, dirt, leakage, dust, mud spattering, paint wear...and much more...all within a few seconds instead of spending hours and hours or weeks painting and tweaking texture maps by hand. The software also comes with a library of surfacing presets and the ability to create and save out your own. In this course we will step-by-step show you how to get up and running fast using this amazing and powerful tool that you get at the following website: www.quixel.se. It's very affordable. Only $50 US Funds and can do amazing things. In this fourth volume we'll be demonstrating how to create amazing "input normal maps" with another external software package called "NDO" which is part of the Quixel Suite. Techniques on how to create Sci-Fi Detail (Nurnies, Panels and Plates) will be demonstrated using NDO's unique normal map creation tools. In Volumes #5 to #12 of the course we will be going through a wide variety of tools in dDo, doing some basic and advanced project work, modeling & uv mapping(with dDo in mind), and how to create your own 3D models to sell on the internet on websites like Daz3D.com and Turbosquid, and more!! Table of Contents for Volume #4: Chapter 1- Intro, Chapter 2- Input Map Creation, Chapter 3- NDO Introduction (Part One), Chapter 4- NDO Introduction (Part Two), Chapter 5- NDO Introduction (Part Three), Chapter 6- NDO Introduction (Part Four), Chapter 7- Wall Panel Creation (Part One), Chapter 8- Wall Panel Creation (Part Two), Chapter 9- Wall Panel Creation (Part Three), Chapter 10- Wall Panel Test in DDO, Chapter 11- Export Final Baked Images, Chapter 12- Testing Images in Lightwave, Chapter 13- Final. Running Time: 2 hrs. 31 mins., High Quality (Screen-Res 1920 x 1080 pixels) , Video Format: MP4 (.mp4), Level: Beginner.
DDO for Lightwave Users- Volume #3- Getting Started III [AG]
What is dDo? dDo is an extemely powerful 3D texturing plugin for Adobe Photoshop used by top Video Game Companies and Movie Studios around the world. Imagine being able to detail your Sci-Fi and Industrial style models with adjustable rust, scratches, corrosion, water damage, dirt, leakage, dust, mud spattering, paint wear...and much more...all within a few seconds instead of spending hours and hours or weeks painting and tweaking texture maps by hand. The software also comes with a library of surfacing presets and the ability to create and save out your own. In this course we will step-by-step show you how to get up and running fast using this amazing and powerful tool that you get at the following website: www.quixel.se. It's very affordable. Only $50 US Funds and can do amazing things. In this third volume we'll be demonstrating how to create amazing "input normal maps" with an external software package called "3D Coat". Techniques on how to create Sci-Fi Detail (Nurnies, Panels and Plates) will be demonstrated using 3D Coats powerful paint tools. In Volumes #4 to #12 of the course we will be going through a wide variety of tools in dDo, doing some basic and advanced project work, modeling & uv mapping (with dDo in mind), introduction to NDO (Normal Mapping Plugin that can be used with DDO, and how to create your own 3D models to sell on the internet on websites like Daz3D.com and Turbosquid, and more!! Table of Contents for Volume #3: Chapter 1- Intro, Chapter 2- Creating Input Normal Maps Using Other Software Packages, Chapter 3- Creating Normal Maps in 3D Coat for DDO Introduction, Chapter 4- Painting Normal Maps in 3D Coat for DDO (Part One), Chapter 5- Painting Normal Maps in 3D Coat for DDO (Part Two), Chapter 6- Painting Normal Maps in 3D Coat for DDO (Part Three), Chapter 7- Painting Normal Maps in 3D Coat for DDO (Part Four), Chapter 8- Exporting Normal Map from 3D Coat, Chapter 9- Exporting Normal Map from 3D Coat, Chapter 10- Loading Input Maps in DDO, Chapter 11- Testing Normal Map with Smart Textures, Chapter 12- Normal Map Error, Chapter 13- Normal Map Input Fix, Chapter 14- Exporting Textures in DDO, Chapter 15- Testing Final Textures in Lightwave, Chapter 16- Final. Running Time: 3 hrs. 0 mins., High Quality (Screen-Res 1920 x 1080 pixels), Video Format: MP4 (.mp4), Level: Beginner.
DDO for Lightwave Users- Volume #2- Getting Started II  [AG]
DDO for Lightwave Users- Volume #2- Getting Started II [AG]
What is dDo? dDo is an extemely powerful 3D texturing plugin for Adobe Photoshop used by top Video Game Companies and Movie Studios around the world. Imagine being able to detail your Sci-Fi and Industrial style models with adjustable rust, scratches, corrosion, water damage, dirt, leakage, dust, mud spattering, paint wear...and much more...all within a few seconds instead of spending hours and hours or weeks painting and tweaking texture maps by hand. The software also comes with a library of surfacing presets and the ability to create and save out your own. In this course we will step-by-step show you how to get up and running fast using this amazing and powerful tool that you get at the following website: www.quixel.se. It's very affordable. Only $50 US Funds and can do amazing things. In this second volume we'll continue to cover what's involved to set-up, creating input maps (Color ID Maps, Normal Maps, etc) and further your understanding of the interface and get you started making awesome textures for your model for use in Lightwave and other pieces of 3D software. In Volumes #3 to #12 of the course we will be going through a wide variety of tools in dDo, doing some basic and advanced project work, modeling & uv mapping(with dDo in mind), introduction to NDO (Normal Mapping Plugin that can be used with DDO, and how to create your own 3D models to sell on the internet on websites like Daz3D.com and Turbosquid, and more!! Table of Contents for Volume #2: Chapter 1- Intro, Chapter 2- Assigning Polygon Colors to Create a Color ID Map, Chapter 3- Using Surface Baker in Layout to Bake Color ID Map, Chapter 4- Saving Extra File Formats of Color ID Map, Chapter 5- Creating Other Input Maps in XNormal, Chapter 6- Baking a Curvature Map in XNormal, Chapter 7- Multiple Surfaces Gotcha, Chapter 8- Select Surfaces in DDO, Chapter 9- ReBaking the Color ID Map with Anti-Aliasing Fix, Chapter 10- Import Corrected Color ID Map, Chapter 11- Baking Out Image Maps in DDO, Chapter 12- Testing Baked Image Maps in Lightwave, Chapter 13- How to Create a Color ID Map in a 3D Paint Program (3D Coat), Chapter 14- Testing the Color ID Map Created in 3D Coat, Chapter 15- Final. Running Time: 2 hrs. 17 mins., High Quality (Screen-Res 1920 x 1080 pixels) , Video Format: MP4 (.mp4), Level: Beginner.
The - Get Everything Ryan has Made - bundle [RR]
This bundle includes everything Ryan Roye has ever made on Liberty3d.com, including the RR_Tools Pro Lightwave plugins and is not only discounted, but may be combined with product codes for even more savings. See product page for details!
DDO for Lightwave Users- Volume #1- Getting Started I  [AG]
DDO for Lightwave Users- Volume #1- Getting Started I [AG]
What is dDo? dDo is an extemely powerful 3D texturing plugin for Adobe Photoshop used by top Video Game Companies and Movie Studios around the world. Imagine being able to detail your Sci-Fi and Industrial style models with adjustable rust, scratches, corrosion, water damage, dirt, leakage, dust, mud spattering, paint wear...and much more...all within a few seconds instead of spending hours and hours or weeks painting and tweaking texture maps by hand. The software also comes with a library of surfacing presets and the ability to create and save out your own. In this course we will step-by-step show you how to get up and running fast using this amazing and powerful tool that you get at the following website: www.quixel.se. It's very affordable. Only $50 US Funds and can do amazing things. In this first volume we'll be covering what's involved to set-up and optimize you meshes so that they are ready for loading into dDo and also take you through the interface and get you started making awesome textures for your model for use in Lightwave and other pieces of 3D software. In Volumes #2 to #12 of the course we will be going through a wide variety of tools in dDo, doing some basic and advanced project work, modeling & uv mapping(with dDo in mind), introduction to NDO (Normal Mapping Plugin that can be used with DDO, and how to create your own 3D models to sell on the internet on websites like Daz3D.com and Turbosquid, and more!! Table of Contents for Volume #1: Chapter 1- Intro, Chapter 2- What is DDO?, Chapter 3- DDO Workflow/Pipeline for Lightwave, Chapter 4- Where to Download XNormal Software for Free, Chapter 5- Baking Input Maps in XNormal: Tangent Space Normal Map, Chapter 6- Baking Input Maps in XNormal: Object Space Normal Map, Chapter 7- Baking Input Maps in XNormal: Ambient Occlusion Map, Chapter 8- Loading Input Map and Object File into DDO for Texturing, Chapter 9- How to Add a Material , Chapter 10- How to Add a Smart Material and Export your Baked Maps, Chapter 11- Testing Baked Maps in Lightwave, Chapter 12- How to Create Your Own Custom "Smart Materials", Chapter 13- Re-Using a Smart Material Preset on another Model, Chapter 14-Final. Running Time: 2 hrs. 36 mins. High Quality (Screen-Res 1920 x 1080 pixels) , Video Format: MP4 (.mp4), Level: Beginner.
Cage and Lattice Workflows by Ryan Roye [RR]
Cage and Lattice workflows were introduced to Lightwave via the 3rdpowers commercial plugins. This content covers everything you need to know about these new, ultra-powerful layout tools that will change the way you animate and rig things.
Practical Production Techniques - Vol. 8 Capital ship combat techniques [KAT]
Kelly "Kat" Myers is back with another installment in the Practical Production Techniques series. In this installment, "Capital ship combat techniques" Kat walks you through the process of building out a shot using BattleStar Galactica style methods to pit basestars against the Galactica herself with guns blazing along with missiles, flak shield effects, explosions and more. This video covers several unseen techniques from the show including the flak shield HV and PFX creation methods and demonstrates how the "big guns" on the Galactica were set up. Jammed packed with goodies (scene files, HVs are included with the content!) this video runs 4.5 hours and Kat is just warming things up with the new TV and Film VFX series that Kat has been developing for release here on Liberty3D.com over the last couple of months. This is the first part of that series and there are more to come. So if you have ever wanted to throw metal against metal in a big ship dogfight, this video will help you along with your efforts.
Practical Production Techniques - Vol. 7 Advanced Surface Baking Part II [KAT]
Kelly "Kat" Myers is back with another installment in the Practical Production Techniques series. This time he covers the process of surface baking in LightWave3D Modeler with PB_Baker (www.blytools.com) and Weighter2.0 to produce game ready assets, drawing on the large resources available at Daz3d.com. For anyone who is doing work with LightWave and wants to create game ready assets, or reduce the burden of their renders by baking certain geometry details to maps and low poly objects, this video covers essential tips and tricks you need to know in order to save you huge amounts of time. The skills you will learn in this video carry over the concepts of those learned in Practical Production Techniques Vol. 6 - Advanced Surface Baking. With a run time of 109 minutes this video details the process of taking a character from Daz3D.com, getting it ready for export from Daz3D via FBX, then over to layout to check it and get things ready for Polygon Reduction Baking using Modeler and the PB_Baker Tool from BlyTools.com. Also discussed in the video is the transfer of weights using Weighter 2.0, so that your characters from Daz can be used in Layout correctly with the weights intact before transferring to Unity or UnrealUDK. Please note: Other than the video content no assets are provided due to their Copyright nature.
ZBrush  Bootcamp 2014 Series -Volume #6-Lightwave Integration II  [AG]
ZBrush Bootcamp 2014 Series -Volume #6-Lightwave Integration II [AG]
In this sixth video volume of 12 volumes 3D Instructor Adam Gibson introduces the beginner 3D student to a hands on project on how to detail a sci-fi prop that was modeled in Lightwave 3D. The main goal is to show how to take a basic model created in Lightwave, detail it in ZBrush, and then import it seamlessly back into Lightwave with all the ZBrush created maps (Color, Displacement, Normal) in tact. Table of Contents for Volume #6: Chapter 1- Intro, Chapter 2- Optimizing the Mesh in Lightwave for Export to ZBrush, Chapter 3- Importing Mesh into ZBrush and Initial Set-up (Morph Target, UV's), Chapter 4- How to Import Custom Alpha Brushes into ZBrush, Chapter 5- Adding Panels and Details in Projection Master, Chapter 6- Exiting Projection Master, Chapter 7- Creating the Maps (Color, Displacement, and Normal), Chapter 8- Exporting and Set-Up in Lightwave, Test Renders, and Final. Running Time: 1 hrs. 22 mins., High Quality (Screen-Res 1920 x 1080 pixels) , Video Format: MP4 (.mp4), Level: Beginner.
ZBrush Bootcamp 2014- Volume #5- Lightwave Integration I  [AG]
ZBrush Bootcamp 2014- Volume #5- Lightwave Integration I [AG]
In this fifth video volume of 12 volumes 3D Instructor Adam Gibson introduces how to integrate Lightwave 3D with ZBrush and how to use the GoZ system. The main focus of this beginner integration tutorial is how to optimize hard surface meshes for sculpting and painting in ZBrush and how to export that data back into Lightwave as seamlessly as possible. Zbrush is a very powerful 3D package but there are also some gotchas and pitfalls along the way that require some extra knowledge to get the best results possible. This tutorial covers those hidden items in great detail. Table of Contents for Volume #5: Chapter 1- Intro, Chapter 2- GoZ Import to Zbrush from Lightwave, Chapter 3- NGon Import Issues to ZBrush, Chapter 4- Unified Skin Option, Chapter 5- Sci-Fi Prop Optimized, Chapter 6- Adding Details in ZBrush, Chapter 7- Creating Maps in ZBrush (Color, Normal, and Displacement Maps), Chapter 8- GoZ Export to Lightwave, Chapter 9- Delete Lower Subdivision Level Fix, Chapter 10- More Displacement Gotchas, Chapter 11- Morph Target Solution, Chapter 12- Final. Running Time: 2 hrs. 52 mins., High Quality (Screen-Res 1920 x 1080 pixels) , Video Format: MP4 (.mp4), Level: Beginner.
Kat's Disco In-fur-no Turbulence for LightWave3D Bundle (Newly expanded!)
*Newly expanded in June 2017!* The Disco In-Fur-No bundle is now better than ever! It's been expanded to include two more videos not previously included in this bundle for a total of 7 kick ass tutorials for TurbulenceFD. This includes the video tutorial that goes along with the dozens of Nuclear Weapons Detonations that are ready to load into your LightWave shots. Simply find a Nuclear detonation that's to your liking out of the dozens included in the collection, load it into your shot, simulate it, and you're pretty much good to go! Kat's done the heavy lifting for you and now you can get it all and up to speed. Fast. Does it get better than this? Absolutely. Every single person who participated in the TFD group buy-in this spring needs to pay attention here! Get these great videos of Kat's at one low price to get... Introduction to Turbulence FD Advanced Concepts and Projects: Fireball Advanced Concepts and Projects: Atmospherics The complete Nuclear Weapons Pack (which includes a training video and of course the dozens of pre-built nuclear weapons detonations made with TurbulenceFD and LightWave3D) Advanced Concepts and Projects - Clouds Practical Production Techniques Vol. 10 - Project Smoke Monster Fusion for LightWave Artists: Volume 4 - Curse of the Phantom Shadow All together that's $193.65USD in awesome product from Liberty3D.com, but it gets more awesome with the bundle pricing of $139.65USD! That's 53.70USD saving if bought separately and this bundle is discountable so if we have a sale on and you want to use a sale coupon to get even a further discount - you can use on this product! While coupons can't be mixed with each other in our store... some of you have a really, really extra special coupon and you should use it for this exact bundle! This means you, recent TFD Group Buy-in Participants! Do I have your attention still? Good. Because the Liberty3D.com Coupon code I issued you during the last phase of the Buy-in can be applied to discount this bundle while your coupon remains active! Even if you have picked up a couple of these titles since picking up TFD during the spring 2017 buy-in, the discount possible with your coupon code top of the bundle discount will more than likely still you big savings!
Ryan's Animation Kit [RR]
The animation kit includes the entire IKBooster Comprehensive Guide series, Common Scenarios for Character Animators, Cage and Lattice workflows, and the Delura Behind the Scenes content at a bulk buy discount price.
Weapons FX in Lightwave [RR]
Weapons FX in Lightwave finally introduces solid workflows that allow the user to operate guns and automate all of the effects tied to it, including damaging the environment.
4 Unity Pipelines for Animations [CW]
This step by step tutorial covers how to perform animations using the four different methods available in Unity, and shows how the pipeline works from a 3D app into the game environment. It also includes a more advanced version of the files you'll see in the tutorials, including free models, scripts, and a good head start for a game. The tutorials are divided into four 15 minute, easy to follow videos, with accompanying files. Also included is a bonus addendum with tips and secrets to getting around a few known bugs, what drawbacks exist, and generally how to make your animation life easier.
Pixel Displays [dwb]
In this tutorial for LightWave 3D, Dana W. Burman shows how to build and animate "pixel displays" using Denis Pontonnier's DP_Filter and DP_Kit plugins. He starts with explaining concepts relevant to these projects, shows how to set up the surface of instanced blocks using DP_Filter's Replace Spot to color their surface, and follows it up with expanding on the technique to specific use scenarios including LCD pixel with separate red green and blue channels, LED displays, to using the technique on parts (connected polygons) and instances attached to moving particles, and he shows how this technique can be used in projects other than "displays". He ends with an overview on setting up each display so it can be moved around in your scene as well as a few different ways to parent objects in Layout.

For more information visit the product page.

This tutorial makes heavy use of instancing and therefore would be best used with LW 11 and up.

Digital Download: 720MB Total Running Time is 2 hours 47 minutes +

TFD Advanced Concepts And Projects - Nuclear Weapons Pack [KAT]
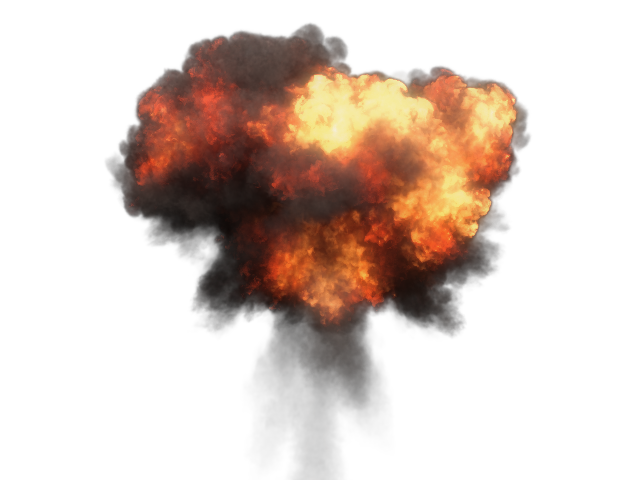
Kelly "Kat" Myers continues his series Advanced Concepts and Projects for Turbulence FD by Jawset.com with the Nuclear Weapons Pack. In this video and download package, Kat has created dozens (Over 50) Nuclear Weapons Style explosions and ground blast wave scenes. Named after early Atomic and Nuclear Blasts from Hiroshima and Nagasaki to Operations Buster-Jangle and Plumbbob, it contains all of the elements you need to create your own explosions for MOAB to multi-megaton detonations. Many of them set up and render ready. Just sim and go. With a run time of 125 minutes this video also includes Quicktime and EXR Renders (optional download) of many of the detonations featured in the package so you can see what they look like without having to render them out yourself first. In addition, bonus content has been provided that can be used in conjunction with the other material in this video giving you the greatest options possible for custom tailoring explosions to your needs. Want to blow up a car or an aircraft carrier or an oil refinery? Samples included in the bonus package give you these styles of explosions. Each of the Advanced Concepts and Projects videos in this series are designed to get you the information and scene examples you need to quickly produce an effect covered in a project. Pick and choose which ones you need when you need them mixing and matching to create unlimited variations on your own. This package is over 5.6GB to download in full. The main tutorial video content is approximately 500MB and the rest is optional for download.
Common Scenarios for Character Animators [RR]
Common Scenarios for Character Animators is a quality training series by Ryan Roye that focuses on interactions between 3d characters and their environments in Lightwave and provides insight into practical and rapid workflows revolving around the subject.
Tom Roth's Basic Principles of Character Animation [TR]
Tom Roth's Basic Principles of Character Animation for 3D Animators. Legendary animator, Tom Roth, with over 40 years of experience in the animation industry guides you through the essential fundamental principles of Character Animation. Intended for Character animators of all levels the techniques discussed in this video are not just for 3D by are rooted and apply to any character animation type. With video and demonstration content, this tutorial is complete with hours of insight into techniques and principles taught to Walt Disney Feature Film Animators and put into practice The download includes: Several hours of Video Content covering the basics to more advanced concepts including The Bouncing Ball, Character Flexibility, Body Mechanics, "Warm up" or beginning acting, animating walk, run and skipping cycles plus much more. Also included are the character model, animation thumbnail sketches and rigs!
The Comprehensive Guide to IKBooster(Parts 3-5) [RR]
The Comprehensive Guide to IKBooster ====================================== CONTENT INCLUDED WITH PURCHASE ------------------------------------------ ------- SUMMARY ------- All videos included are encoded in h264 format, 1600x868 resolution, and include optional subtitles. Total video content runtime is 114 minutes. The download includes: - The IKBooster Comprehensive Guide, parts 3 through 5 - Scenes, prefabs, and example/demonstrative Lightwave content to open and play with - 5 character models - Sample IKB relative motion files, including relative motion capture samples - Sample commented Lscripts demonstrating time saving functions - Supplementary video content -------------- VIDEO DETAILS -------------- ? VIDEO PART 3: Relative Motion Loading ? Relative motion loading is a workflow in IKBooster that allows you to load animations so that the character will perform the actions contained within that clip "relative" to their current position and orientation in 3d space. Because the motions are relative, one can, for example, use a run cycle, make the character turn while running, and not worry about slipping foot placement which is a typical problem in most 3d animation programs. This also introduces the concept of a "tweaker's" workflow, where one simply edits existing motions in order to create entirely new ones. Relative motion loading will change the way you work, whether you prefer IKBooster's part-time IK or not. Also included with this tutorial is how to edit and blend these relative motions. ? VIDEO PART 4: Motion Capture Adaptation ? Motion capture sounds great, but often times it is a real pain to take advantage of in production. One problem is simply knowing how to adapt a custom character rig to a motion capture clip. Another is the fact that normally, tedious re-positioning is required in order to seamlessly blend the motion into the production. This section introduces how one can end up with a "1-click" workflow for adapting a character to motion capture, and how to utilize the techniques learned in part 3 to make the motion capture clip play relatively to the character's position. ? VIDEO PART 5: IKBooster Dynamics ? IKBooster dynamics can be difficult to take advantage of without knowing how it works. If you want to do things like have characters interact with long ropes, or simulate things but retain total control over them at the same time, this section shows how to achieve that with IKB dynamics.
TFD Advanced Concepts And Projects - Atmospherics [KAT]
Kelly "Kat" Myers is back with the next video in the Advanced Concepts and Projects Series for Turbulence FD by Jawset.com In this video, Kat shows you how to use TFD to create various lighting effects normally difficult to produce with LightWave on its own. This is an extension of the concepts shown in the Introduction to Turbulence FD for LightWave3D video available here from Liberty3d.com. With a run time of 128 (approx) minutes this video includes all the scene files you need to follow along and experiment with your own settings while learning more about how to produce things like Disco Ball and Night Club style lighting effects such as ultra-realistic looking lasers. Also covered in this tutorial is how to create atmospheric effects such as the downdraft from helicopter blades and steam coming out of vents. Each technique takes advantage of Turbulence Fluid Dynamics ability to produce a variety of volumetric lighting looks that you can tweak to suit your project needs. Each of the Advanced Concepts and Projects videos in this series are designed to get you the information and scene examples you need to quickly produce an effect covered in a project. Pick and choose which ones you need when you need them.
Lightwave 11.5 Super Bundle-19 Video Titles (AG)
This Bundle Contains 19 Lightwave 11.5 video titles: 1) Lightwave 11.5 Genoma Rigging Bundle (Vol. #1,2,3,4), 2) Lightwave 11.5 Modeler Tools Bundle Volumes #1 to 12, Lightwave 11.5 UV Mapping Essentials, Lightwave 11.5 UV Mapping a Creature, and Lightwave 11.5- UV Mapping a Human.
LightWave 11.5 Modeler Tools Bundle- Volumes #1 to 12 (AG)
This bundle contains all 12 volumes of "Lightwave 11.5 Modeler Tools". Volumes #1 to 8 is designed for Tool-Based training. Volumes #9 to 12 are Project Based training. In the Project-Based section Lightwave Instructor Adam Gibson shows how to create a Gigantanosaurus dinosaur using Sub-D's.
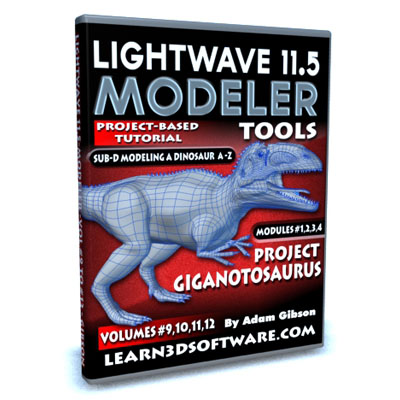
LightWave 11.5 Modeler Tools- Volumes #9 to 12- Project Gigantanosaurus (AG)
In Volumes 9, 10, 11, and 12 of our Lightwave 11.5 Modeler Series Lightwave Instructor Adam Gibson will take you through a complete Sub-D Character Modeling project broken up into four Modules (1 to 4) . From A to Z the creation of a Gigantonosaurus Dinosaur will be taught step by step in great detail all starting from a simple box primitive. The concepts and techniques used here in this extensive training course will give you the knowledge on how to create amazing characters, animals, beasts and monsters of your own. Some of the things you will learn from this course: 1) Sub-D Theory, 2) Setting Up Backdrop Images, Using the Internet to find useful images for your own projects, Box-Modeling Concepts, Quad-Patching, Creating Complex Geometry Starting from Basic Shapes, Redirecting Polygon Flow, Mesh Prepping/Cleaning/Optimizing/Tweaking and more. A great series for beginner 3D students or those who wish to improve their Sub-D Modeling skills with a minimal amount of tools. Bonus Content: 1) All Lightwave model files, Back-Drop Reference Images, and absolutely free our "Creature Eye Pack" texture collection (Retail Value- $19.00 US Funds). Running Time: Approx 12 hrs. 0 mins., Resolution: 1920 x 1080 pixels, Video Format: MP4 Video (.mp4), Level: Beginner.
LightWave 11.5 Modeler Tools- Volume #8 [AG]
In this Eighth Volume of 12 Volumes Lightwave Instructor Adam Gibson introduces the 3D student to Lightwave's Powerful Modeler. A great series for beginner 3D students. Table of Contents for Modeler Volume #8: Chapter 1- Intro, Chapter 2- Multi Text Tool, Chapter 3- Mirror X Tool, Chapter 4- Mirror Y Tool, Chapter 5- Mirror Z Tool, Chapter 6- Mirror Tool (Part One), Chapter 7- Mirror Tool (Part Two), Chapter 8- Clone Tool, Chapter 9- Rail Clone Tool, Chapter 10- Array Tool, Chapter 11- Final. Running Time: 2 hrs. 0 mins., Resolution: 1920 x 1080 pixels, Video Format: MP4 Video (.mp4), Level: Beginner.
The Comprehensive Guide to IKBooster (Parts 1-2) [RR]
The Comprehensive Guide to IKBooster ====================================== CONTENT INCLUDED WITH PURCHASE ------------------------------------------ ------- SUMMARY ------- All videos included are encoded in h264 format, 1600x868 resolution, and include optional subtitles. Total video content runtime is 110 minutes. The download includes: - The IKBooster Comprehensive Guide, parts 1 and 2 - Scenes, prefabs, and example/demonstrative Lightwave content to open and play with - 5 character models - Sample IKB relative motion files - Sample commented Lscripts demonstrating time saving functions - Bonus videos (~ 3 minutes) -------------- VIDEO DETAILS -------------- ? VIDEO PART 1: User Interface and Fundementals ? With exception of motion files and dynamics (covered in the yet-to-be-released parts 3 and 5), every conceivable aspect of IKBooster is revealed in this segment. After watching this part, you will know what all of IKBooster's tools do and be provided with insight as to where those tools are useful. Additionally, I include tips and advice that are absolutely required for smooth operation of IKBooster. Why doesn't Apply Keys work all the time? Why would anyone use FK control? Why do my characters wobble around after I use and animate with fixed bones? Why can't I load my IKBooster characters into a new scene? Countless questions like this are answered entirely, allowing you to use IKBooster seamlessly in your workflow. ? VIDEO PART 2: Rigging and Animation ? Just knowing what IKBooster's tools do isn't enough. You need to know to use them and how they all work together to give you a completed production. The following is covered in part 2... - IKBooster's advantages vs. normal character rigs in Lightwave - Creating a master template rig you can use on all your characters, includes basic usage relativity (little to no math! I promise!). I explain the control mechanisms, the reasons behind bone placement, and other details. - How to quickly (in minutes) adapt your master template rig to other characters. - Micro Scale Hold Nulls. These allow for easy 2-channel click-drag movements without using any motion modifiers or adding bulk to your scene. - Expressionless Multimorphs. A more visual and interactive approach to combining morphs (uses micro scale hold nulls). - How to do Character Interaction... by clicking a checkbox. I'm not kidding. - Using IKBooster to rig other things like lights, cameras, and other things to make animation as a whole much easier. - Why you should NEVER, EVER do character animation at above 20 frames per second... no matter what program you are using, Lightwave included. - I demonstrate the basic animation process and how it relates to IKBooster's workflow. IKBooster's animation workflow is more traditional in approach rather than technical. - How to make any looping animation in half the time. Literally.
Practical Production Techniques - Vol. 6 Advanced Surface Baking [KAT]
Kelly "Kat" Myers is back with another installment in the Practical Production Techniques series. This time he covers the process of surface baking in LightWave3D using the LightWave3D Surface Baking Camera to produce photo-realistic bakes of set pieces that can easily be transferred into game engines or help speed up renders inside of LightWave in general. With a run time of 210 minutes this video includes all the scene files you need to follow along.
Mechanical Displays 2: Part Move [dwb]
In this tutorial for LightWave 3D, Dana W. Burman shows how to build and animate a mechanical display with irregularly shaped panels using Denis Pontonnier's DP Kit Part Move plugin. Along the way he covers some simple modeling techniques, surfacing with the node editor, and using Part Move in animation and texturing. He also demonstrates a couple of other mechanical display scenes which are also included in the tutorial files.

For more information visit the product page.

Most of this tutorial should be able to be done in LightWave 9.6 and up with the exception of a few of the modeling tools used which were added in 11.5, and the .mdd baking tools used. We did not check the LightWave 9 or 10 versions of DP Kit to see if they have the functionality used in this tutorial.

Digital Download: 648MB Total Running Time is 2 hours 11 minutes

TFD Advanced Concepts And Projects - FireBall [KAT]
Kelly "Kat" Myers is back with the first in the Advanced Concepts and Projects Series for Turbulence FD by Jawset.com In this video, Kat shows you step by step the process in creating a fire ball effect similar to a ground burst or that of a gas bomb explosion. This is an extension of the concepts shown in the Introduction to Turbulence FD for LightWave3D video available here from Liberty3d.com. With a run time of 150 minutes this video includes all the scene files you need to follow along and experiment with your own settings while learning more about the shading and emission techniques used. Each of the Advanced Concepts and Projects videos in this series are designed to get you the information and scene examples you need to quickly produce an effect covered in a project. Pick and choose which ones you need when you need them.
LightWave 11.5 Modeler Tools- Volume #7 [AG]
In this Seventh Volume of 12 Volumes Lightwave Instructor Adam Gibson introduces the 3D student to Lightwave's Powerful Modeler. A great series for beginner 3D students. Table of Contents for Modeler Volume #7: Chapter 1- Intro, Chapter 2- Selection Modes, Chapter 3- Connected Tool, Chapter 4- Invert Selection Tool, Chapter 5- Expand and Contract Tool, Chapter 6- Select Loop Tool, Chapter 7- Select Next and Previous Loop, Chapter 8- Select Outline and Sel Switch, Chapter 9- Select Points, Edges, Polygons, Chapter 10- Change Selection Mode and Drop Selection, Chapter 11- Sel Outline Points and Sel Outline Edges, Chapter 12- Edges: Loop Expand and Loop Contract, Chapter 13- Sel Outline Edges and Sel Edge Border, Chapter 14- Sel Open Edges, Chapter 15- Pick Surface Tool, Chapter 16- Select Drop-down List, Chapter 17- Final. Running Time: 1 hrs. 37 mins., Resolution: 1920 x 1080 pixels, Video Format: MP4 Video (.mp4), Level: Beginner
Lightwave Version 9 and 10 Complete Collection
The Total Lightwave Bundle is a collection of 29 Video Instructional Titles by Adam Gibson. This offer will be available for a Limited Time only.

Lightwave Titles
  1. Dinosaur Sub-D Modeling
  2. Dinosaur UV Mapping
  3. Spacecraft Modeling
  4. Surfacing for Beginners Volume #1
  5. Surfacing for Beginners Volume #2
  6. Surfacing for Beginners Volume #3
  7. Advanced UV Mapping Volume #1
  8. Advanced UV Mapping Volume #2
  9. Modeler Volume #1
  10. Modeler Volume #2
  11. Modeler Volume #3
  12. Modeler Volume #4
  13. Modeler Volume #5
  14. Modeler Volume #6
  15. Rigging a T-Rex with Skelegons
  16. Rigging a T-Rex with Bones
  17. Animating a Tyrannosaurus
  18. Sci-Fi Modeling-Interiors Hallways and Corridors
  19. LW CAD 3.6 Modeling Tools Volume #1
  20. LW CAD 3.6 Modeling Tools Volume #2
  21. LW CAD 3.6 Modeling Tools Volume #3
  22. LW CAD 3.6 Modeling Tools Volume #4
  23. LW CAD 3.6 Modeling Tools Volume #5
  24. LW CAD 3.6 Modeling Tools Volume #6
  25. Rigging a Human
  26. Animation Essentials-Vol. #1
  27. Animation Essentials-Vol. #2
  28. Camera Essentials
  29. Sci-Fi Modeling (Volume #2)-Exteriors: Futuristic City
LightWave 11.5 Modeler Tools -Volume #6 [AG]
In this Sixth Volume of 12 Volumes Lightwave Instructor Adam Gibson introduces the 3D student to Lightwave's Powerful Modeler. A great series for beginner 3D students. Table of Contents for Modeler Volume #6: Chapter 1- Intro, Chapter 2- Merge Points Tool, Chapter 3- Weld Tool, Chapter 4- Set Value Tool, Chapter 5- Extrude Tool, Chapter 6- Taper Tool, Chapter 7- Magnet Tool, Chapter 8- Unweld Tool, Chapter 9- Bridge Tool (Part One), Chapter 10- Bridge Tool (Part Two), Chapter 11- Connect Tool, Chapter 12- Delete Tool, Chapter 13- Final, Running Time: 2 hrs. 7mins., Resolution: 1920 x 1080 pixels, Video Format: MP4 Video (.mp4), Level: Beginner
LightWave 11.5 Modeler Tools -Volume #5 [AG]
In this Fifth Volume of 12 Volumes Lightwave Instructor Adam Gibson introduces the 3D student to Lightwave's Powerful Modeler. A great series for beginner 3D students. Table of Contents for Modeler Volume #5: Chapter 1- Intro, Chapter 2- Rounder Tool, Chapter 3- Bevel Tool, Chapter 4- Extender Plus Tool, Chapter 5- Knife Tool, Chapter 6- Straighten Tool, Chapter 7- Edit Edges Tool, Chapter 8- Spin Edge Tool, Chapter 9- Border Slice Quad Tool, Chapter 10- Border Slice Tool, Chapter 11- Add Edges Tool, Chapter 12- Bend Tool, Chapter 13- Final. Running Time: 2 hrs. 20 mins., Resolution: 1920 x 1080 pixels, Video Format: MP4 Video (.mp4), Level: Beginner
Lightwave 11.5 UV Mapping Essentials
In this video tutorial Lightwave Instructor Adam Gibson introduces the 3D student the basics of UV Mapping in Lightwave 11.5. Table of Contents for UV Mapping Essentials: Chapter 1- Intro, Chapter 2- UV Interface Tour, Chapter 3- UV Mapping Primitives, Chapter 4- Spherical UV Mapping Options, Chapter 5- UV Mapping Text Objects, Chapter 6- UV Mapping a Cigarette Box, Chapter 7- Create Artwork for UV Map in Adobe Photoshop, Chapter 8- Apply Artwork in Lightwave for the UV Map, Chapter 9- How to Copy and Paste UVs and Final, Running Time: 3 hrs. 3 mins., Resolution: 1920 x 1080 pixels, Video Format: MP4 Video (.mp4), Level: Beginner
Intro to TurbulenceFD For LightWave3D [KAT]
Kelly "Kat" Myers is back again with "Introduction to TurbulenceFD for LightWave3D"! Intended for first time users of TurbulenceFD as well as a reference for more experienced users of LightWave3D, this video tutorial will help in deciphering the various settings and meanings in the plug-in. Exploring the fundamental concepts behind computational fluid dynamics and TFD itself, Kat also shows you some of the "gotchas" that can easily frustrate users from tips on how to avoid certain types of crashes, artifacts in your TFD sims and tips on optimization. This video has 24 main parts and 2 smaller sections introducing the video as well as plug-in installation covering all of the basic functions of the plug-in while addressing techniques and concepts behind fuel masking, normal force and pressure, surface texture emission and more. The first in a two part series, "Introduction to TurbulenceFD for LightWave3D" is an essential video in getting you up and running fast. The second video "TurbulenceFD For LightWave3D: Projects" will be released shortly at a discounted price. Get your copy today and start setting things ablaze with TFD for LightWave! Video Resolution: 1920×1080 Approximate Duration: 325 min.
LightWave 11.5 Modeler Tools -Volume #4 [AG]
In this Fourth Volume of 12 Volumes Lightwave Instructor Adam Gibson introduces the 3D student to Lightwave's Powerful Modeler. A great series for beginner 3D students. Table of Contents for Modeler Volume #4: Chapter 1- Intro, Chapter 2- Add Center Point Tool, Chapter 3- Text Tool, Chapter 4- Rotate Tool, Chapter 5- Stretch Tool, Chapter 6- Size Tool, Chapter 7- Transform Tool (Part One), Chapter 8- Transform Tool (Part Two), Chapter 9- Points Tool, Chapter 10- Make Polygon Tool, Chapter 11- Pen Tool, Chapter 12- Sketch Tool, Chapter 13- Final. Running Time: 2 hrs. 2 mins., Resolution: 1920 x 1080 pixels, Video Format: MP4 Video (.mp4), Level: Beginner
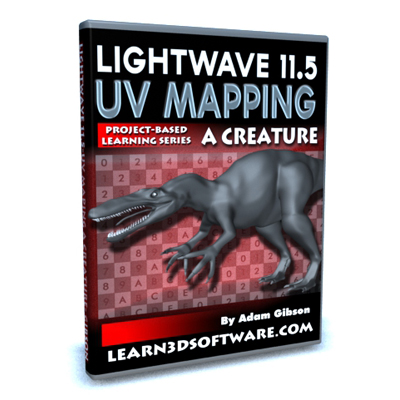
Lightwave 11.5 UV Mapping a Creature
In this video tutorial Lightwave Instructor Adam Gibson will show the 3D student how to UV Unwrap a Suchomimus dinosaur for the eventual purpose of texturing and detailing. Topics Covered: Retopology for Better UV Maps, Edge Selection for Creating UV Islands, ABF UV Unwrap Tool, Renaming UV's, UV Editing Tools, UV Interpolation Modes, Tweaking and UV Correction Techniques. A great video to quickly understand how to UV map your characters. Table of Contents for UV Mapping Essentials: Chapter 1- Intro, Chapter 2- Retopology for UV Mapping, Chapter 3- Creating UV Seams (Part One), Chapter 4- Creating UV Seams (Part Two), Chapter 5- Creating UV Seams (Part Three), Chapter 6- Creating UV Seams (Part Four), Chapter 7- ABF (Angle Based Flattening) UV Unwrap, Chapter 8- How to Rename a UV Map, Chapter 9- Organize UV Islands, Chapter 10- Final Edit of the UV Map. Running Time: 3 hrs. 7 mins., Resolution: 1920 x 1080 pixels, Video Format: MP4 Video (.mp4), Level: Beginner.
LightWave 11.5 Modeler Tools -Volume #3 [AG]
In this Third Volume of 12 Volumes Lightwave Instructor Adam Gibson introduces the 3D student to Lightwave's Powerful Modeler. A great series for beginner 3D students. Table of Contents for Modeler Volume #3: Chapter 1- Intro, Chapter 2- Slice Tool, Chapter 3- Place Mesh Tool, Chapter 4- Chamfer Tool (Part One), Chapter 5- Chamfer Tool (Part Two), Chapter 6- Thicken Tool (Part One), Chapter 7- Thicken Tool (Part Two), Chapter 8- Heat Shrink Tool, Chapter 9- Final, Running Time: 1 hrs. 48 mins., Resolution: 1920 x 1080 pixels, Video Format: MP4 Video (.mp4), Level: Beginner
Lightwave 11.5 Genoma Rigging Bundle (Vol. #1,2,3,4)
If you are looking to get up to get started quickly using the new Lightwave 11.5 Genoma Rigging Tools this is the training series for you. This video bundle includes Genoma Volumes #1,2,3, and 4. Level: Beginner. Video Format: MP4 ).mp4 at 1920x1080 pixels. Running Time: 12 hrs 13 mins.
Lightwave 11.5 Genoma Rigging- Volume #4
In this video tutorial Lightwave Instructor Adam Gibson demonstrates how to rig a quadruped dog character using Lightwave 11.5's new powerful Genoma Rigging tools. Topics Covered: Importing Genoma Presets in Modeler, How to Combine Genoma Presets, Rig Editing, Test Deformations, and Weight Mapping. A Great tutorial to get you up and started rigging Quadruped (4 legged) characters while also getting a first hand look at how to deal with some of the gotchas and pitfalls of rigging a character using Genoma. Table of Contents for Genoma Volume #4: Chapter 1- Intro, Chapter 2- Import Model and Insert Quadruped Rig Preset, Chapter 3- Adjust Leg and Spine Bones, Chapter 4- Add Head Preset, Chapter 5- Add Tail Preset, Chapter 6- Adjust Neck Bone, Chapter 7- Welding the Tail and Head to the Body, Chapter 8- Test Deformations in Layout, Chapter 9- Weight Maps (Part One), Chapter 10- Weight Maps (Part Two), Chapter 11- Assign Weight Maps to Genoma Skelegons, Chapter 12- More Deformation Tests, Chapter 13- Chest Deformation Issues, Chapter 14- Review and Final, Running Time: 3 hrs. 44 mins., Resolution: 1920 x 1080 pixels, Video Format: MP4 Video (.mp4), Level: Beginner
Lightwave 11.5 Genoma Rigging- Volume #3
In this video tutorial Lightwave Instructor Adam Gibson demonstrates how to rig a female human character using Lightwave 11.5's new powerful Genoma Rigging tools. Topics Covered: Genoma Bi-Ped Preset, Weight-Maps, IK (Inverse Kinematics), Editing Genoma Bi-Ped Preset to Conform to the Female Model, Arm and Leg Pre-Bending for IK, Deformation Tests, and Posing. A Great tutorial to get you up and started rigging bi-ped characters while also getting a first hand look at how to deal with some of the gotchas and pitfalls of rigging a character using Genoma. Table of Contents for Genoma Volume #3: Chapter 1- Intro, Chapter 2- Importing Genoma Bi-Ped Rig and Pre-Bend Limbs, Chapter 3- Adjusting the Genoma Skelegons in the Head, Chapter 4- Adjusting the Neck, Spine, Hips and Legs, Chapter 5- Adjusting Arm Skelegons and Test Deformations, Chapter 6- Adjusting the Foot Skelegons, Chapter 7- Adjusting the Hand and Finger Skelegons, Chapter 8- Creating the Lower Jaw Weight Map, Chapter 9- Assigning Weight Maps to the Genoma Skelegons, Chapter 10- Test Deformations and Final. Running Time: 3 hrs. 51 mins., Resolution: 1920 x 1080 pixels, Video Format: MP4 Video (.mp4), Level: Beginner
Lightwave 11.5 Genoma Volume #2
In this second volume on Genoma Rigging, Lightwave Instructor Adam Gibson introduces Lightwave 11.5's newest set of rigging tools. Topics covered: Genoma Muscles, Genoma Tendons, How to Set-Up the Genoma Head Rig, Adding Weight-Maps, Correcting Deformation Problems. A must have video on how to get started using this powerful new rigging tool!! Table of Contents for Genoma Volume #2: Chapter 1- Intro, Chapter 2- Genoma Muscles (Introduction), Chapter 3- Genoma Tendons (Introduction), Chapter 4- Head Rig Set-Up (Part One)- Weight Maps, Chapter 5- Head Rig Set-Up (Part Two)- Genoma Skelegon Editing, Chapter 6- Head Rig Set-Up (Part Three), Chapter 7- Head Rig Set-Up (Part Four), Chapter 8- Final. Running Time: 2 hrs. 5 mins., Resolution: 1920 x 1080 pixels, Video Format: MP4 Video (.mp4), Level: Beginner
Lightwave 11.5 Genoma Volume #1
In this first volume on Genoma Rigging, Lightwave Instructor Adam Gibson introduces Lightwave 11.5's newest set of rigging tools. Topics covered: Using the Genoma Presets Panel, Full-Rigs, Sub-Rigs, Genoma Skelegons, Bones, Types of Genoma Connectors, Bone Influence, Welding Rigs Parts together, Importing Genoma Rigs into Layout, Exporting Genoma Rigs out of Modeler, Genoma Tips, and dealing with Errors/Gotchas. A must have video on how to get started using this powerful new rigging tool!! Table of Contents for Genoma Volume #1: Chapter 1- Intro, Chapter 2- Genoma Menu Orientation, Chapter 3- Genoma Bi-Ped Rig Demo/Introduction, Chapter 4- Genoma Presets Panel, Chapter 5- How to Export a Genoma Rig into Layout, Chapter 6- Basics of Connectors, Chapter 7- Passive and Active Connectors, Chapter 8- Connectors and Points/Vertices, Chapter 9- How to Create a Genoma Preset, Chapter 10- Final. Running Time: 2 hrs. 33 mins., Resolution: 1920 x 1080 pixels, Video Format: MP4 Video (.mp4), Level: Beginner
LightWave 11.5 Modeler Tools -Volume #2 [AG]
In this First Volume of 12 Volumes Lightwave Instructor Adam Gibson introduces the 3D student to Lightwave's Powerful Modeler. A great series for beginner 3D students. Table of Contents for Modeler Volume #2: Chapter 1- Intro, Chapter 2- Box Tool (Part One), Chapter 3- Box Tool (Part Two), Chapter 4- Ball Tool, Chapter 5- Cone Tool, Chapter 6- Disc Tool, Chapter 7- Drag Tool, Chapter 8- Snap Drag Tool, Chapter 9- Tweak Tool, Chapter 10- Axis Rotate Tool (Part One), Chapter 11- Axis Rotate Tool (Part Two), Chapter 12- Axis Scale Tool, Chapter 13- Final, Running Time: 2 hrs. 46 mins., Resolution: 1920 x 1080 pixels, Video Format: MP4 Video (.mp4), Level: Beginner
LightWave 11.5 Modeler Tools- Volume #1 [AG]
In this First Volume of 12 Volumes Lightwave Instructor Adam Gibson introduces the 3D student to Lightwave's Powerful Modeler. A great series for beginner 3D students. Table of Contents for Modeler Volume #1: Chapter 1- Intro, Chapter 2- Modeler Overview, Chapter 3- Polygon Types and Theory, Chapter 4- Unit Primitives, Chapter 5- The Move Tool in Detail, Chapter 6- Axis Translate Tool (Part One), Chapter 7- Axis Translate Tool (Part Two), Chapter 8- Axis Translate Tool (Part Three), Chapter 9- Final, Running Time: 3 hrs. 19 mins., Resolution: 1920 x 1080 pixels, Video Format: MP4 Video (.mp4), Level: Beginner
Secrets of SubD Modeling in LightWave 11.5 Volume 2 [cw]
These videos will teach you several subdivision modeling techniques specific to LightWave 11.5. While there are multiple videos in this series, each volume is self contained and can be viewed independently of the others. This video is around 2 hours long, and contains mostly specific projects and workflows. This volume also contains all of the files for both volumes, along with a bonus file and a brief video discussing the creation of the Horny Cricket model for the Dark Reef video game.
Secrets of SubD Modeling in LightWave 11.5 Volume 1 [cw]
These videos will teach you several subdivision modeling techniques specific to LightWave 11.5. While there are multiple videos in this series, each volume is self contained and can be viewed independently of the others. This video is around 3 hours long, and contains about half techniques, tips, and tricks, and half specific projects.
Intro to Unity3D for LightWave3D users [cw]
This video introduces you to the Unity game engine from the perspective of a LightWave user. Chapter 1: The Basics The videos in this chapter are designed to be watched straight through. You don't have to follow along with your own copy of Unity or LightWave, though you certainly may. I promise that the more you watch of Unity in action, the more it will make sense. So if you feel like you missed something important, just keep watching. When you go back, it will probably make sense. If not, let me know! 1) Intro: 35 minutes - General intro to Unity3D - Navigating the Unity3D interface 2) Importing objects from LightWave: 30 minutes - Key concepts for importing - Physics - Texturing - Tiling - How to properly share UV maps, - Spreading UV maps across materials 3) How to make a building: 12 minutes - Tiling in more detail - Chilton's Magic Box 4) Using the Terrain Engine in Unity: 20 minutes - Grass - Trees - Bump maps 5) Simple Car: 15 minutes - Adding a script - Intro to 3D math concepts 6) Turntable: 7 minutes - Creating an instant turntable - Rotation vs translation - A few notes on importing 7) Intro to Scripting: 15 minutes - How to find things in the script reference - How to access variables outside of an object Chapter 2: Velocitractor - The Velocitractor videos are divided up into very short groups so you can walk through the steps with your own models if you're having problems or are trying to understand a core concept. Feel free to follow along with your own models, and email me if you have any questions. 8) Modeling, Texturing, and adding Skelegons : 5 minutes 9) Layout and Rigging Part 1: 5 minutes - Basic rig importing, converting from Skelegons 10) Rigging Part 2: 5 minutes - IKBoost and Animations 11) Inspecting the Rig: 4 minutes 12) Creating a walk cycle - 1 minute 13) Exporting Animations to Unity - 2 minutes 14) Inspecting FBX Animations in Unity - 2 minutes 15) Applying Animations to Mechanim - 7 minutes 16) Scripting Mechanim, final thoughts - 15 minutes Also included in the UnityExtras folder (accompanying this file)... All Unity3D project files, and Unity3D files for Version 1 of this document. http://www.Unity3D.com/ All LightWave3D project files. http://www.LightWave3D.com/ Riggin' Trix - a list of things you can do to simplify your rigs for Unity integration. Screenshot of the magic number and the order of things in Unity (GameObject, transforms, components), which you will want burned into your brain. Almost 3 hours of narrated video, files, and cheat sheets!
Modeling the M.A.C.O. using LightWave 11.5 [cw]
This video details using the new Modeler tools in 11.5 to go from concept art to a mostly finished product, using an asset from the game, The Dark Reef. We'll use Straighten, PasteNew, PlaceMesh, EditEdges, Slice, LinePen, Chamfer, Transform, AxisScale, Align, Tweak, AxisRotate, MakePols, AxisTranslate, Thicken, the three new Align commands, and the Align to Plane and Restore Align. Additionally, you'll learn how to use combinations of new and old tools to do things like run cabling and pipes neatly across uneven surfaces faster than ever! The download includes the concept art as well as the finished model, and 3 hours of narrated video.
Lightwave 11.5- UV Mapping a Human
In this video tutorial Lightwave Instructor Adam Gibson demonstrates how to UV Unwrap a Human using the new powerful ABF Unwrap tool in Lightwave 11.5. Problem Solving and Work Flow is shown in great detail in order to educate you on how to get the best possible UV Maps for your 3D models. Without clean UV Maps it is very difficult to have glitch-free textures. This tutorial will give you the knowledge on how to pre-plan your UV unwraps and how to fix UV unwrapping errors. *Bonus: Includes all Content Files and a free Female Human Model. Running Time: 4 hrs. 21 mins., Resolution: 1920 x 1080 pixels, Video Format: MP4 Video (.mp4), Level: Beginner
Space Toon: Volume One [dwb]

Space Toon: Volume One is a project-based tutorial that takes you from scratch to a retro-cartoon inspired shot using LightWave 11.5. This covers creating the environment, modeling the planet, wreckage and space fighters. Particular attention is given to the Node Editor for object edges - a new feature in LightWave 11.5.

Video run time is approximately 4hr 30 min

Click for more details.
GoZ for Lightwave 11 and ZBrush Users- Volume #3- Endomorphs
GoZ is a new and powerful addition to Lightwave 11. In this third volume on GoZ Instructor Adam Gibson demonstrates how to create Endomorphs in ZBrush for use in Lightwave 3D. Learn the theory, the possibilities, and the Gotchas that can arise combined with the understanding of how to overcome them. Being able to take advantage of powerful Zbrush sculpting tools for animation purposes will open new doors for your creations. Learn to how to combine Endomorphs created in both ZBrush and Lightwave for maximum control over your objects. A Great Video for those who wish increase their knowledge on how to integrate Lightwave and Zbrush together for animation purposes!! Running Time: 2 hrs. 5 mins., High Quality (Screen-Res 1920 x 1080 pixels) MP4 Video (.mp4), Level: Beginner to Intermediate
Lightwave 11- Endomorph Essentials
In this training video Lightwave 3D Instructor Adam Gibson demonstrates how to quickly get started using Endomorphs for animation production. Tips and Tricks are shown on how to avoid mesh distortions when using Endomorphs on Sub-D models. Multiple examples using Endomorphs are shown in detail to provide the 3D student a strong foundation of how they could use and create their own imaginative uses for Endomorphs. A great training video for beginner Lightwave users!! Running Time: 3 hrs. 44 mins., High Quality (Screen-Res 1920 x 1080 pixels) MP4 Video, Level: Beginner & Up
Lightwave 11 -Rigging a Tiger
In this training video Lightwave 3D Instructor Adam Gibson demonstrates how to rig a tiger character for animation using Layout's powerful Bone Tools and IK (Inverse Kinematics) System. Tips and Tricks on how to clean up your rig to avoid typical problems like Gimble Lock and glitches during animating. Other topics covered include: Foot Control Goals for Position and Foot Pivoting, Knee/Elbow Control, the use of "Hold Bones" and "Weight Maps". A great video for beginner level Lightwave users to get started rigging Quadruped "Toe Walker" style animals like tigers, lions, cats, dogs and more!! *Bonus: Includes Tiger model and all Scene Files so you can follow along with course!! Running Time: 8 hrs 52 mins., High Quality (Screen-Res 1920 x 1080 pixels) MP4 Video, Level: Beginner & Up
Practical Production Techniques Vol. Five [kat]
Continuing on in the popular Practical Production Techniques series, Kat is back and brings the next in the series a great tutorial package that runs 120 minutes. It covers many of LightWave3D 11.x new functions in detail while working in project based "real-world" use tutorial environment. If you have been looking at the new features in LightWave3D 11 but were unsure of where to start or where to use them in your shots, this video is for you. This video deals with the new flocking system, instancing, IKBoost, MDD baking and playback techniques applied to instances, Unified Sampling overview, touches on the benefits of the advancements made to the Adaptive Sampling system and more. Additional videos in this series are planned, advancing each time in complexity and techniques as LightWave3D improves and will be made available exclusively through Liberty3d.com
RHN - Full Package
RHN - Full Package
Complete Set (Fundamentals, Nodes and Projects) training for the Node Editor in LightWave 3D.
RHN - Projects
RHN - Projects
Projects training for the Node Editor in LightWave 3D.
RHN - Nodes
RHN - Nodes
Nodes Collection training for the Node Editor in LightWave 3D.
LWCAD 3.6 Modeling Tools BUNDLE (Volumes #1,2,3,4,5, and 6) [AG]
This Lightwave Modeling Bundle includes LWCAD 3.6 Volumes #1,2,3,4,5,and 6. Save $35!!
GoZ for Lightwave 11 and ZBrush Users-Volume #2-UV Maps
GoZ is a new and powerful addition to Lightwave 11. In this second volume on GoZ an in depth study of the possibilities, strengths and limitations of UV Mapping in both software applications are shown. Tips and Tricks are shown how to deal with typical problems gotchas that can arise when integrating Lightwave with ZBrush. Learn how to create UV Maps for your 3D models using Zbrush's powerful "UV Master" Plugin. Running Time: 3 hrs. 52 mins. High Quality (Screen-Res 1680 x 1050 pixels) MP4 Video (.mp4) Level: Beginner to Intermediate
Lightwave 11-Animating a Human-Vol.#1-How to Make Your Character Walk [AG]
In this training course for beginner Lightwave students 3D Instructor Adam Gibson shows the essential basics of how to animate a character walking. Keyframing concepts and problem solving are covered in an easy to understand video chapters. *All Model and Scene Files are included with the course so that you can follow along. High Quality (Screen-Res 1440 x 900 pixels) Quicktime Video Level: Beginner Running Time: 3 hrs. 56 mins.
Fanboy Combo - Inspired by District 9 [kp]
The entire FanBoy "Inspired by D9" project is now available as one purchase - Learn to model, UV map and texture paint up a weapon inspired by the excellent District 9 movie! Over 14 hours of video training (1064 x 840, Mpeg4) and loaded with all assets (including model sheets, texture images, 3D models and more). Downloadable (Approx 4.7Gb, split in 10 zip files).
GoZ for Lightwave 11 and ZBrush Users-Volume #1- The Essentials
GoZ is a new and powerful addition to Lightwave 11. In this first volume on GoZ an in depth study of the possibilities, strengths and limitations are shown. Tips and Tricks are shown how to deal with typical problems gotchas that can arise when integrating Lightwave with ZBrush. Learn how to get the best possible Color, Normal and Displacement maps for your 3D models. Running Time: 4 hrs. 49 mins. High Quality (Screen-Res 1680 x 1050 pixels) MP4 Video (.mp4) Level: Beginner to Intermediate
Fanboy series - Texture painting inspired by District 9 [kp]
In this third and final chapter of the FanBoy District 9 inspired training, Kevin Phillips takes you through the process of painting and applying custom texture maps to take this model to photoreal completion using Photoshop and LightWave3D. The training includes around 5+ hours of video (MP4), the 3D model in 5 file formats (OBJ, DAE, 3DS, FBX and LWO) for those artists using other CG applications and a whole collection of grunge and detailing maps!

Downloadable immediately when purchased - 1.1Gb (split into 3 zip files).
Lightwave Sci-Fi Modeling (Volume #2)-Exteriors: Futuristic City
In this training video watch Lightwave Instructor Adam Gibson build a Sci-Fi Style City similar to many that have been created for big screen sci-fi action films. The premise of this video is to show Lightwave's quick and powerful modeling tools combined with some compositing tricks to create the illusion of a massive city using very little geometry. Less geometry means quicker render times. Techniques on how to set up a Sky-Dome and how to set-up optical illusions using Perspective are discussed in detail. Level: Beginner Running Time: 7 hrs. 44 mins. Screen-Res: 1680 x 1050 pixels) Video Format: MP4(.mp4)
Total Lightwave Bundle
The Total Lightwave Bundle is a collection of 28 Video Instructional Titles by Adam Gibson. This offer will be available for a Limited Time only.

Lightwave Titles
  1. Dinosaur Sub-D Modeling
  2. Dinosaur UV Mapping
  3. Spacecraft Modeling
  4. Surfacing for Beginners Volume #1
  5. Surfacing for Beginners Volume #2
  6. Surfacing for Beginners Volume #3
  7. Advanced UV Mapping Volume #1
  8. Advanced UV Mapping Volume #2
  9. Modeler Volume #1
  10. Modeler Volume #2
  11. Modeler Volume #3
  12. Modeler Volume #4
  13. Modeler Volume #5
  14. Modeler Volume #6
  15. Rigging a T-Rex with Skelegons
  16. Rigging a T-Rex with Bones
  17. Animating a Tyrannosaurus
  18. Sci-Fi Modeling-Interiors Hallways and Corridors
  19. LW CAD 3.6 Modeling Tools Volume #1
  20. LW CAD 3.6 Modeling Tools Volume #2
  21. LW CAD 3.6 Modeling Tools Volume #3
  22. LW CAD 3.6 Modeling Tools Volume #4
  23. LW CAD 3.6 Modeling Tools Volume #5
  24. LW CAD 3.6 Modeling Tools Volume #6
  25. Rigging a Human
  26. Animation Essentials-Vol. #1
  27. Animation Essentials-Vol. #2
  28. Camera Essentials
Mega-Uber Deal (Contains 55 Video Titles, 2 Texture Packs, 1 Model Pack)
The Mega-Uber Deal is a collection of 55 Video Tutorial Titles by Adam Gibson as well as 2 Texture Packs and 1 Model Collection. It contains 31-LightWave 3D titles, 12-3D Coat titles, 7-ZBrush titles, 4 Modo titles and 2-Photoshop titles. This offer will be available for a Limited Time only.

Lightwave Titles
  1. Dinosaur Sub-D Modeling
  2. Dinosaur UV Mapping
  3. Spacecraft Modeling
  4. Surfacing for Beginners Volume #1
  5. Surfacing for Beginners Volume #2
  6. Surfacing for Beginners Volume #3
  7. Advanced UV Mapping Volume #1
  8. Advanced UV Mapping Volume #2
  9. Modeler Volume #1
  10. Modeler Volume #2
  11. Modeler Volume #3
  12. Modeler Volume #4
  13. Modeler Volume #5
  14. Modeler Volume #6
  15. Rigging a T-Rex with Skelegons
  16. Rigging a T-Rex with Bones
  17. Animating a Tyrannosaurus
  18. Sci-Fi Modeling-Interiors Hallways and Corridors
  19. LW CAD 3.6 Modeling Tools Volume #1
  20. LW CAD 3.6 Modeling Tools Volume #2
  21. LW CAD 3.6 Modeling Tools Volume #3
  22. LW CAD 3.6 Modeling Tools Volume #4
  23. LW CAD 3.6 Modeling Tools Volume #5
  24. LW CAD 3.6 Modeling Tools Volume #6
  25. Rigging a Human
  26. Animation Essentials-Vol. #1
  27. Animation Essentials-Vol. #2
  28. Camera Essentials
  29. ZBrush 3.1 for Lightwave Users-Volume #1-How to Paint Color
  30. ZBrush 3.1 for Lightwave Users-Volume #2-Normal Maps
  31. ZBrush 3.1 for Lightwave Users-Volume #3-Displacement Maps
3D Coat titles
  1. 3D Coat -StarFighter Detailing Volume #1 -Normal Maps
  2. 3D Coat -UV Mapping a StarFighter -Quick Method
  3. 3D Coat 3.5 for Lightwave Users-Photo Painting I
  4. 3D Coat 3.5 for Lightwave Users-Photo Painting II
  5. 3D Coat 3.5 for Lightwave Users-Painting Color
  6. 3D Coat 3.5 for Lightwave Users-Normal and Displacement Maps
  7. 3D Coat 3.5 for Lightwave Users-Voxel Sculpting:Project Dragon
  8. 3D Coat 3.5 for Lightwave Users-UV Mapping
  9. 3D Coat 3.5 for Lightwave Users-Retopology I
  10. 3D Coat 3.5 for Lightwave Users-Retopology II-Project Suchomimus
  11. 3D Coat 3.5 for Lightwave Users-Auto-Retopology
ZBrush Titles
  1. ZBrush 4 for Lightwave Users-Painting Color
  2. ZBrush 4 for Lightwave Users-Normal Maps
  3. ZBrush 4 for Lightwave Users-Displacement Maps
  4. ZBrush 4- ZApp Link Plugin
  5. ZBrush 3.1 Creature Sculpting
  6. ZBrush 3.1 Creature Head Detailing
  7. ZBRUSH 3.5 -UV Unwrapping-"Mastering UV Master"
Modo Titles
  1. Modo 501 Painting Color-The Essentials
  2. Modo 501 Modeling Tools(Volume #1)
  3. MODO 501-Retopology
  4. MODO 501-Dinosaur UV Mapping
Photoshop Titles
  1. Photoshop CS4-Basic Training
  2. Photoshop CS4-Seamless Textures
Texture Packs
  1. Creature Eye Packs- Volume #1
  2. 2D Sci-Fi Alpha Brush Collection Volume #1
Model Pack
  1. Dinosaur Mega-Pack (Over 40 Dinosaurs)
Introduction to Node Based Surfacing [jw]

DO NOT buy this if you already have the Kurv Studios Node Surfacing DVD.

In this 3 1/2hr introductory video to Node Based surfacing by James Willmott, you will learn most of the basic functions of the node editor, and how to think 'nodally' so you can recreate layer based setups using nodes quickly and efficiently, as well as flexible node setups from scratch,

Nodal based surfacing is quite a paradigm shift from layer based but offers infinite flexibility, and although not as fast as Layers for simple setups it has almost no limits in what can be achieved.

This video was recorded on LightWave 9. LightWave 10-11 has a number of changes to the node editor including new nodes and workflows, but all the concepts shown here are applicable to any nodal version of LightWave.

Please note! You should use an archiver like 7-zip, winrar etc. or HJSplit to recombine the files, your OS zip handling might not manage it.

First ... 123 ... Last Go to page:
CLICK A PAGE NUMBER ABOVE FOR EVEN MORE LIGHTWAVE 3DTRAINING PRODUCTS: